5 Useful Tips for Working with the Calendar App
Windows 8.1 features another built-in app that helps you keep track of the current date and month and as well as schedule some events and create reminders for some important things that you need to do in a future time. This app is called the “Calendar”.
You can do a number of tweaks with this very useful tool. For instance, you can choose from different views such as Day, Work Week, Week and Month. From any of these views, you can just quickly return to the Calendar app’s landing page which will then show the present date. In this tutorial, we will be learning how to use the Calendar app in doing some stuff that will help you keep track of your schedules and be reminded about any even at any time of the year so be sure to prepare your Windows 8.1 machine and follow the steps that I’ll be showing below.
Accessing the Calendar App
Just like any other built-in app, the Calendar app bears a tile on the Start Screen which you can easily click in order to open the app in full-screen. Modern apps in Windows 8.1 only open in full-screen and you can’t minimize them into the taskbar as desktop programs do but you can snap two modern apps or a modern app and the desktop screen side by side each other using the new Snap feature available in every machine that runs Windows 8.1. To open the Calendar app, simply open the Start Screen by pressing the Windows Key or clicking the Start Button. Once the Start Screen opens, simply click on the tile that looks like the one below.

1. Get Familiar with App Bar Options
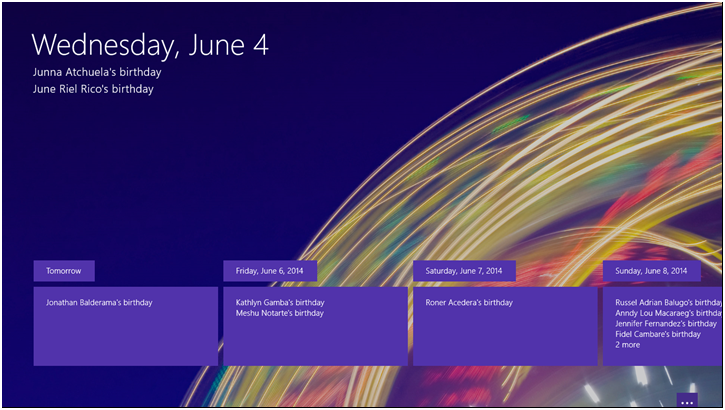
If you have already setup your computer to work with the Email app and other social media apps such as Skype, Facebook and others then the Calendar app will be able to have some information about birthdays of your friends. It will also display all of this information on the Lock Screen if ever you have selected Calendar to display details on it. On the screenshot below, you will see that the Calendar app already bears some information about the birthdays of some of my friends since I have already setup other apps to sync some information to my computer.
Just like any other apps, you can access some options on the App bar while the Calendar app is open on the screen. To do this, simply right-click on the screen or click the dots that appears at the bottom-right portion of the screen.

After doing so, you will see that the App bar will appear at the top and the bottom edges. Go over all of the available options in it quickly and we will get through them one by one as we move on in this tutorial.
2. Switching Between Calendar Views
Moving from one Calendar view to another is very easy. After right-clicking on the Calendar app screen or clicking on the dots located at the bottom-right portion of the screen, you will see some icons on top which will help you change the Calendar views in a single click. To switch to the Day view, simply click on the icon that has the label “Day” from the App bar at the top. Other views are “Work Week”, “Week”, and “Month”. If you selected the Day view, the Calendar screen will look like the screenshot below.

As you can see, there are two sections on the “Day” view. The one on the left is labeled “Today” and the other on the right is labeled “Tomorrow”. Each of these sections are divided into the hours that compose a day. Now, let’s go to the next Calendar view option which is labeled Work Week. After you click on it, you will see five sections each representing the five working days in each week as you can see on the screenshot below.

Each of the five sections on the Work Week view are still divided into the hours that compose the day from 12am and ends in 11pm. You will also see a marking of the current day and time on the Calendar itself.

Next Calendar view is labeled Week and just like Work Week, each day is still divided into the hours that compose one day but this time, there are already seven divisions on the screen since Saturday and Sunday are already included in this Calendar view option.

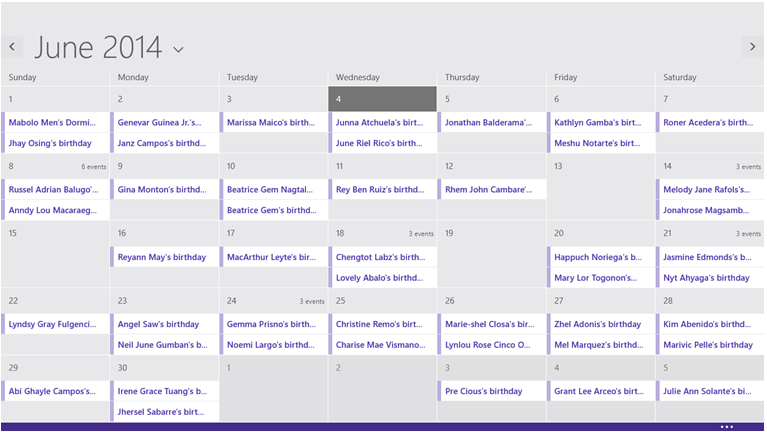
Lastly, you’ll find the “Month” Calendar view option which is found next to the Week view. When you select it, all of the days in a month will be displayed on the screen containing all the events that coincides with them such as the birthdays of your Facebook friends.
To return to the default Calendar view, all you need to do is click on the “What’s next” option from the App bar that appears on top of the screen when you do a right-click mouse command on the screen or click on the dots found at the bottom-right portion of the screen.

3. Updating the Information Shown by the Calendar App
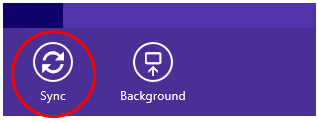
You might have been out from the Internet for a very long time and everything from Windows down to the apps like the Calendar app installed in it already got outdated. If this is the case then you can update and sync the app to all your social media accounts that provide information to it. To do this, simply right-click on the Calendar app screen or click/tap on the dots located at the bottom-right portion of the screen to access the App bar. Once the App bar appears, simply click on the “Sync” option found at the extreme left end of the App bar that is found at the bottom.
4. Changing the Calendar Background Image
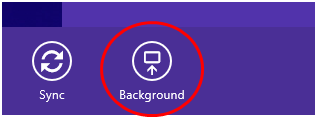
The default picture at the background of the Calendar app can also be changed and the steps involved in doing it is very simple. Just access the App bars by right-clicking on the screen or clicking/tapping on the dots at the bottom-right portion of the screen and when the App bar appears, simply hit the “Background” option located at the bottom-left just beside the “Sync” option.
After doing so, a small options box will appear and from here, all you need to do is click on the option that says “Browse” and you will then be taken to a screen that will allow you to browse on through the different folders in your computer. Once you find the image that you want to use, simply click on it and you will be taken back to the Calendar app landing page that already has a new background.
5. Adding an Event
To add an event, you can simply click on one of the hours in a day which you would like to select as the time when the Calendar app should start reminding you about it. After you do so, a box will appear which is labeled “Subject” and “Location”. You can put a description of the event on the subject and where it’s going to happen on the location. If you want to add even more details, simply click on the arrow that points down located at the right end of the box and another small box will appear where an “Add details” link is available.

After clicking on “Add details”, you will be taken to a new screen where you can add even more details of the event that you want to assign on a date you selected.

That’s it! You now learned all that there is about the Calendar app on your brand new Windows 8.1 machine. Take time to do the steps that I have shown above and you’ll be able to use this built-in app like an expert in no time!