6 Tips for Working with the Photos App
A picture is worth a thousand words. Developers at Microsoft could have been thinking of this when they decided to include a modern-style app that will let you manage your pictures and even do a little bit of editing on them or arrange them using a certain sorting or grouping rule. This app comes bundled with every Windows 8.1 installation so it doesn’t really matter if you are buying a brand new machine or just getting an installer and having Windows 8.1 installed on a relatively older machine- you will still get the “Photos” app in it ready to do the job whenever and wherever you like. In this tutorial, we will be looking at the basics in using the app and learn some way in accessing it all arranged in a numbered set of tips so you can follow each one of them easily and start sorting your photos a well as all of the other files captured by your camera more effectively!
1. Accessing the Photos App
Just like any other modern-style app in Windows 8.1, there are many ways in accessing the Photos app but for this tutorial, I will only be showing two of the easiest methods to save you the reading. First, you can access the Photos app by clicking on the Start Button or pressing on the Windows key and when the Start Screen opens, just look for the Photos app tile then click or tap on it.

If the Live Tile feature is turned on for the tile, it will appear differently and will show some of the pictures that are saved in your machine’s hard drive one after another. The screenshot below shows the Photos app tile on my computer when I turned on its Live Tile feature.

Just remember that the tile bearing the label which says “Photos” is what you will need to click if you want to open the Photos app since it can easily be mistaken for the another tile when the Live Tile feature is turned on. Next, if you can’t find the Photos tile on the Start screen for some reasons such as it could have accidentally been unpinned from the Start Screen by other users then you can access it from the Apps View screen. To do this, you will first need to access the Start Screen and move the mouse pointer. You will then see a circle button bearing an arrow that points down inside it at the bottom-left portion of the screen which you will need to click to access the Apps View screen and from here, click on the Photos app shortcut which can be found on the first part of the apps list under the Photo category.

2. Viewing Your Photos
The Photos app will then open in full screen just like any other modern-style app in your Windows 8.1 machine and will show all the photos that are saved in the Pictures library. There are a few buttons on the Photos app screen aside from the clickable photos. If you want to view a photo to see a greater detail of it, all you need to do is click on it and if you want to go back to the pictures library, simply press the “Esc” button on your computer’s keyboard.
3. Zooming in and Zooming Out
To zoom in and make a photo appear larger so you can see an even greater detail, all you need to do is click on the “+” button located at the bottom-right corner of the screen. This is very useful for wide angle shots which you want to zoom in so you can see what’s a certain area of the picture really contains. After clicking on the “+” button, you will notice that a “-“ button will appear on the left of it and this is what you will need to click if you want to zoom out until you arrive to the normal size of the picture.

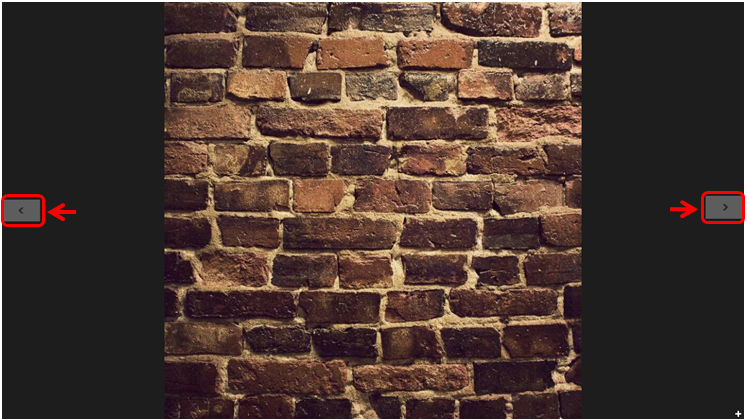
4. Scrolling Through Your Pictures
While a picture is open on the Photos app screen, you can move through the other ones in your Pictures library without pressing “Esc” and having to click on another picture. All you need to do is move the mouse pointer or touch the screen (if you are using a laptop that has a touch-enabled screen) and an arrow that points to the right will appear on the right edge. Just click on it to advance to the next picture and right after you do so, another arrow will appear on the left edge of the screen which you can click or tap to go back to the previous picture which you viewed. A shorter and easier way of doing this by pressing the arrow right key to advance to the next picture or the arrow left key to get back to the previous one.
5. Playing Your Pictures on a Slideshow
If you’ve got plenty of pictures which you want to view one after another then manually doing it would take time and you would most probably get tired of clicking on the arrow right or arrow left buttons just to scroll through all of them then playing them on a slide show will be a great idea. To do this, just right-click an empty space on the Photos app screen and the app bar will appear at the bottom. From this bar, simply click on the option that is labeled “Slide show” located at the left portion. After you do so, all of the photos in your machines Pictures library will just play one after the other automatically without you having to click or press any key so just sit back and enjoy each picture as Windows 8.1’s Photos app does the scrolling for you.

6. Making Tweaks on the Photos Tile
Lastly for this tutorial, we will look at some tweaks that you can do to the Photos tile. To initiate doing some changes on it, simply right-click on its tile pinned on the Start Screen and select the tweak that you want to do from the right-click menu that appears. For instance, you can unpin the tile from the Start Screen by clicking on the first option that says “Unpin from Start” or pin it to the taskbar by clicking on the second option on the list that says “Pin to taskbar”. You can also make the tile larger or smaller by clicking on the “Resize” option and choosing the size that you want from the options that appears on a separate box. Lastly, if you want to make the Tile look plain, simply click on the option that says “Turn live tile off” if the live tile feature is currently set active or “Turn live tile on” if the feature is currently turned off and you want the tile to look more alive by flashing some of your photos one after another.

That’s all there is for the first part of the Photos app tutorial, on our next article for this series, we will be discussing even more options that are available on the app bar which you can use in tweaking the Photos app so watch out for it and master using the Photos app in managing all the pictures saved on your Windows 8.1 machine!