Changing the Mouse Settings in Your Windows 8.1 Computer
No matter what type of computer you own- whether its a PC or a laptop, you surely use a mouse and a keyboard when providing input to it. This has been the norm since the earliest computer came into existence and as years went by, more and more features and hardware designs came to the market. Starting from Windows XP, Microsoft has started incorporating some features into the Windows operating system which helped people with minor disabilities in hearing, vision as well as dexterity to still be able to use a computer.
These features are called Ease of Access tools and I might have already described some of them in the previous tutorials like making tiles on the Start Screen appear bigger or turning the volume level up easily. Adjusting the screen resolution is also one of the topics that has been discussed previously and most of these tweaks are universally available which means that they can also be found even on other Windows 8 and Windows 8.1-based devices such as tablets and smartphones.
However, there are other options that are found in Windows 8.1 computers which are not available in other devices. They are mostly found in the PC settings, Control Panel and as well as the Ease of Access Center among others. For instance, in your Windows 8.1 laptop or PC, you can change the orientation of the mouse itself and tweak how the pointer looks like on the screen.
You can also enable high contrast to make the display clearer for users having problems with vision or even make some items on the screen a lot bigger using Magnifier. There’s also a Narrator and as well as a Speech Recognition feature that will surely make things easier to accomplish and your computer a lot easier to use. All these and even more will be discussed in the next tutorials but for now, we will be focusing on changing some properties of the mouse to make it more comfortable to use to both left-handed and right-handed users so be sure to get your computer ready and follow the steps which are described below.
Accessing the Mouse Settings Section
Before you can do any changes in how the mouse works, the very first step that you need to do is to of course access the section where its settings are located. There are different ways in doing this on your Windows 8.1 machine and we will be looking at all of these available steps one-by-one so you can choose between them and use the one that is most comfortable to you.
Getting to the Mouse Settings Section Using the Search Feature
One of the newest improvements done in the Windows 8 and Windows 8.1 operating system is the perfect integration of the Search feature. This means that you can easily look for something from almost any location within the operating system itself. For instance, in accessing the mouse settings section, you can simply use the search feature by first accessing the Start Screen. You can do this by clicking on the Start Button or pressing the Windows key. After doing so, the Start Screen should open and once you reach this stage, simply start typing the word “Mouse” on your keyboard. You should then notice that the Search screen will appear from the right edge and the word that you typed is already inside the input box that is located on top of the Search screen itself as shown on the screenshot below.
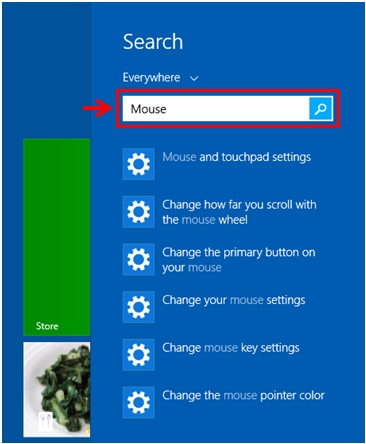
You can also access the Search screen by pressing the Windows+S keys on your computer’s keyboard and after doing so, you should be able to see the search screen that will appear from the right-edge no matter where you are within the operating system. Again, once you see this screen, you can simply click inside the input box that is available on its top portion then start entering the word “Mouse” to it. The search results will then start appearing just below the input box after a few seconds and from here, simply click on the one that says “Change your mouse settings” so you can finally access the Window that contains the mouse settings where you can make changes on.

Accessing Mouse Settings from the Control Panel
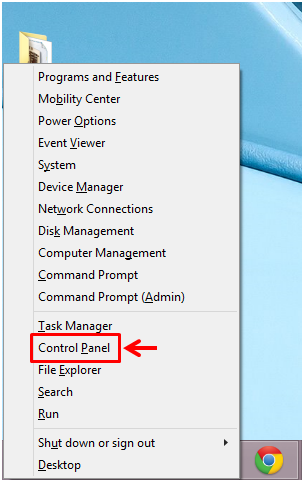
While there are other ways in accessing the mouse settings section in Windows 8 and Windows 8.1, the old way in doing it is still available. If you are new to using Microsoft’s brand new operating system, you might get confused because of the absence of the Start Menu but accessing the Control Panel is even made easier in this operating system version. Simply press the Windows+X keys and you will be able to access a hidden menu which includes the “Control Panel” as you can see on the screenshot below.
Now, when the main Control Panel Window opens, all you need to do is click on the link that says “Hardware and Sound” and on the Window that follows, simply hit the link that says “Mouse” which is located under the “Devices and Printers” section.
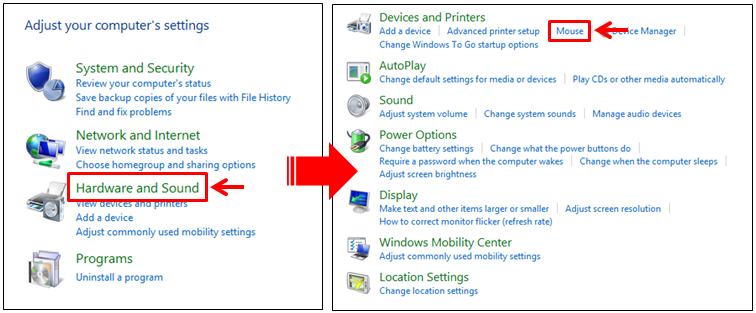
Now, you should be able to access the Window which contains all tweaks and settings for your computer’s mouse and this is where we will be doing most of the changes for this tutorial.
Working with Mouse Properties
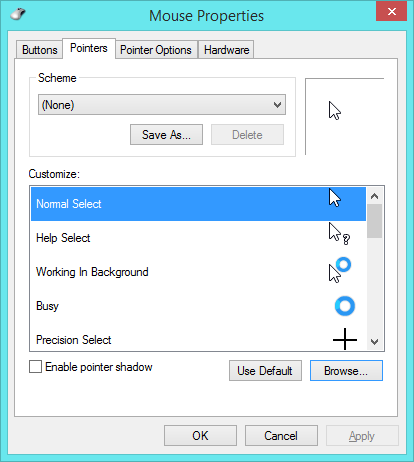
Now that you are able to access the Mouse Properties Window, it is time to get familiar with the settings that are included with it. First of all, you will see tabs on top of the Window itself which are labeled as “Buttons”, “Pointers”, “Pointer Options” and “Hardware”. Under the “Buttons” tab, you should be able to see options which are labeled as “Button configuration”, “Double-click speed” and “ClickLock”. All of these options have very clear descriptions about their uses so all you need to do is to read what each one is used for and decide if you want to change a certain setting or not.

If you are a left-handed person, the “Button configuration” settings will allow you to change the function of the left and right-click buttons. It basically reverses everything to make the mouse more comfortable to use.
Changing the Appearance of Mouse Pointers
The next tab which is labeled “Pointers” will allow you to change how the mouse pointer looks like or let a shadow appear behind it. You can also create your own mouse scheme by first downloading a scheme and setting it as the one to be used for your computer. To do this, just click on the “Browse…” button and go to the downloaded mouse scheme. Once you find it, simply select it and hit the “Open” button at the bottom of the Window which opened after you clicked the “Browse” button. Once you are done making changes in this section, just hit the “Apply” then “OK” buttons to make it final.
Tweaking the Pointer Options
The next tab will now allow you to change some aspects of the mouse pointer itself such as the “Motion”, “Snap To” effect and as well as its “Visibility”. Again, each option under this tab are described well so you shouldn’t have any problems when you’re working with them. Once you are done changing some settings, simply hit “Apply” the “OK” to save them.

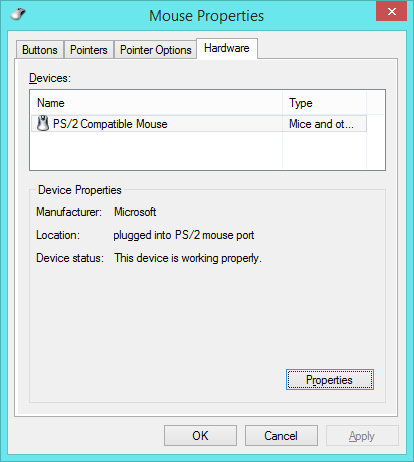
Learning Some Hardware Details
Lastly, you will find the “Hardware” tab and when you click on it, you will see some details about the device that is connected to your computer such as its “Manufacturer”, “Location” and as well as its “Status”.
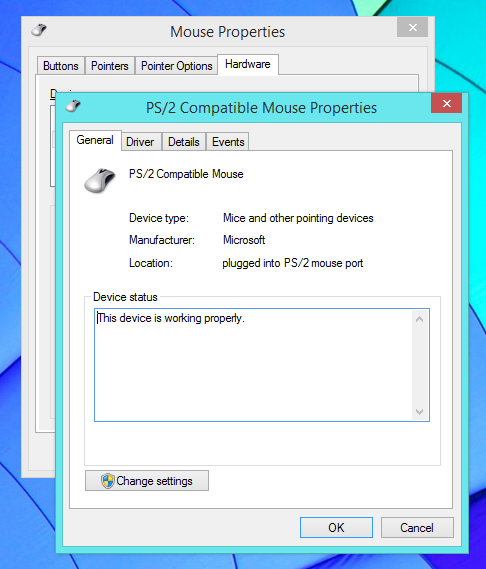
At the bottom-right portion of this Window, you’ll find a button that says “Properties” and when you click on it, another Window will appear which contains even more information about the hardware itself as shown on the screenshot below.
As you can see, accessing the Mouse Properties and settings in Windows 8.1 is fairly easy. Now that you learned how to get into this section and got familiar with all available tweaks in it, you can start doing the changes as you wish and in case you want to revert to the previous setting, simply look for a button that says “Restore default” or “Use default” and everything will turn back to how they used to be before you made any changes.