Creating a Recovery Drive in Windows 10
Here at WindowsTechies.com, we have always repeated in most of our previous tutorials the undeniable fact that there really is no perfect operating system existing in this planet. Even the most advanced operating system, no matter what brand or make it is can suffer different problems of varied causes. This is the reason why you as a user must know some preventive steps or if the worst happens, you must at least have some knowledge on how to get your computer up and running without you suffering too much from data loss or sudden parts replacements.
In the case of the latest operating system from Microsoft dubbed as Windows 10, the old problems such as Blue Screen of Deaths (BSODs) and other troubles that can prevent Windows from working properly or even booting up normally still can occur and when this happens, you need to keep a tool in handy so you can combat these forces of darkness from invading your Windows machine.
What Tool Should You Use?
If you’ve been a long time Windows user then you should already have some clue on what tool we’re talking about. Yes! It is the good-old “Recovery Drive”. The good thing about this weapon which is really a handy one especially if your machine is exposed to the risks of getting into any of the serious troubles that we’ve mentioned above is that it has remained almost the same! Microsoft has not made big changes to it even in Windows 10!

This means that if you’ve already tried using it in any of the older Windows editions (XP, Vista, and Windows 7) then you still would surely be able to use it in Windows 10 without getting lost or confused along with the process. However, if it is your first time using this tool then this tutorial is exactly what you need so you can be guided on how to create a Recovery Drive for your Windows 10 machine!
Accessing the Recovery Media Creator in Windows 10
Before getting into the steps that would show how you can create a recovery media drive in Windows 10, you will first need to secure a USB memory stick that has at least 4GB of memory if you have a 32-bit Windows version and 8GB for a 64-bit Windows OS version. If it has some important contents in it, be sure to back them up first by copying the contents to a different computer or another storage device since the process of creating a recovery drive would delete all of the USB drive’s contents.
After preparing the USB drive, it is time to access the “Recovery Drive Creator” tool. There are different ways in doing this on your Windows 10 machine and we will be showing some of the steps here so be sure to get your computer ready and follow the steps below.
Accessing Recovery Media Creator from the Control Panel (Windows 7 Version)
Let’s start with the old method. You can access the Recovery Media Creator tool from the Control Panel in your Windows 10 computer. But the question (especially to those who are new to Windows 10) is how can the Control Panel Window be opened? The solution to this is pretty simple. You can access the Control Panel quickly by pressing the Windows + X keys.
After doing this, you will be able to open a hidden menu also known as WinX menu or Admin Menu which will pop-up from the bottom-left portion of your computer screen as you can see on the screenshot below.
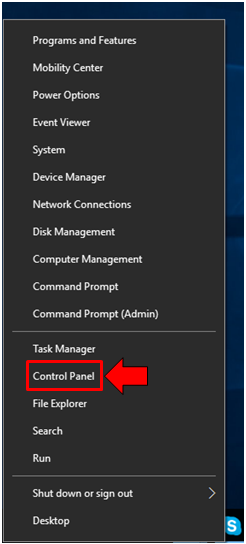
You can also launch this same WinX/Admin Menu by right-clicking on the Start Button. Once the Admin Menu appears on the bottom-left portion of your screen, you will simply need to click on the “Control Panel” link that is found in it as highlighted on the screenshot above and the Control Panel Window should launch instantly.
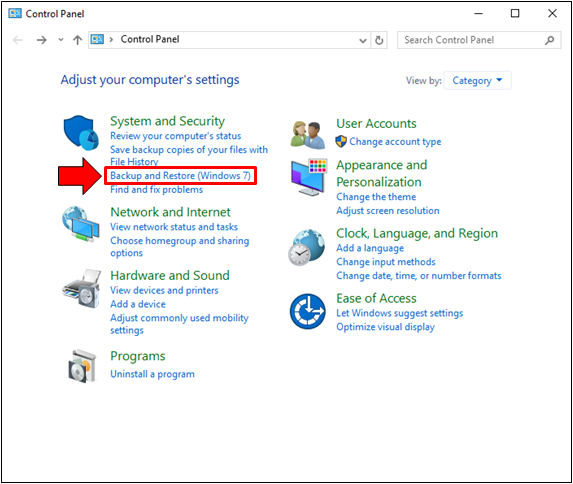
Now, on the Control Panel Window, just click on the “Backup and Restore (Windows 7)” link that is located under the “System and Security” category as you can see highlighted on the screenshot below.
After hitting this “Backup and Restore” link, you will be able to access the “Backup and Restore (Windows 7)” Control Panel Window and from here, you will be able to access settings and options for keeping your data as well as your machine safeguarded against any troubles that can render its files or even the whole operating system inaccessible.

The version of the Recovery Media Tool that will be accessed using this method is the one found back in Windows 7.
Now, that’s the more traditional way in accessing the Recovery Media Creator tool in Windows 10 but just like the other tools that are found within the Windows operating system, there are also some other ways in launching this tool which are shortcut methods that you can employ in your Windows 10 computer. Let’s see how they are done.
Accessing Recovery Media Creator Using the Search Tool
Accessing the Recovery Media Creator tool using this method is a lot easier. To do this, you will first need to press the Windows + S keys in order to launch the Search screen as you can see on the screenshot below. This new app has been introduced back in Windows 8 and was later improved in Windows 8.1 as well as in Windows 10.
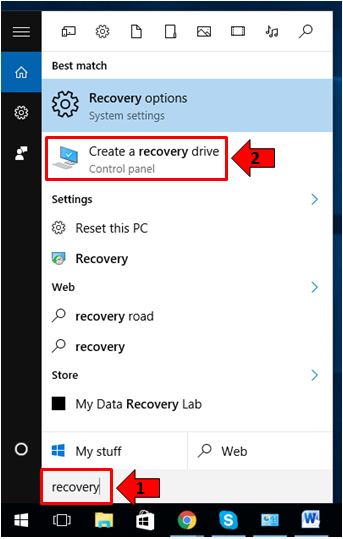
From this Search screen, simply enter the word “recovery” into the search input box that is located at the bottom as highlighted above. After doing this, the search results will instantly appear just at the top of the search box. From here, you will simply need to click on the one that says “Create a recovery drive”.
After doing this, the modern (Windows 10) version of the Recover Media Creator tool will open and it looks like the one shown below.
Accessing Windows Recovery Media Creator from the Settings Screen
Another method in accessing the Windows Recovery Media Creator in Windows 10 is from the modern Settings screen. To open this new feature in the modern version of the Windows operating system, just press the Windows + I keys. Once the Settings screen opens, just enter the word “recovery” into the search input box that is located at the top-right portion as shown below.
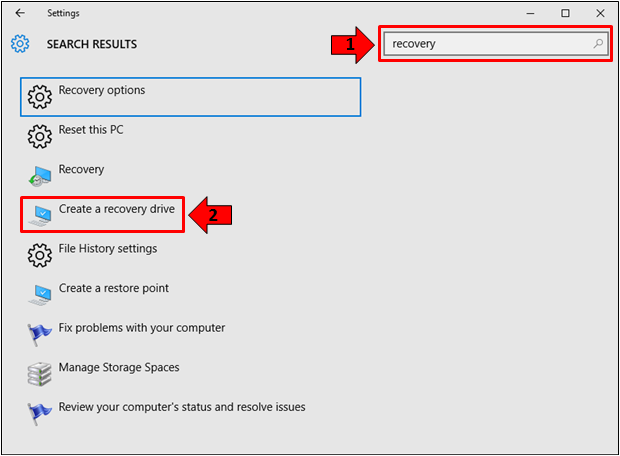
After entering “recovery” into the search box, the results will appear on the main portion of the screen and from here, simply click on the “Create a recovery drive” option as highlighted on the screenshot above.
Steps in Using the Recovery Media Creator Tool
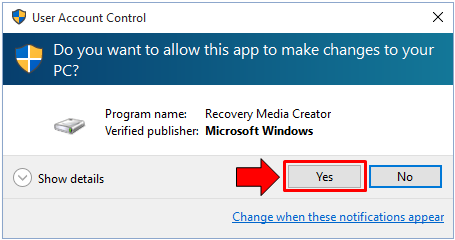
Since we are using Windows 10, we will be taking advantage of the latest version of the Recovery Media Creator tool instead of using the old Windows 7 version. Right after clicking the “Create a recovery drive” search result in case you accessed the tool itself using the last method that we’ve shown above, a UAC prompt will appear on the screen where you will need to click on the button that “Yes”.
After hitting the “Yes” button, the Recovery Media Creator tool and this is where the start of creating a recovery drive would start. Again, be sure to check your Windows operating system if it is a 32 or 64-bit version and prepare a USB flashdrive that has enough space as we have mentioned above (4GB for 32-bit and 8GB for 64-bit Windows OS version).
Checking Your Windows OS Version
Since one of the requirements is checking if your Windows is a 32-bit or 64-bit version, it would be helpful if you first learn how it is done. First, you’ll need to open File Explorer and once it launches, simply right-click on the “This PC” link found on the navigation pane at the left as highlighted on the screenshot below.
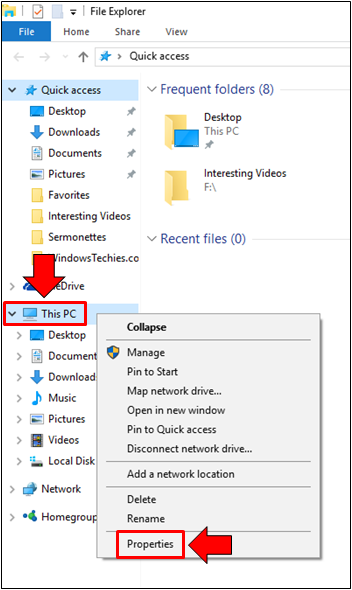
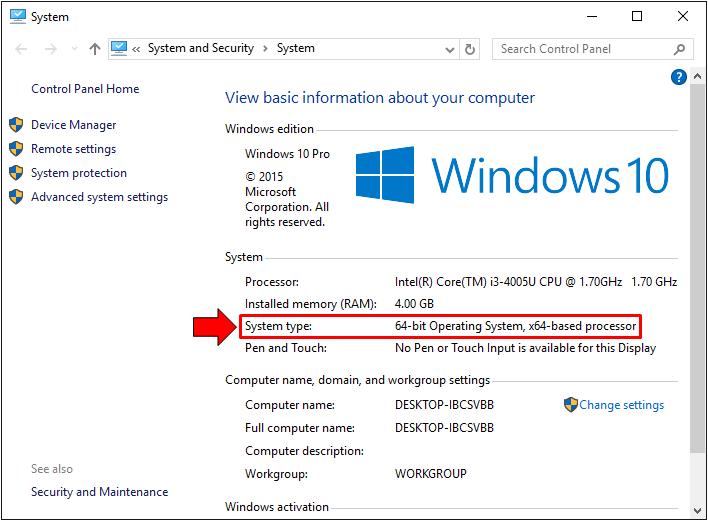
After you right-click on the “This PC” link, a context menu also known as a right-click menu will appear and from here, just click on the option that says “Properties” as shown above and you will be able to see a Control Panel Window that is labeled as “System” and from here, you should be able to find the version of the Windows OS that is installed in your computer along with some other information about your machine and the operating system that is installed to it.
After finding out your computer’s operating system version, be sure to prepare the USB flashdrive that has the required storage space according to the OS version and you can then proceed on with the process of creating a recovery drive.
Attach USB and Fire Up the Recovery Media Creator Tool!
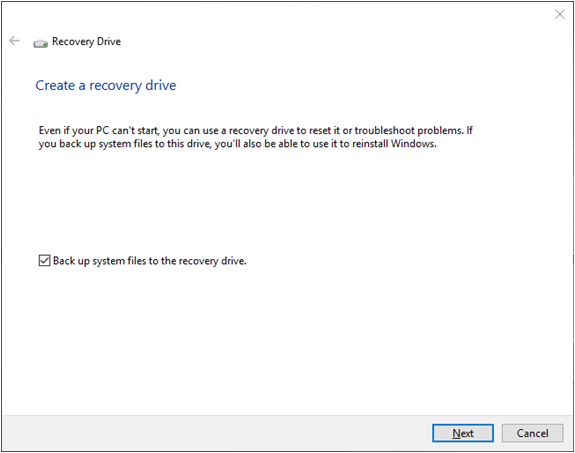
After securing a USB flashdrive to be used for creating a Recovery Drive, it is time to attach it to your computer and get the Recovery Media Creator started. Once the tool launches, you’ll be able to see a small check box at the bottom that says “Back up system files to the recovery drive”. If you leave this option checked then all your system files will be copied to the recovery drive that is going to be created.
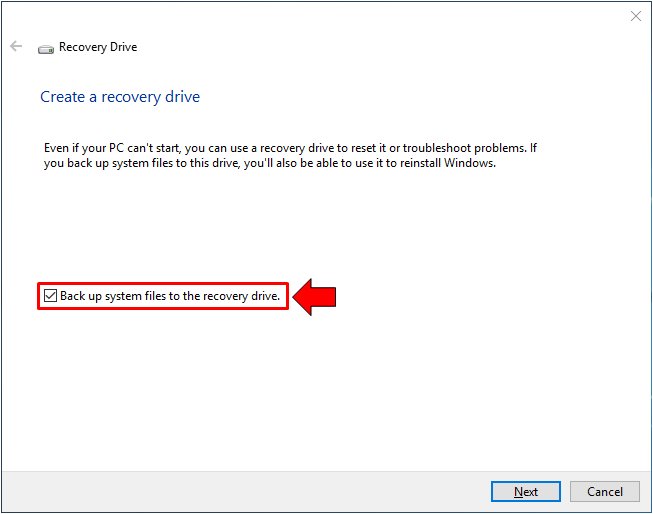
If you uncheck this option, the Recovery Media Creator tool will only copy the basic system files instead of copying some advanced ones as part of the backup (if the option is left checked).
After choosing to whether save backup files into the recovery drive or not, simply hit the button at the bottom which says “Next” and you will be automatically taken to the next step as you can see on the screenshot below.
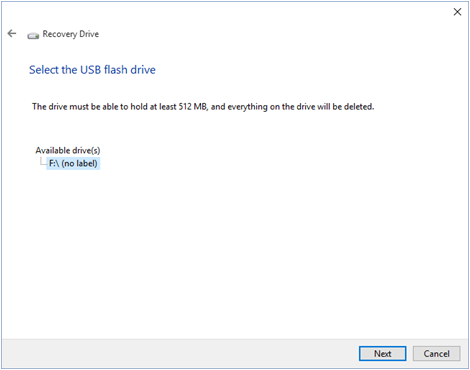
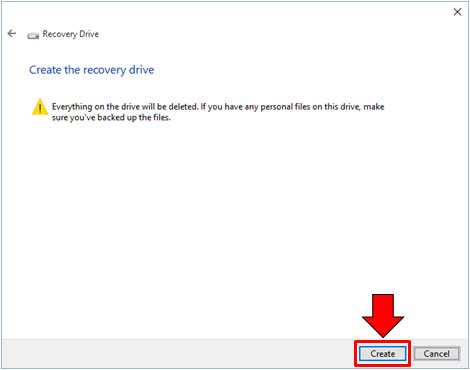
From this Window, you will now need to select the USB flashdrive that you want to use in creating your recovery drive. After finding the drive and selecting it from the list (in case there are multiple USB storage devices that are attached to your computer), just hit the “Next” button again that is found at the bottom. You will then be able see a prompt warning you that the contents of the USB drive will be deleted during the process so again, be sure to back them up especially if they are very important ones to avoid losing data. If you’ve already done this,just hit the “Create” button as shown below.
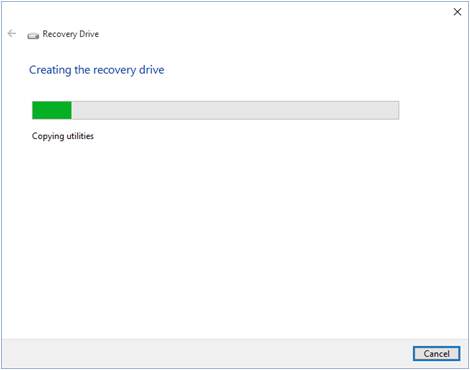
The Recovery Media Creator tool will then format the USB flasdrive and start copying the system files into it. The process takes a few minutes and you will know when it is almost done because a progress bar will be displayed on the tool itself as you can see on the screenshot below.
Once the creation of your recovery drive is done, a message will appear on the screen informing you that the recovery drive is ready. From here, all you need to do is click on the button that is labeled “Finish” and voila! You now have your very own Recovery Drive which you can use to restore Windows into its working condition in case it runs into a problem at any given time in the future!
A Very Useful Tool For Bringing Windows Back to Life!
As you can see, creating a recovery drive in your Windows 10 machine is quite easy. Having this tool can help you save your computer or even bring it back to live in case something bad happens to the Windows OS that is installed on your computer. The tool itself is just hidden deep within Windows that it takes a tutorial like this one to let someone know about its existence.
Have you ever used Windows 10’s Recovery Media Creator tool? What are your thoughts about it. Did it work smoothly when used to help a dying OS be restored into a good working condition? Share your experiences with us by taking advantage of the comments section below!