Creating New Items and Moving or Copying Them to Different Locations
Windows 8.1 has a good set of features that will surely take productivity to new heights. One of the newly-added features in this brand new operating system edition is called the “Ribbon-Based Options” which is found on the operating system’s file management tool now named as File Explorer taking off its old name known as Windows Explorer. In our previous tutorial, we’ve explained the basics in copying and pasting files as well as using other options that are found in the “Clipboard” section of the Home tab but these are not the only important stuff that you can find in the ribbon of File Explorer. In this tutorial, we will continue on to the next set of options that are available in the ribbon that will surely help you work even faster with the files and folders that are saved in your machine’s hard drive so be sure to get your Windows 8.1 machine ready to follow all the steps that I will be illustrating below. But before anything else, let us first review a little bit about the steps in accessing File Explorer in an operating system that doesn’t have the Start Menu.
Quickly Accessing File Explorer
The Windows operating system has always offered a variety of ways in accessing all of the features that it has and this includes the File Explorer tool. If your Windows 8.1 machine is relatively new or it has just been taken out of the box, you should be able to see the “File Explorer” thumbnail that should be pinned on the taskbar together with other important tools and features such as Internet Explorer and the Windows Store itself. To open File Explorer, all you need to do is click on its thumbnail from the taskbar and its Window will automatically pop-out on the screen.

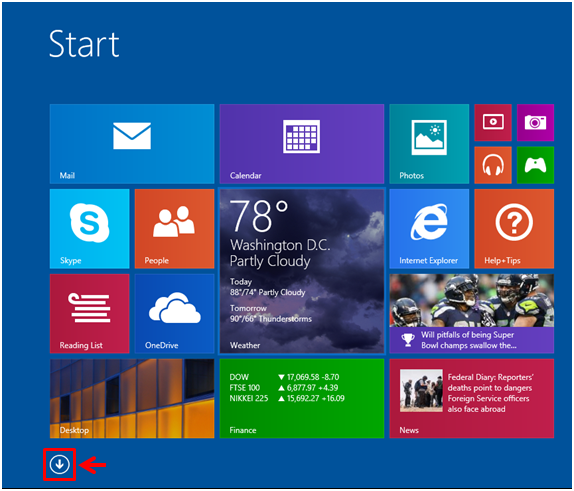
In case, your machine is quite older, probably you got it when Windows 8.1 was released and there were already a lot of people who used it then there’s a possibility that the File Explorer thumbnail has already been removed from the taskbar. If this happens then you can access File Explorer from the Apps view screen. To do this, you will first need to open the Start Screen by pressing the Windows Key or clicking on the Start Button. Once this screen opens, simply make movements with the mouse or touch an empty area of the screen if you are using a computer having a touch-enabled screen and after doing so, you should be able to see a round button containing an arrow-down icon in it that will appear at the bottom-left portion of the screen.
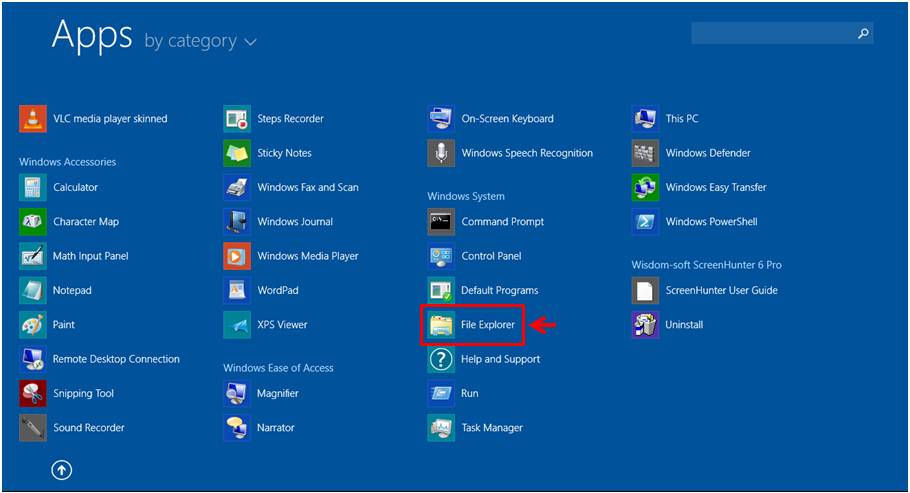
After doing so, you will be taken to the Apps view screen where you need to scroll towards the right so you can see the Windows system category where the File Explorer shortcut which you’ll need to click is located.
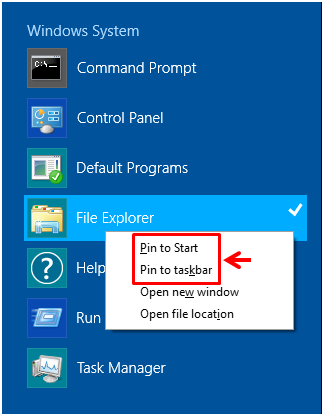
If you want to add the File Explorer thumbnail back into the taskbar, all you need to do is right-click on the shortcut that you found on the Apps view screen and on the options that appears in a white box, simply hit the one that says “Pin to taskbar”. You may also choose to pin File Explorer to the Start Screen for quick access by clicking on the option that says “Pin to Start” which is located just above the former option that I have mentioned.
Now that you’ve learned some steps in accessing the File Explorer tool in your Windows 8.1 machine and got familiar with the steps in how you can pin its shortcut to the taskbar and the Start Screen, it is time to get some tasks done using the next group of options under the Home tab which are labeled as “Organize” and “New”.
The Move to and Copy to Options
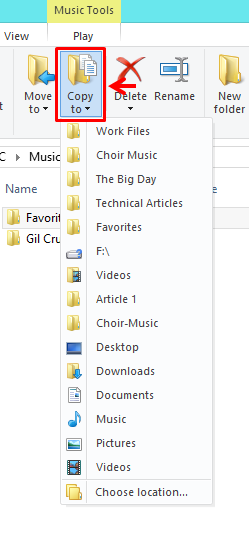
While working with some files or folders, there might be some items that you want to move to another location. There are two different options that will help you do this in the File Explorer’s ribbon-based options and they are labeled as “Move to” and “Copy to”. The “Move to” option essentially moves the selected folder or file from its original location to the new one without leaving a copy of it in its first location and to use this option, all you need to do is click on it and select the folder or location that you want to move it into from the drop-down list of folders and locations that would appear as shown on the screenshot below.

The “Copy to” option on the other hand allows files to leave a copy on its original location and create a duplicate one in the new location that you have selected. To use this option, just click on it and just like “Move to”, you will see a drop-down box that contains a list of folders and locations where you can copy the file or folder into.
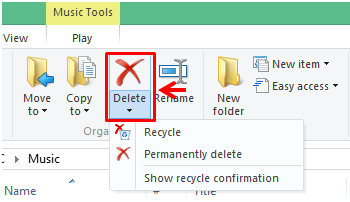
New Options for Deleting a File or Folder
Right next to the “Copy to” option is one that says “Delete” and at the bottom of it, you will see an arrow that points down which you can simply click to view two other options for deleting a selected item. The first option that says “Recycle” will bring a deleted file to the “Recycle Bin” so you can still access it just in case you want to restore and bring it back to its original location while the second option that says “Permanently delete” would remove the file permanently from your computer without any hopes of having it restored except if you use a third party software that will allow you to restore permanently delete files but you need to have the right knowledge and skill in using such software to avoid getting into serious problems.
Renaming a File or Folder
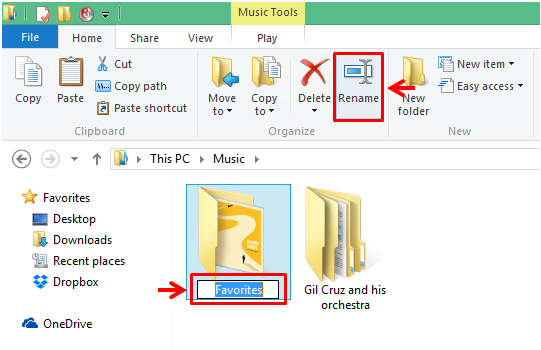
Another awesome feature that is found in the “Organize” group of options is one that is labeled “Rename”. In Windows Explorer, you surely used the right-click menu each time you want to change the name of a file or folder but in Windows 8.1, all you need to do is select the file to be renamed then click on the “Rename” option on the ribbon. After doing so, you will notice that an input box will appear at the bottom of the file or folder which you have selected having the name in it. From here, just remove the current file or folder name and type in the new one. Once you’re done, just click an empty space on the contents pane and the new name you typed in will automatically be saved and assigned to the selected file or folder.
Adding New Items
Next to the “Organize” options group is another one that is labeled as “New”. Most of the options under this group are focused in adding a new item on the contents pane of any folder, library or system location that you opened with File Explorer. For instance, you can add a “New folder” by clicking on the option that says so in the ribbon itself or add other items like a Word or Excel document. You can also choose to add the item you selected into an easy to access location such as the Start Screen, Library, Favorites or even map it as a drive. Just take time to explore these options and experiment on them and you’re on your way to mastering the ribbon-based options in your Windows 8.1 machine.