What is the DirectX Diagnostic Tool and How Can You Use it in Windows 10
Windows 10 along with the other modern Windows operating system editions that were released before it contains in them a secret tool that is designed to help you troubleshoot problems when they occur on your computer.
The tool is called DirectX Diagnostic and with it, you can troubleshoot and identify problems that are related to audio, display, video and other multimedia applications and features especially when you are running some advanced games on your computer. The tool also allows you to find problems that occur when you are using audio and video players on your Windows 10 machine.
In this tutorial, we will be showing you the different ways in launching the DirectX Diagnostic tool and as well as demonstrate the steps in how you can use it if you want to find useful information for certain multimedia applications that are valuable especially if you want to troubleshoot the real source of a problem that you’ve been having. But before we start, let’s first learn what the tool really is and what it can do.
What Exactly is the DirectX Diagnostic Tool All About?
A simple search about the DirectX Diagnostic tool using Google in case your computer is connected to the Internet will return a result from Wikipedia that defines the tool this way:
“Microsoft DirectX is a collection of Application Programming Interfaces (APIs) for handling tasks related to multimedia, especially game programming and video on Microsoft platforms”.
This means that DirectX is used in Microsoft sponsored gaming platforms such as Xbox. In case you are using your Windows 10 machine for Xbox games and you’ve been noticing some gaming issues especially the ones that are related to video quality and performance, the tool can help you find the problem and better understand its source.
Whenever users who are also gamers need support and troubleshooting for the games that they are playing, gaming companies would most of the time recommend the DirectX Diagnostic tool as a means to identify the problem.
So the next question is how can this tool be accessed in Windows 10? That’s exactly what we’re going to talk about first so be sure to get your computer started up and follow the steps that are going to be demonstrated below.
Different Ways in Accessing the DirectX Diagnostic Tool in Windows 10
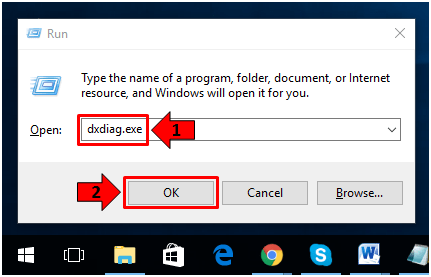
Different tools have varied ways of being accessed in Windows 10. For the DirectX Diagnostic tool, we will be showing two available methods in launching it and we will be starting with the first one which is done using the Run box. So the first thing that you need to do is to open the Run box first by pressing the Windows + R keyboard shortcut combination.

After pressing this keyboard shortcut combination, you should be able to see the Run box appearing on the bottom-left portion of the screen and from here, all you need to do is enter the words “dxdiag.exe” (excluding the quotation marks) then hit the “OK” button on the bottom portion as shown on the screenshot below in order to launch the DirectX Diagnostic tool.
Another available method in launching the same tool in your Windows 10 machine is done easily with the use of the Search feature which has been made better in Microsoft’s latest operating system version. To quickly launch the Search box, all you need to do is press the Windows + S keyboard shortcut combination and the box should slide-up from the bottom-left portion of your computer screen as you can see below.
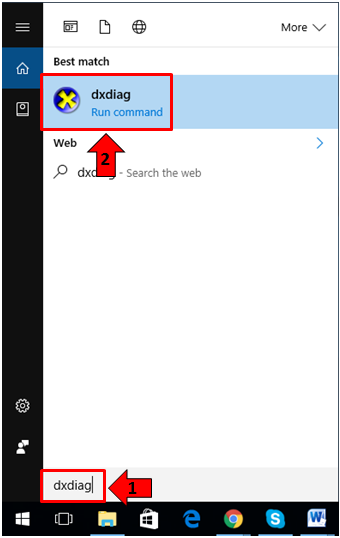
On the Search box, you will need to enter the word “dxdiag” into the search input textbox that is found at the bottom and after typing in the words, you should be able to see the search results above it where you will need to click on the one that says “dxdiag” as you can see being shown on the screenshot above. Clicking on the “dxdiag” shortcut from the search results will launch the DirectX Diagnostics tool on your computer screen and it will be ready for some troubleshooting steps depending on what you intend to use the tool for.
What Happens After You Launch the DirectX Diagnostic Tool
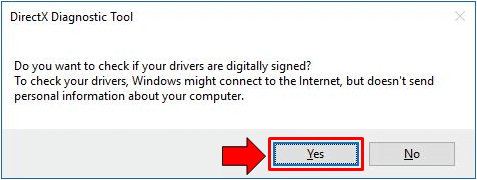
After launching the DirectX Diagnostic tool and if you are doing it for the first time on your Windows 10 machine, you will encounter a prompt that is asking you if the tool can be allowed to do a scan for drivers that are digitally signed as you can see being shown on the screenshot below. From this prompt, we would recommend that you click on the button that says “Yes” so that the tool will be allowed to do a scan.
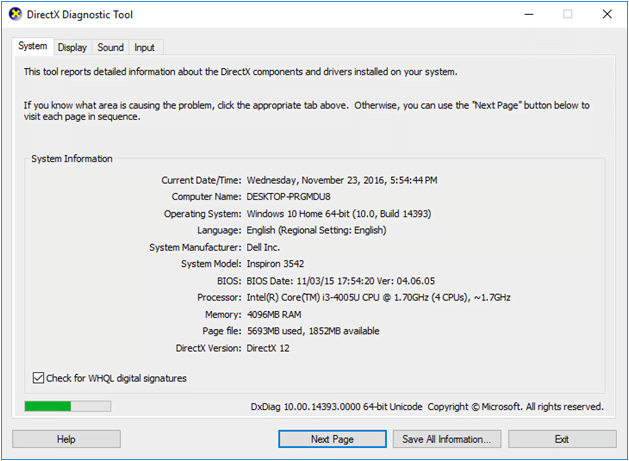
Once the DirectX Diagnostic tool is done doing its job of checking digitally signed drivers and those that are approved by Windows Hardware Quality Labs by Microsoft, the tool should then be able to initialize and open its main Window where you should be able to find four tabs on top namely “System”, “Display”, “Sound”, “Input”.
There would be instances that you would see several tabs for a single item such as Display or Sounds. If this happens, it means that there are actually two monitors (if you see two Display tabs) or two or more audio devices (if you see two or more Audio tabs) that are attached to your computer. This scenario is shown on the screenshot below.
Moving on, at the bottom-left portion of the DirectX Diagnostic Tool, you will see an option that says “Check for WHQL digital signatures” and this option is checked by default after you open the tool itself as we have shown above. This means that after the tool asked if it can check the drivers in your computer and you clicked on the “Yes” button, it already did check for drivers that have WHQL digital signatures.
For the DirectX Diagnostic tool that is found in older Windows editions such as Windows Vista or Windows 7, you might notice that it first checks for drivers that work with 32-bit Windows OS versions which are installed on the computer that is being checked. If you wish to check for 64- bit drivers, all you need to do is click on the “Run 64-bit DxDiag” button that is found at the bottom portion as you can see being shown on the screenshot below.
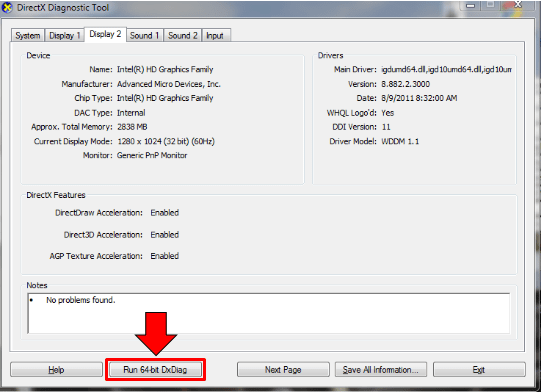
After clicking on the button, the DirectX Diagnostic tool will then start scanning for 64-bit drivers that are installed on your computer. In the version of the DirectX Diagnostic tool that is found on Windows 10, this button is no longer available since the tool automatically scans for both 32-bit and 64-bit driver that is currently installed on the host computer.
How to View System Information from the DirectX Diagnostic Tool
Now, let’s get into the things that the DirectX Diagnostic tool is capable of doing. First of all, if you look into the tabs that are found on top, you’ll see the first one which is labeled “System” and no matter how many display devices or sound devices you attach to your Windows 10 machine, there will always be one “System” tab on top while there would be 2 or more “Display” and “Sound” tabs.
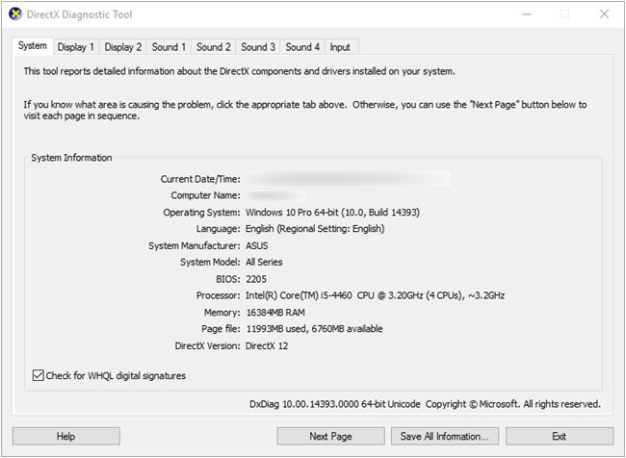
The reason for this is because the “System” tab represents your computer so if you click on it, you should be able to see information about your machine’s important hardware and other relevant information that are related to the system as you can see being shown on the screenshot below.
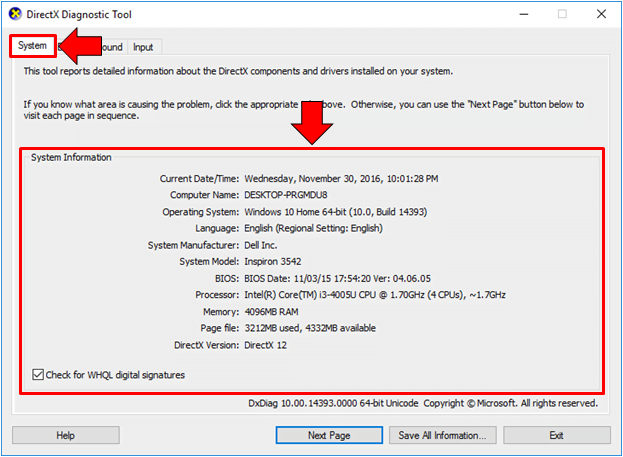
As you can see, there are very important information that are shown in the “System” tab such as the version of Windows and its current build that is installed on the computer as well as processor, RAM and even System Manufacturer and the System Model.
How to View System Display Information Using the DirectX Diagnostic Tool
Next, if you look to the tab that sits next to the one that is labeled “System”, you will see one or more tabs that is labeled “Display” and clicking on it will show important information which pertains to the display device/s that are attached to your machine. These information includes the name of the video card, its manufacturer, the currently set resolution and on the right portion, you will see the display device driver/s that are installed on your computer as shown below.
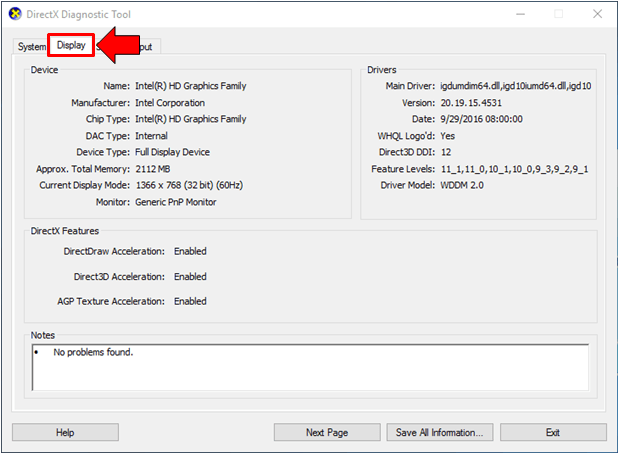
Towards the bottom, you will see a box which is labeled “Notes”. If your display device currently has problems, the information about these detected problems should be displayed in this box.
Viewing System Sound Information Using the DirectX Diagnostic Tool
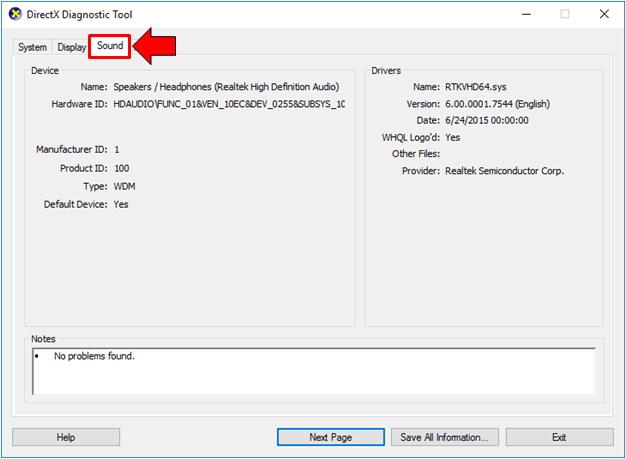
Next to the tabs that is labeled “Display” is another one that says “Sound” and clicking on this tab will display information about your computer’s audio device, its manufacturer and the drivers that are currently installed for it. Just like the “Display” tab, there is also a box that is located towards the bottom portion which is labeled “Notes” and in here, you should be able to find information on the problems that your machine’s audio device currently has. If no problem is detected, you would be able to see a message that says “No problems found” under this section as shown below.
Viewing Input Device Information from the DirectX Diagnostic Tool
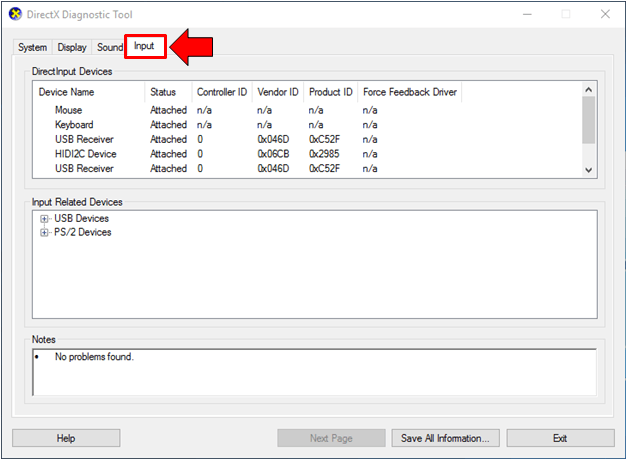
Finally, we come to the last tab that is found at the top portion of the DirectX Diagnostic tool which is labeled “Input”. As its name itself suggests, this section displays information about the input devices such as mouse keyboard and others that are attached to your computer. As usual, you’ll see a box found towards the bottom which is labeled “Notes” and if the DirectX Diagnostic tool detects a problem in any of the input devices that are attached to your machine, it will display the information about those problems in this box.
Once you are done checking for errors and finding information about your system, display devices, sound devices and input devices, you can simply click on the “Exit” button that is found at the bottom-right portion of the DirectX Diagnostic tool in order to close the Window. You can also choose to save the information that is shown on a certain page by clicking on the “Save All Information…” button which is also found at the bottom of the DirectX Diagnostic tool Window.
Find Errors and Problems Easily with the DirectX Diagnostic Tool
As you can see, Microsoft really has a good set of tools for finding the root of certain problems that are currently appearing on your Windows machine and DirectX Diagnostic is just one of those tools that you can use in finding out what the errors are all about. It’s a less known tool but now that you’ve already found out and learned about it, you can take advantage of it the next time a prompt appears on your screen saying that a certain driver is missing or is not working.