Getting More from the Calendar App
We have already gone through the basics in working with the Calendar app in our last tutorial but there are still even more features offered by this awesome app which will make you get updated about everything and stay reminded with some events that you have entered into it. In this tutorial, we will look into greater details about entering an event and setting it up to remind you at the exact time. Just follow the steps below to learn how these things are done.
Creating Your First Event
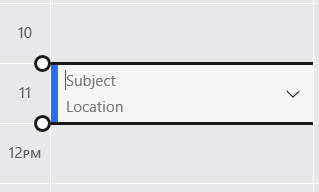
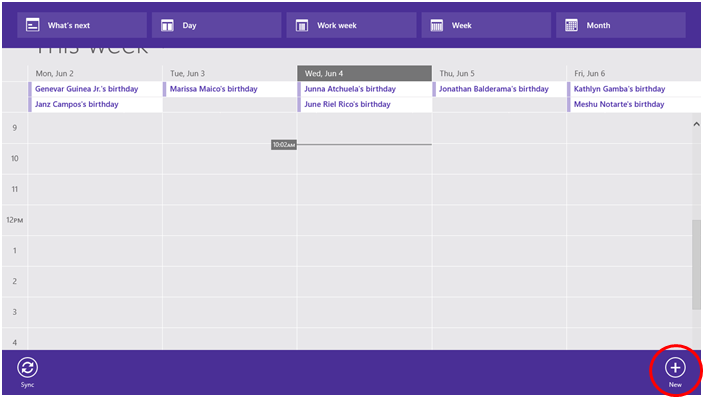
Creating an event in the Calendar app is very simple, just open the app from the Start Screen and once it opens, simply choose from the “Day”, “Work Week”, “Week” or “Month” view. If you selected Day, you can simply click on the time of the day where you want to set the event or reminder and you will see a small box bearing a “Subject” and “Location” label. If you are just going to set a simple event, simply enter what the event is all about on the “Subject” section and where it is going to happen on the “Location” section.
Another way of doing this is by right-clicking on the Calendar app screen and on the app bar that appears at the bottom, simply click on the “New” option located at the extreme-right end of the app bar.
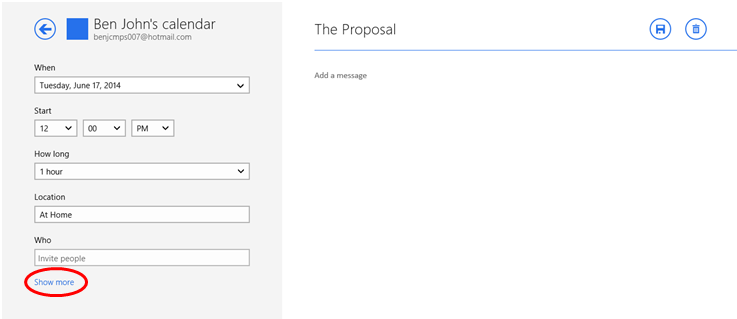
After doing so, you will arrive at a screen where you can input some other details that you want to assign to the event that you are going to create.

At the bottom of the screen, you will also find a link that says “Show more”. Clicking on it will reveal even more input boxes for some other details which you can add to the event you have just created and most of these settings and input boxes are for the reminder function. For instance, you can set how often the reminder will appear on your computer screen to help you remember the event. This is very useful if you have set a very important appointment on a given date and you need to get reminded of it very often so as not to forget about it.
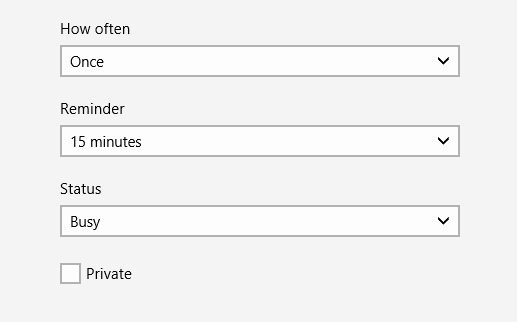
The next setting will allow you to set the length of time that the reminder will display on the screen and even on the Lock Screen and finally, the last setting is about the status of the reminder. There is also a check box at the bottom which will allow you to set the reminder to Private or not.
Inviting People to an Event
If the event which you have set is about a meeting or a party with some friends which are registered to the “People” or the “Email” app on your computer then you can invite them by entering their names on the “Who” input box. To send an invite, simply bring the mouse pointer to the top-right corner of the screen and click on the “Send invite” icon.

Using Some Reminders
One purpose of why you can enter events to the Calendar app is so you can be reminded of it whenever needed according to the settings which are active. When an event gets created, some of the options that appear will help you get alerted about it long before the event happens. For instance, you can set it to show a message as a reminder 15 or 30 minutes and even days before the events happen. When a specified time for a certain reminder arrives, the Calendar app will send an email to your inbox about the event. To set the details about a reminder, simply follow the steps below.
1. Click an existing event on the Calendar app and once it opens, click on the “Show more” link located at the left options pane.
2. After doing so, there will be some other options that will appear which will help you specify some aspects of the reminder. The first option will help you choose how often the reminder will notify you about the event. Just click inside the box under the “How often” heading and you will see all available options in it.

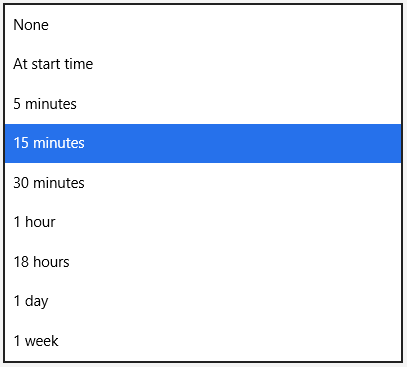
3. Moving on, the next setting is labeled “Reminder” and if you click or tap on it, you will see a list of time durations when the reminder would notify you about the event before it actually starts. You can choose between the shortest time which is 5 minutes to the longest one which is 1 week as you can see on the screenshot below.
Lastly, there’s a Status option available at the bottom most part of the menu at the left portion of the screen. Simply select between the available options which are “Free”, “Busy”, “Tentative” and “Out of office” and this will serve as the label of the event that you created.
Saving an Event
All of the information about the event which you entered into the Calendar app will all disappear if you don’t save it so be sure to click on the Save this event button found at the top-right portion of the screen.

A shorter way of saving an event is done simply by pressing the CTRL + S keys on your computers keyboard.
Editing an Existing Event
The schedule of the event which you entered on the Calendar app may have changed and you badly need to update it so as not to mislead your friends whom you sent invites to. To edit the details of an existing event, simply click on it from the Calendar app screen and you will then be taken into a screen where you can make changes on the details of the saved event. After updating the event and reminder settings, simply go back to the Calendar landing page by clicking on the left pointing arrow icon located at the top-left portion of the screen.
Deleting an Event
Lastly, you can also delete an event that has already happened to clean the Calendar from unnecessary entries. To do this, simply open the event and once you are on its details screen, simply look for the delete icon which is located at the top-right portion of the screen and once you see it, simply click or tap on it then on a small confirmation Window that appears, simply click or tap on the button that says “Delete”.
