Getting to Know the Power Options Section in Windows 8.1
There’s one part on every device that is common in all and in fact, you’re surely using it almost everyday as you do plenty of tasks in your computer, tablet or smartphone. Without this tiny yet very important component, you surely won’t be able to start your devices at all even if it is fully-charged or even if it is already plugged in to the right power source.
What we are referring to is actually the power button which can be found in different locations on every device. However, did you know that there are actually other ways in turning on or turning off your computer aside from using the power button? Yes! Your Windows 8.1 computer actually has some hidden tricks that will help you to quickly start up or close your computer without the lengthy process of booting up or shutting down and we will be learning the steps in doing these things in this tutorial so be sure to prepare your Windows machine and follow the steps that we will be showing below.
First, Access the Control Panel
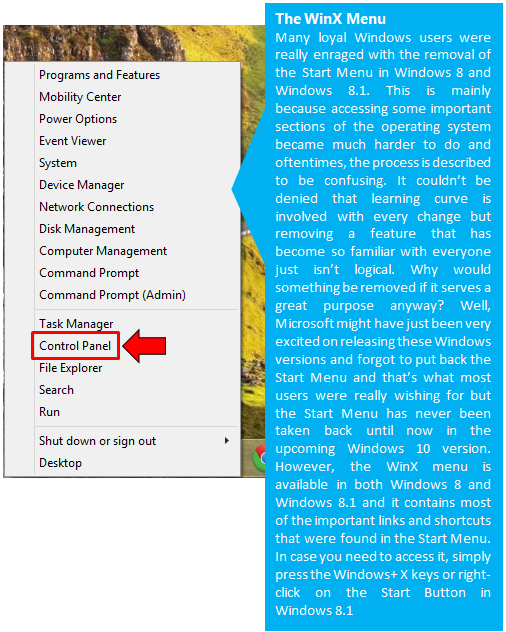
The very first step in doing these tricks on your Windows 8.1 machine is by first accessing the Control Panel. This section of the Windows operating system has used to be very easy to open back in Windows XP, Vista and Windows 7 but in Windows 8 and Windows 8.1, everything changed and became a bit confusing. However, to easily open it, you can simply press the “Windows + X” keys and the WinX menu will pop out of the bottom-left portion of the screen as highlighted on the screenshot below.
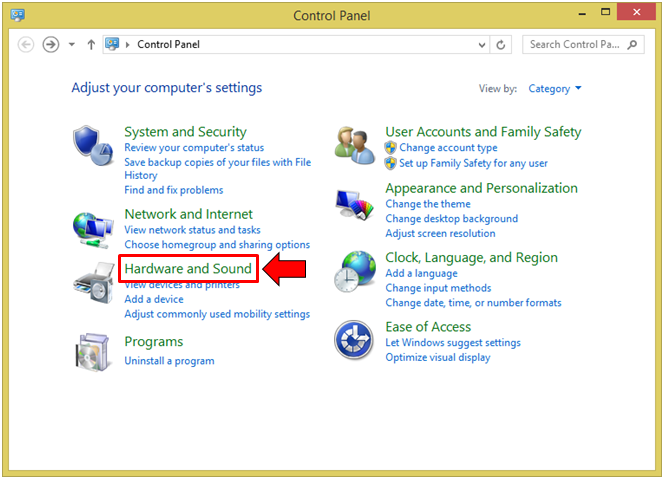
Now that you have opened the Control Panel Window, you will need to open the “Hardware and Sound” section by clicking on it as shown below.
On the Window that follows, you will find all the items that are under the “Hardware and Sound” section and from here, simply click on the link that says “Power Options” as highlighted on the screenshot below.
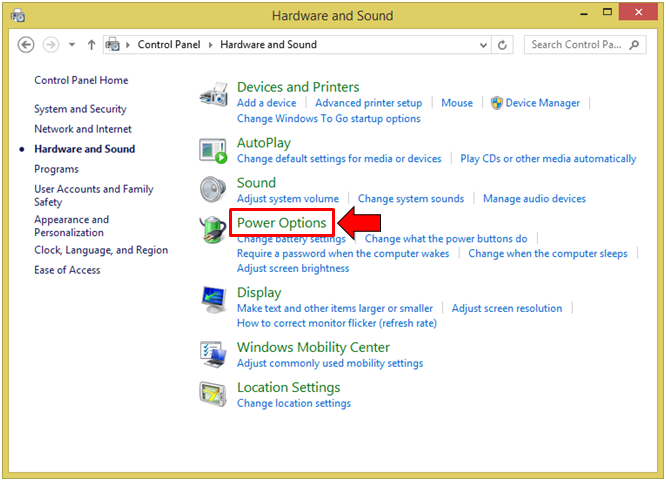
Alternatively, you can also click on the “Change what the power buttons do”, “Change when the computer sleeps” and “Require a password when the computer wakes” links under the “Power Options”category in order to enter the section where we will be making the tweaks to how your computer turns off, sleeps, hibernates or wakes up.
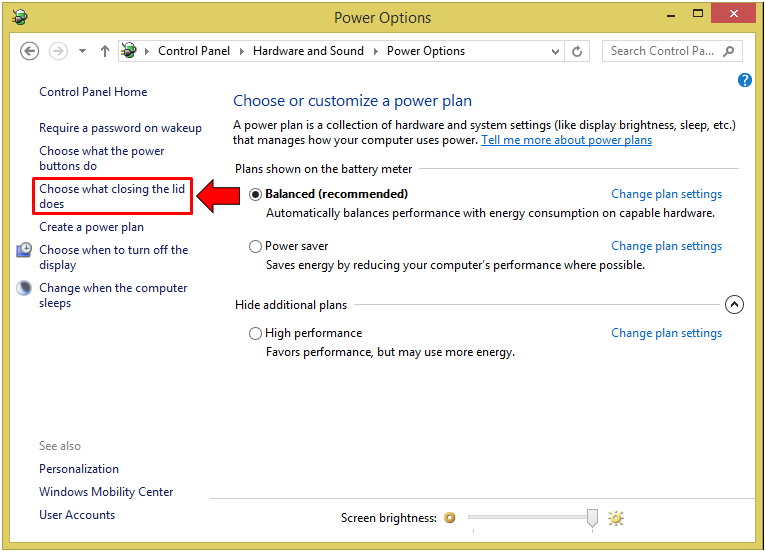
Now, if you clicked on the “Power Options” category link as highlighted on the screenshot above, you will be able to access the Window that looks like the one shown below. From here, you can make tweaks on your computer’s current Power Plan and choose from either “Balanced”, “Power saver” and “High performance”.
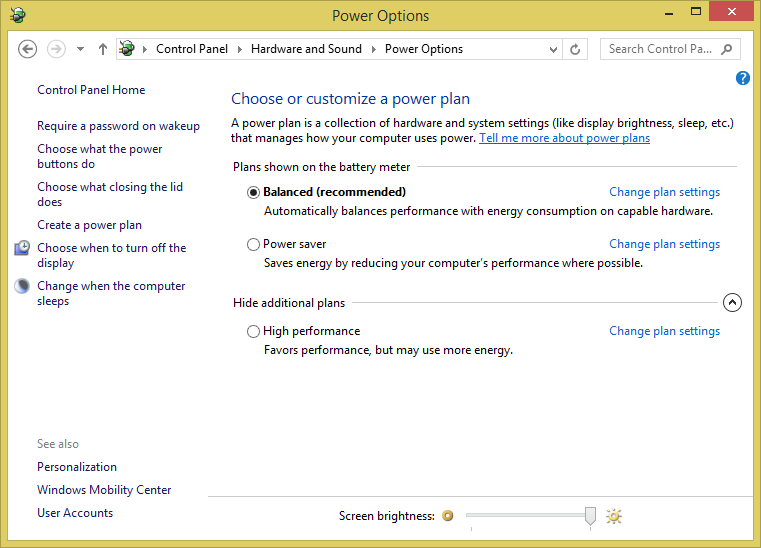
If you click on the “Change plan settings” link, you will be able to access the section where you can make changes on the length of time before your computer sleeps or when the screen dims on two circumstances “On battery and Plugged in” if you are using a laptop.
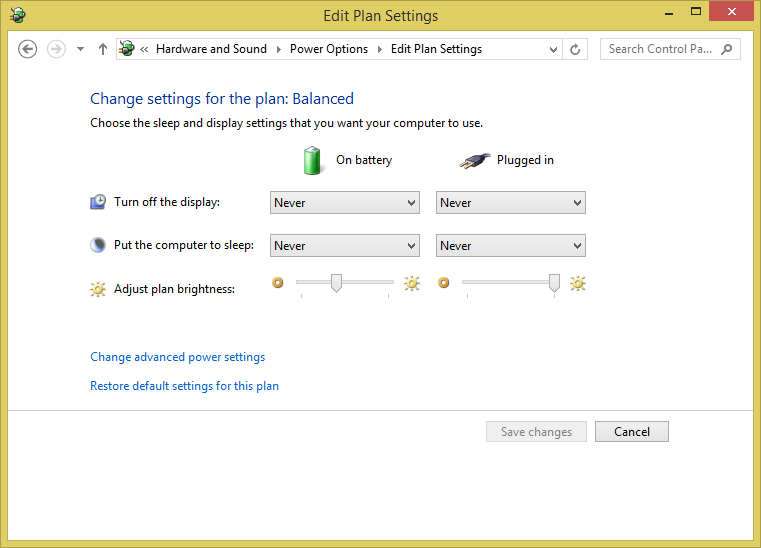
If you want to make some deeper tweaks to your computer’s current power plan settings, you will be able to do so simply by clicking on the link that says “Change advanced power settings” right at the bottom of the “Hardware and Sound > Power Options > Edit Plan Settings” location of the Control Panel. If you think the changes aren’t really needed and you want to revert back to the default settings of everything for a certain Power Plan, you can simply click on the “Restore default settings for this plan” link as you can see on the screenshot above.
Changing What Closing the Lid Does
Now, if you are using a laptop, you can actually do some tweaks with what happens when you close the lid or the screen itself. The default setting for this is “Sleep” which works almost the same as Hibernate but takes a little time for your computer to wake up compared to the former and uses up a bit more of your battery juice. To start tweaking this aspect of how your machine works, simply go back to the “Power Options” section of the Control Panel and focus your attention on the links that are located on the navigation pane at the left where you will need to click on the link that says “Choose what closing the lid does” as highlighted on the screenshot below.
On the Window that follows, you will find three different actions where you can select what happens when you do the action in two situations “On battery and Plugged in”. The three different actions are “When I press the power button”, “When I press the sleep button” and “When I close the lid”. To choose what happens when you do the action, you can simply click inside the box located at the right which has the “Sleep” power off option by default and you will see more options to choose from.
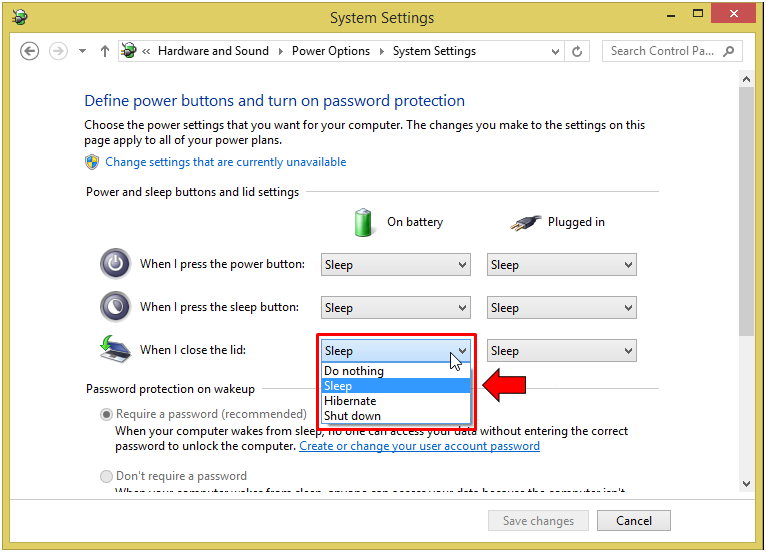
As you can see, you can just “Shut down” your Windows 8.1 laptop instantly by just closing the lid or doing other actions like pressing the power button or the sleep button and just be sure that you apply the power off option that you have selected in both the “On battery” and “Plugged in” situations.
Now, scroll down and you will see some other things that you can make tweaks with. For instance, you can actually skip the inputting of your account password but before you can change this setting, you will need to first click on the link that is located on the top portion of the Window that says “Change settings that are currently unavailable” as highlighted below.
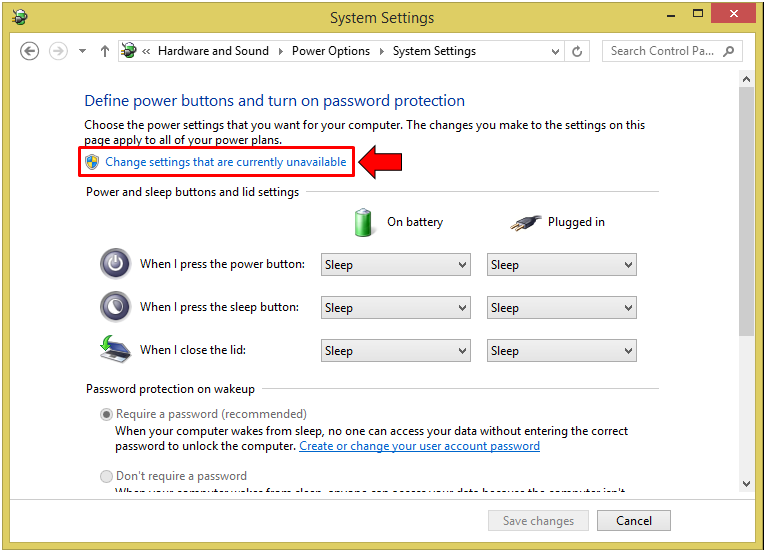
After doing so, the options that are located towards the bottom of the Window will now become available. If you are the only one that is using your computer, you can disable the password screen when your computer wakes up from sleep. To do this, you will simply need to mark the “Don’t require password” option and if you scroll towards the bottom even more, you will see the Power Off options which appears whenever you click on the power button on the Start Screen. If you don’t see “Hibernate” as one of the options, be sure to mark it from this section then hit the “Save changes” button in order to save all the changes you’ve made.
As you can see, there are actually a lot of tweaks that you can do with your computer’s Power Options and you will surely find even more if you explore even deeper into each of the links that we have pointed out in this tutorial. Always take note of the revert to default settings link and you’ll surely be able to do plenty of changes to this aspect of your Windows 8.1 computer without having to worry of any problem that would be hard to solve since setting everything back to the default settings is just one link away!