How to Access and Setup Remote Desktop Connections in Windows
Operating systems such as Windows has really evolved so much through the years. From its looks alone down to the features and tools that were improved or incorporated to it in the recent years, there’s really no doubt that we are at present in the “golden age” of technology and we are going to witness even more innovations as advancements in technology seem to be unstoppable.
We’ve been publishing tutorials about Windows in the past 4 years and we’ve witnessed how this popular operating system changed through the years. One of our favorite features in Microsoft’s flagship software product is called the the Remote Desktop Connection and in this tutorial, we will be showing the steps in how this awesome productivity tool is used so be sure to fire up your Windows 10 machine and be ready to follow the instructions that will be shown as we move along.
NOTE:
This tutorial is applicable in certain Windows versions such as Windows 10 Pro and Enterprise editions, Windows 8.1 Pro and Enterprise editions and as well as Windows 7 Professional, Ultimate and Enterprise editions. If you have these Windows operating system versions installed on your computer then you can enable Remote Desktop Connections so your computer can be accessed and controlled remotely.
Accessing the Remote Desktop Connections Setting
There are numerous ways in accessing the Remote Desktop Connection tool in Windows 7, Windows 8.1 and Windows 10 and since we are using a computer that runs in the Windows 10 OS platform, we will be showing you the steps in how it is done in Microsoft’s latest version of Windows.
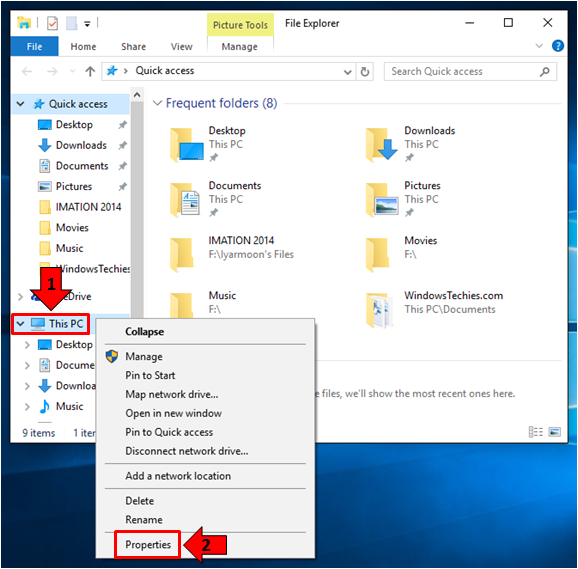
To do this quickly, you will first need to open the File Explorer Window and again, there are many ways in doing this. The simplest one is done by pressing the Windows + E keyboard shortcut combination. After doing so, the File Explorer Window would launch instantly.

Once the File Explorer Window opens, just look for the “This PC” link that is found on the navigation pane at the left portion and once you find it, you’ll need to right-click on it in order to open a contextual menu which would show options for the “This PC” system location and the link itself. From this menu, simply hit the one that says “Properties”.
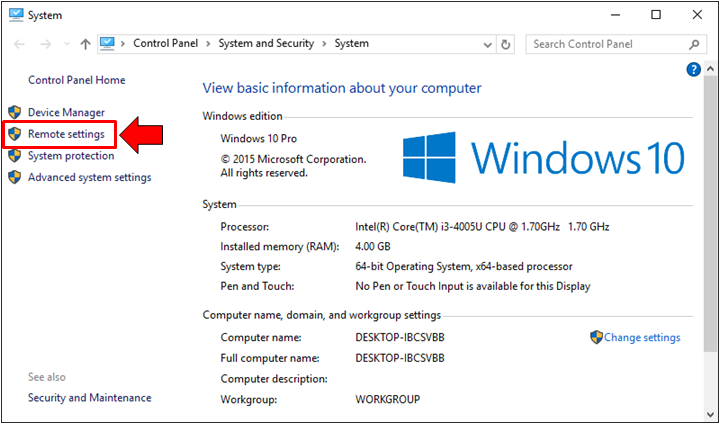
The “System” Window of the Control Panel will then open right after you click on the “Properties” option that appeared earlier after right-clicking on the “This PC” link of the File Explorer Window. From here, you will now be able to open the Remote Desktop Connection settings simply by clicking on the link found on the navigation pane at the left which says “Remote settings”.
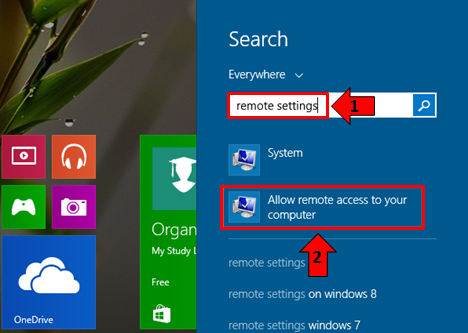
Another method in doing this on a Windows 10 computer is through the new Search app. To summon this improved feature quickly, all you need to do is press the Windows + S keyboard shortcut combination and the Search app should launch instantly on the bottom-left portion of your computer screen as shown on the screenshot below.

On this Search app screen, all you need to do is enter the words “remote settings” into the input box that is located at the bottom portion of the screen and right after you do so, the search results will pop out just on the top portion of the input box. From these search results, just click on the one that says “Allow remote access to your computer” as shown on the screenshot above.
In Windows 8.1, you can also access the Remote Desktop Connection settings Window from the Search screen by doing the same thing. Just press the Windows + S keys first to open the Search app which will slide-in from the right edge of your computer screen, enter “remote settings” into its search input box then on the search results that will appear just below the input box, simply click on the item that says “Allow remote access to your computer”.
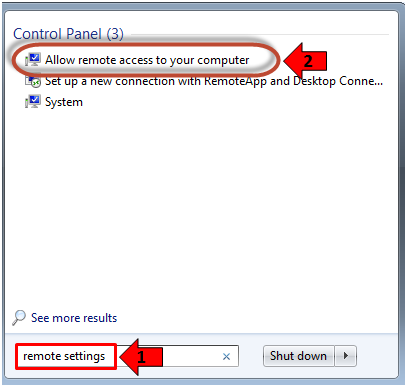
Finally, in Windows 7, you can also use the Search feature in order to access the Remote Desktop Connections Window. Doing this is very simply, just launch the Start Menu first and once it opens, simply enter the words “remote settings” into the input box that is located at the bottom. After doing so, the search results will be displayed just above the input box and from here, simply click on the one that says “Allow remote access to your computer” as you can see on the screenshot below.
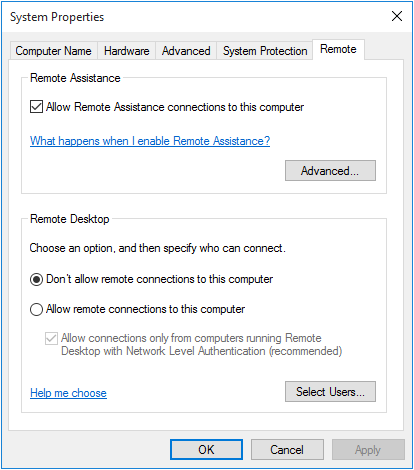
After doing any of the steps shown above depending on the version of Windows that you are using, you will now be able to open the Remote Desktop Connections settings Window and it should look exactly like the one shown below if you opened it from Windows 8.1 or Windows 10.
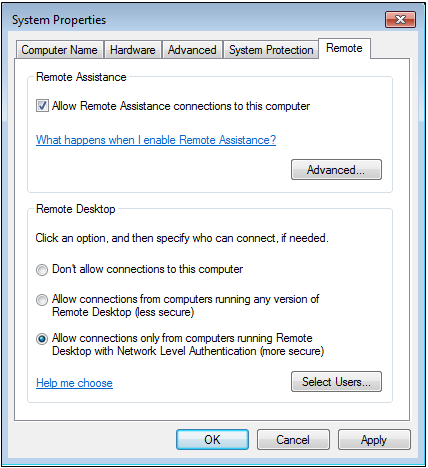
The Remote Desktop Connections settings Window looks slightly different in Windows 7 and in case you accessed it from this Windows operating system version, it should resemble the one shown on the screenshot below.
Now, you might notice that the label of the Window is “System Properties”. This is because Remote Desktop Connections is part of your operating system’s settings and is placed under this category in Control Panel. Now that you already learned how this awesome feature is launched, it is time to get into the details on how it is setup.
What is it Used For?
Now that you already know how the Remote Desktop Connections settings Window is accessed in your version of Windows, it is time to learn how it is setup so it can start to work in providing others access to your computer. But before anything else, let’s see some applications of this tool in different scenarios. Here are some:
- Giving access to a friend or a technical service personnel to your computer even if they are not in the same location as you are provided you are connected to the Internet.
- Provide you access to your work computer in the office in case you have to do something or access something in it. Remote Desktop Connection allows users to access a computer in a different location and it would feel as if they are actually working on the actual computer itself.
- Remote Desktop Connection also boosts productivity since a user can remotely access his or her work computer even from home or from any other location.
There are many other applications for this tool for different types of users depending on their needs and we have just enumerated the simple and common ones above
Setting Up Remote Desktop Connections
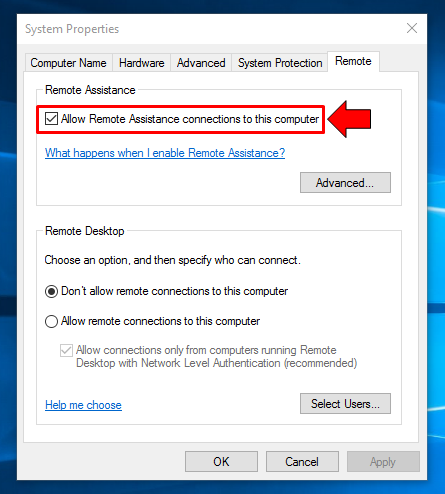
Once the Remote Desktop Connections settings Window opens, you will need to make sure that the check box which says “Allow Remote Assistance connections to this computer” is checked as shown on the screenshot below.
Now, below this checkbox, you will find a set of options under the “Remote Desktop” section. Each option and their applications are explained in greater detail below:
- Don’t allow remote connections to this computer- If enabled, this option will prevent any user from even connecting to your computer through the Remote Desktop Connections feature or from the RemoteApp. RemoteApp is a tool in Windows that allows connection by a single client to a single application.
- Allow connections from computers running any version of Remote Desktop (Windows 7) or Allow remote connections to this computer (Windows 8.1 and Windows 10)- This option is found in Windows 7’s Remote Desktop Connections tool and it essentially allows other users with any version of Remote Desktop, RemoteApp or even any third party remote desktop application to access your computer. For instance, if the user who wants to remotely access your computer is using Ubuntu, you will need to select this second option on your Windows 7, Windows 8.1 or Windows 10 computer.
- Allow connections only from computers running Remote Desktop with Network Level Authentication- This is the most secure option since it only allows Remote Connections from computers that runs Remote Desktop having a Network Level Authentication. This advanced Remote Desktop Connection feature has been introduced in the Remote Desktop Client 6.0 version.
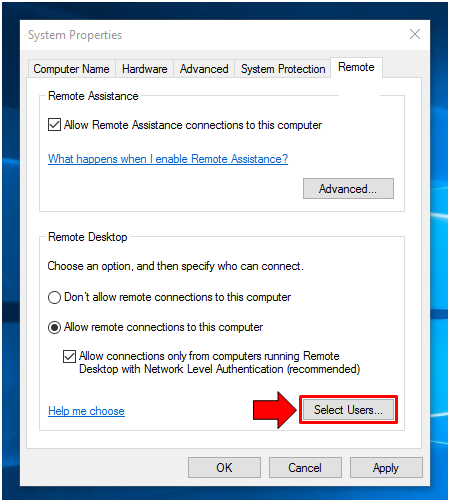
After choosing the option that best fits your needs, you can simply click on the “OK” button at the bottom. However, if you don’t want the user who will be remotely accessing your computer to get access to your sensitive files. It is best to create a standard level user first and enable Remote Desktop Connections from it. If you want to give permission for Remote Desktop Connection on the other user accounts on your computer, simply click on the “Select Users…” button which is found on the bottom-right portion of the “Remote Desktop” section as highlighted below.
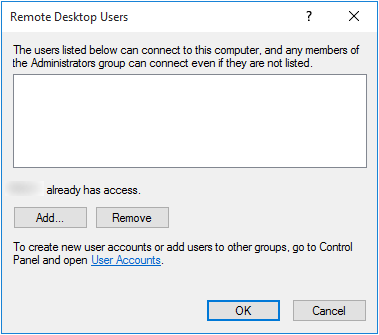
After hitting on the button, you will be taken to the “Remote Desktop Users” Window which will now give you a chance to add the users to whom you want to give permissions to simply by clicking on the button that says “Add…” as highlighted on the screenshot below.
Now, on the Window that follows which is labeled “Select Users”, you will simply need to type in the account name of the user into its designated box then hit the “Check Names” button as show below.
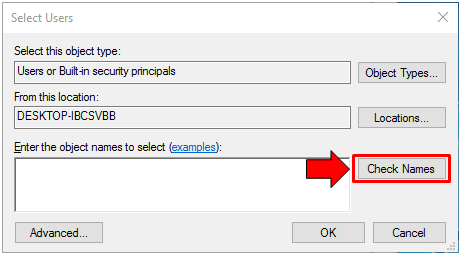
Windows will then check if the user account name that you have entered really exists and its location should also be added in front of it if it is a local user account or your complete email address if it is an administrator account created using Microsoft account. Once you are done, just click on the button which is located at the bottom which says “OK”.

You will then be taken back to the “Remote Desktop Users” Window and from here, you will simply need to click on the “OK” button once again in order to save all the changes that has been made.
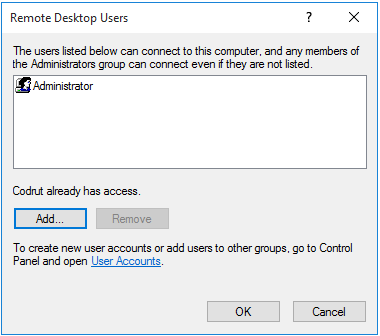
By now, the user which you have added to the list will start to be able to connect to your computer via the Remote Desktop Connections tool with the use of his/her logins. Remote Desktop really is a very useful tool especially if you want to maximize that you spend each day for work or any other tasks that require multiple computers located in different places either within the office or even at home. Just imagine the comfort that it gives by providing you access to any computer at any given time without you leaving your personal computer.
In our future tutorials, we will be tackling about other Remote Desktop applications which are developed by third party companies and compare it with the one that Microsoft has developed and incorporated into the Windows operating system. Do you have experiences using the Remote Desktop Connections tool in your Windows machine? How did it help save your day? We would like to hear your story and in case you have some wonderful experiences using this tool that we have covered in this tutorial or even some other built-in Windows OS tools, please feel free to share them with us through the comments section below.
We also welcome topic suggestions on our next articles so if you want one of our experts to talk in detail about a certain Windows feature then please let us know on the comments section or email us at the email address we’ve given in our contact page.