How to Configure Windows Update
The Internet is an ever changing environment and all the devices and operating systems that are capable of connecting to it should as well follow the same flow. There’s not a single operating system which exists today that is perfect in any way and since everything around the Internet is changing, it should also be able to adopt with the changes and have all the needed features so it can work properly every time. This is the reason why different OS brands and versions really have occasional updates which the developers really recommend for users to install.
If you are using a Windows computer, you should have been able to see a prompt telling you to install Windows Updates and if you don’t know what it is, just think of these updates as something that would add more features and as well as apply security patches that will protect your computer from all the latest threats that easily infiltrates into your system without you being aware of it. To learn how important these updates are and see how you can configure them so that the download and install process would happen on a set schedule, just read this tutorial towards the bottom.
How Important are Windows Updates?
As was mentioned above, Windows Updates contain very important stuff that help improve your computer’s performance and makes it more secure against any threat that comes from different sources both online and offline. The size of an update largely depends on its contents. Major updates which could contain brand new features, security patches and other important stuff can be larger and would take longer to download and install. Failure to install updates could lead to problems that range from simple to the more serious ones which could take all your files at risk. To avoid these things from happening, it is important that you download and install updates automatically into your Windows machine which we will be learning as we move forward in this tutorial.
Accessing the Windows Update Section
You might already know how to access Windows Update in your old PC or laptop that runs in Vista and Windows 7 but if you upgraded to Windows 8 or Windows 8.1, accessing the same feature is different. This is because the Start Menu which you surely got used to and has become a quick access section for shortcuts leading to different places within the Windows operating system has now been removed and was replaced by a brand new section called the Start Screen.
To access the Windows Updates section from the Start Screen, simply click on the Start Button or press on the Windows key and Windows 8.1 will take you there. Once you arrive on this screen, you will need to press the Windows + S keys in order to summon the Search screen which will appear from the right edge. On this screen, simply enter the words “windows update” into the search input box that is found on the top portion of it.
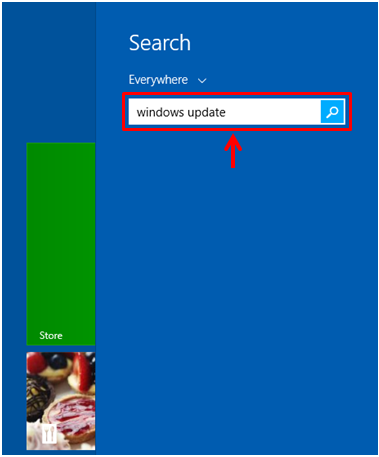
After the words gets entered into the input box as shown above, you will need to wait for a few seconds until the search results starts appearing below it. From these search results, simply click on the one that says “Windows Update” if you want to change the settings from the desktop screen or “Windows Update settings” if you want to choose to make some changes on the Metro screen.

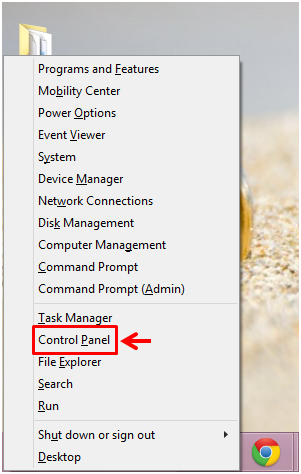
Another way in accessing the Windows Update section in your Windows 8.1 machine is by first pulling up the Control Panel Window. To do this, simply press the Windows + X keys in order to access a hidden menu which will appear from the bottom-left corner of the screen. Once this menu appears, simply click on the link in it that says “Control Panel”.
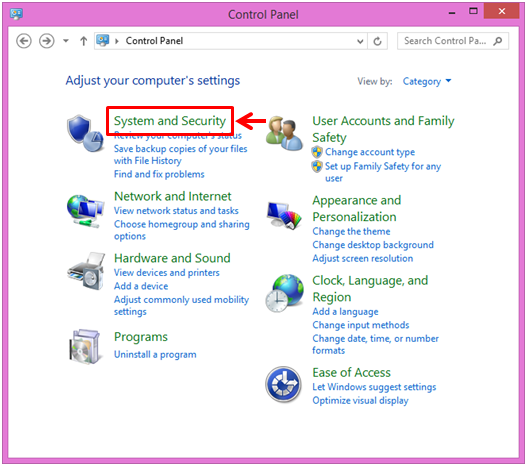
Now, the Control Panel Window will open and show the different settings category which are grouped accordingly. From here, you will need to click the item that says “System and Security”.
After you do so, another Window will follow which will show all the other settings that falls under the “System and Security” section. Take time to look at each one of them that you might need to access in the future and when you are done, just hit the item that says “Windows Update”.

The Window that follows now contains all the tweaks and setting that you can do to Windows Update such as turning it on or off, manually checking for updates, manually installing then and even viewing your update history. You can also schedule automatic updates from this section which we will be discussing next.
Manually Updating Your Computer and Viewing the Updates History
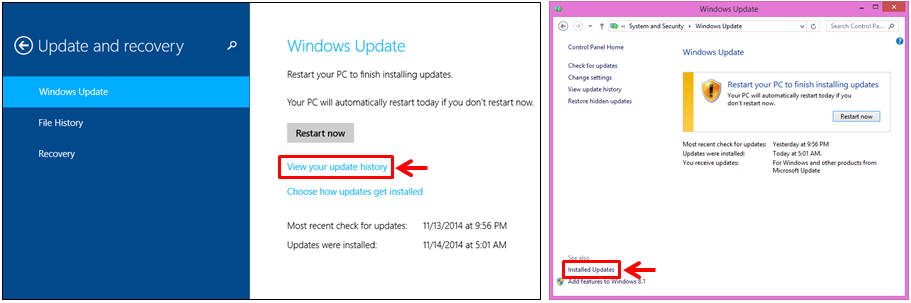
Now that you know how to access Windows Update, it is time to learn how you can tweak all the settings in it. First, you need to take note that if an update is available, the Windows Update Window will appear like the screenshot below both in its Metro and Desktop mode.

If you want to the updates right away, all you need to do is click on the button that says “Restart now” from any of the environments where Windows Update can be accessed (Metro or Desktop). You can also choose to view your installed updates by clicking on the link that says “View your update history” if you are on the Metro screen or the “Installed Updates” link found at the bottom-left portion of the Window if you accessed Windows Update from the Desktop screen.
Changing Windows Update’s Download and Install Schedules
Windows Update can also be customized. For instance, you can click on the “Choose how updates get installed” link that is found on the Metro version of the Windows Update settings section and you will be taken to a screen that looks like the one shown on the screenshot below.
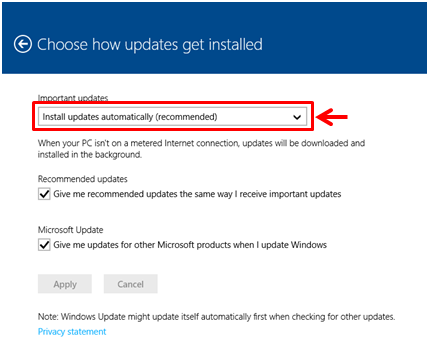
From here, you can let Windows to download and install updates automatically or change it to some other settings which you can choose at your own discretion by clicking on the arrow-down icon that is located at the extreme-right end of the box as highlighted on the screenshot above. After you do so, all the other options will appear for you to choose from but you need to remember that Microsoft recommends that updates should be installed automatically which is set by default so you can protect your from any threat and get it updated with all the latest features. Once you are one making tweaks, simply click on the “Apply” then “OK” buttons to save them.
Changing Settings from the Desktop Screen
If you opened Windows Update settings from the Control Panel, you can simply click on the link that is found on the navigation pane at the left which says “Change settings”. After doing so, the same set of settings that you were able to access in the Metro version of Windows Update settings will appear on the its Desktop counterpart so all you need to do is make the changes that you want the same way as you did it in the Metro screen version then click the “OK” button to save all the changes done.

That’s it! You now learned how to access Windows Update in both the Metro and Desktop screens in Windows 8.1 and also discovered the steps in how you can make changes with it. Stay tuned with us here in WindowsTechies.com to learn more cool stuff that you can do to your Windows computer so you can use it to its fullest!