How to Use Windows Remote Assistance in Providing Help and Support
Previously, we have talked about the Windows Remote Desktop Connection tool which is often confused with Windows Remote Assistance but these two are different. They might bear quite similar names and even work quite similar to each other but they are different tools designed for different purposes. So what exactly is Windows Remote Assistance and how can you make use of it?
That’s exactly what we are going to talk about in this tutorial so be sure to get your Windows computer fired up and prepare to follow the steps that we are going to demonstrate below.
What is Windows Remote Assistance?
Before getting into the details on how you can actually use this tool that is found in your Windows machine, let us first learn what it really is and what it actually does so we can distinguish it from the other tool called Windows Remote Desktop Connection which we have talked about extensively in our previous tutorials.
Windows Remote Assistance is a tool that is designed to help technical support persons to access a certain Windows computer from a different location and help the user solve some issues in it. You see this is really similar with the Windows Remote Desktop Connection but the difference is whenever the support person connects, the screen of the problematic computer does not log the owner off of it. Yes! Unlike Remote Desktop Connection, Windows Remote Assistance allows both the technical support person and the owner of the problematic computer to view and share control over the screen!
If you recall, in the Remote Desktop Connection tool, it is only the person who is accessing the host computer who can see the screen and the host computer itself is logged off. In the moment that a user logs in to the host computer, the remote desktop connection would be terminated automatically but in the Remote Assistance tool, both the support person who is in another location and the owner of the computer who is in front of the computer itself can see everything!
This tool is made to work this way so that the user who is trying to get some help in solving a certain technical problem in his or her computer can tell the support personnel what really is the problem or even point it out exactly as it actually occurs.
Wait a second, Windows Remote Desktop Connection was a cool feature but this one is no doubt a lot cooler than that! Some of us might say this way and it really is because you finally, you won’t be trying to solve problems by yourself, Windows Remote Assistance is here to help get other people solve a certain problem faster! So how exactly can you use this tool in your computer? Join us as we explain the steps in this tutorial.
Launching and Requesting Help with the Windows Remote Assistance Tool
So let us now learn how the Remote Assistance tool is launched in your Windows computer. While you might be using Windows 8.1 or Windows 7 right now, the screenshots that we are going to show in this tutorial are going to be taken from Windows 10 so just follow it in your computer since most of the steps are just similar.
First, if you really are finding it hard in looking for the shortcut that would launch this tool, you can easily summon it using the Search feature in your Windows computer. To do this in Windows 10, simply press the Windows + S keys in order to launch the Search screen which will slide up from the bottom-left portion of your monitor. Once it appears, just type in the words “remote desktop” which is found at the bottom portion of the search screen as highlighted below.
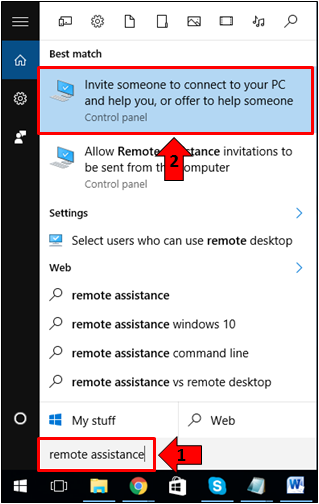
After typing in “remote assistance” into the search input box, the search results will then appear just on top of the box itself and from here, just click on the result that says “Invite someone to connect to your PC and help you, or offer to help someone” as you can see being highlighted on the screenshot above.
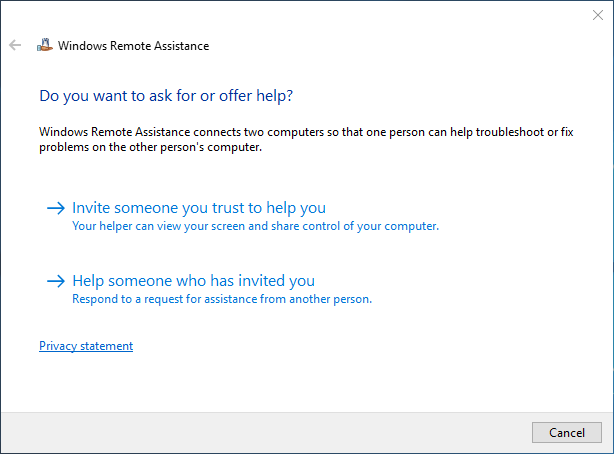
After clicking on it, you will be able to open the Windows Remote Assistance tool and from here, you will be presented two options depending on what you want to do at the moment. Right now, we will be clicking on the first option which says “Invite someone you trust to help you” as you can see on the screenshot below.
The next Window will now ask you choose the method in which the person whom you’re going to ask help from would get the notification about it. For this example, we will be selecting the first option which says “Save this invitation as a file” as highlighted on the screenshot below. However, if your Microsoft Outlook is setup in your computer, you can use the second option in sending the invitation and if both you and the person you are asking help from has “Easy Connect” then you can choose the third option. It is grayed out in the screenshot below because Easy Connect is not available in our test computer.

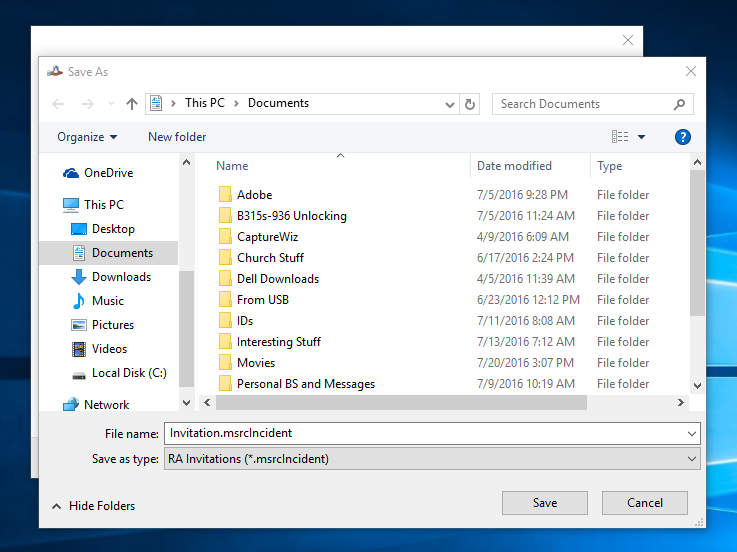
After clicking on the option, you will be able to open the “Save As” Window of the File Explorer tool where you can simply type in the invitation name or if you don’t want to change anything, just leave it unchanged. This invitation file will be saved in the “Documents” library and once you are done changing the file’s name, just hit the “Save” button that is found at the bottom-right portion of the Window.
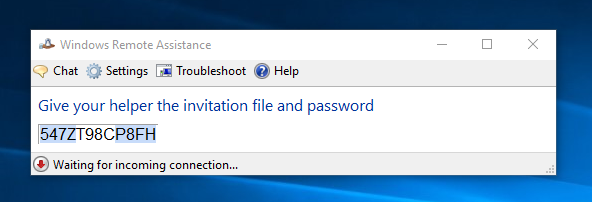
After hitting “Save”, a small Window containing the connection password will appear. Don’t close this small Window because this is the same password that you need to give to the technical person after they open the invitation file that you have sent them. The small Window which contains the password looks like the one shown below.
Next, what you need to do is to open your email account, create a new email and attach the invitation file and send it to the person whom you have chosen to ask help from. You can choose to include a short message as well so that the person will know that it is an invitation from you regarding Windows Remote Assistance and be clear on the subject of your email that it is something urgent. Once it is sent and the person you sent it to responds, you will need to give the connection password to them because Windows Remote Access will ask for it on their end.
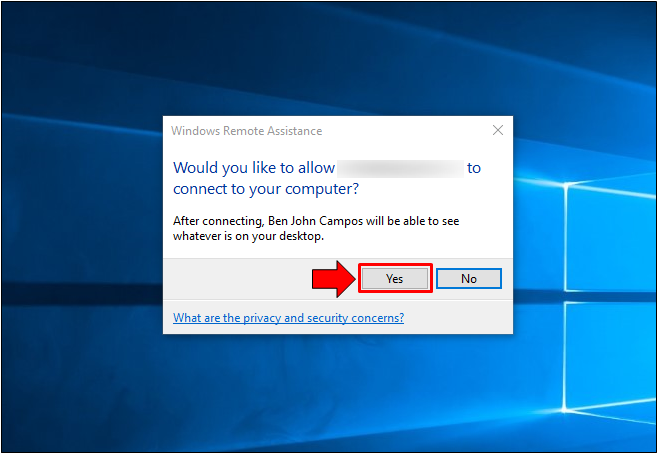
Once the technical person enters the password, you will be notified on your computer and all that you need to do is to approve it by clicking on the “Yes” button.
After doing this, your Desktop wallpaper will turn black and the Windows Remote Assistance tab will now appear on your screen which shows the name of the person that you asked help from.
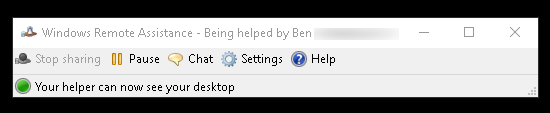
From here, you will see buttons such as “Stop sharing”, “Pause”, “Chat”, “Settings” and “Help”. Pressing “Stop sharing” will stop the technical person from having control over your computer. It is still grayed out on the screenshot below since the Share Control option has not yet been permitted in the Remote access session. Pressing “Pause” will temporarily stop the connection and you can resume it at a later time. You can also chat with the person who is helping you so you can explain the problem or error that you are experiencing on your computer. Doing this would help solve the problem easily. If you click on the “Settings” button, you will be able to open a Window that looks like the one shown below.
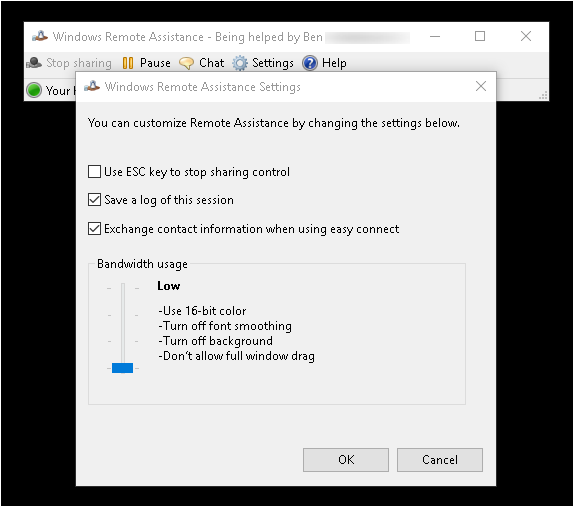
The default settings actually works great so you don’t have to change anything but if you want to easily stop the technical person from being able to control your computer then you can simply do it with a press of the Esc key and in order to turn it on, you just need to enable the feature from this settings Window. Once you are done making the changes, just click on the “OK” button that is found at the bottom-right portion of the settings Window in order to apply all the changes made.
Approving Request for Control
The technical person who is on the other side of the remote access session can also request for control over your computer. Remote Access only allows the technical person to view your screen and chat you for the instructions in solving a problem but you can allow them to control your computer from their location if you are finding it hard to follow their instructions. Once the technical person requests to get control on your computer, you will receive a notification on your machine that looks like the one shown below.
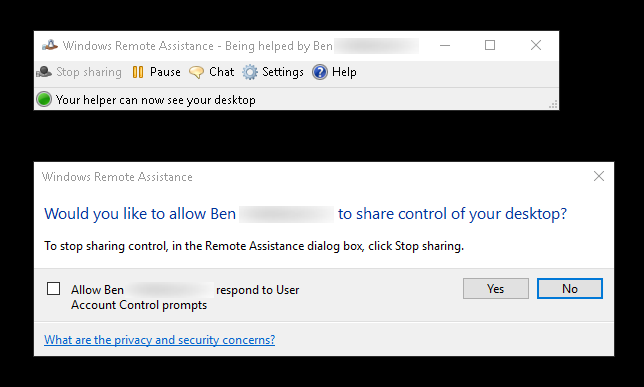
If you want to completely be free from the hassle of guarding your computer while the technical person is fixing it, you can check the “Allow <Techical Person’s Name> to respond to User Account Control prompts” option then hit the “Yes” button that is found to the right of the option itself in order to apply the change and allow the technical person to control your computer from their location. If you want to stop sharing the control over your computer, you can simply click on the button that is found on the Windows Remote Desktop tab which says “Stop sharing”.
How to Provide Help with Windows Remote Assistance
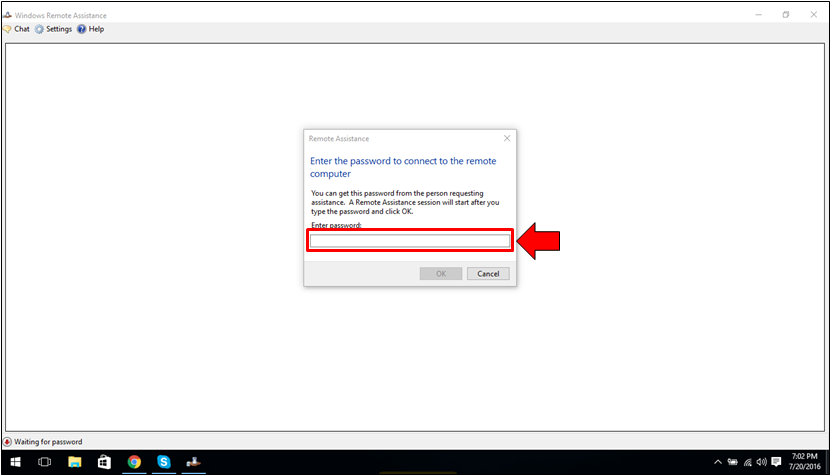
Now, let’s say you are the technical person and you want to provide help. After receiving the invitation to connect in your email, all that you need to do is download the attached invitation file that came with the email. Once it is downloaded, all that you need to do is open it and you will be able to launch the Windows Remote Assistance tool where you will see a small Window which is labeled “Enter the password to connect to the remote computer”. This is where you will need to enter the password which you will be getting from the person who sent you the invitation email.
After entering the password, just click on the “OK” button and all you need to do now is to wait until the person who invited you to provide help would approve the connection. Once he/she approves, you will be able to see his/her screen on your computer screen and the person as well can still continue using his/her computer.
Requesting Control from the Person Being Helped
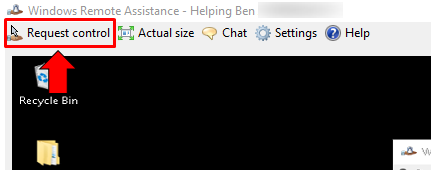
Windows Remote Assistance just allows the technical person to view the computer screen of the person who asked help. Controlling the mouse is not allowed from the side of the person who is helping but thankfully, a request can be made so that the technical person can share control of the mouse and other aspects on the computer of the person being helped. To send this request, all that you need to do is click on the button that is found at the top-left portion of the Remote Assistance Window which says “Request control” as you can see being highlighted on the screenshot below.
Doing this will send a notification to the computer of the person being helped. If the request for control is approved, you will now be able to control the mouse and as well as the keyboard from your location in order to solve the problem a quickly and easily. This saves time on both you and the person that you are helping. Once you are done solving the problem, you can simply end the session by clicking on the “X” or the Exit button that is found on the top-right portion of the Window and everything will automatically be terminated.
Solve Problems Quickly and Easily with Windows Remote Access
As you can see, launching and setting up the Windows Remote Access tool is not that hard. It’s also easy to use and very comfortable to deal with even with novice users. Have you been experiencing problems on your Windows computer and you already tried everything to no avail? You might need help from a friend who’s more techie minded than you. If this is the case then you can try using this built-in feature in your Windows machine simply by following the steps we’ve shown above. After you use it, please tell us about your overall experience so others will know and be encouraged to use this very useful tool as well!