How to Install RAM in Your Laptop
After learning all about RAMs in our previous article, you might now be considering an upgrade of it. There could be many reasons why you’d choose to update RAM and one of it is a PC that’s becoming slow.
Yes! Old PCs can become sluggish especially when used with more modern operating systems such as Windows 10. The programs that are available at present are also becoming more demanding in terms of system resource.
This is the reason why RAM upgrades (as long as it is compatible with your system) or adding more memory helps! But how will you do it by yourself?
What if you already spent enough on the RAM modules and nothing is left for paying someone to install them? This is the perfect time to learn some DIY and that’s exactly what we’re going to show you in this tutorial.
Installing RAM Into Your Laptop
Your machine will never work without RAM and it will not work good enough if the RAM installed needs upgrading. Below are the steps that you can follow in removing your old RAM modules and replacing them with new ones. Be sure that you got the right model of RAM modules before attempting to upgrade your machine’s RAM.
NOTE:
Before purchasing RAM for your laptop, be sure to first know what kind of module you need (DDR2, DDR3 or DDR4). If it is an old laptop then it probably has DDR2 so you’ll need to buy a DDR2 RAM. Open your laptop’s user manual or access the manufacturer’s website to see what kind of RAM your machine has.
Step 1: Unplug and Remove All External Power Sources
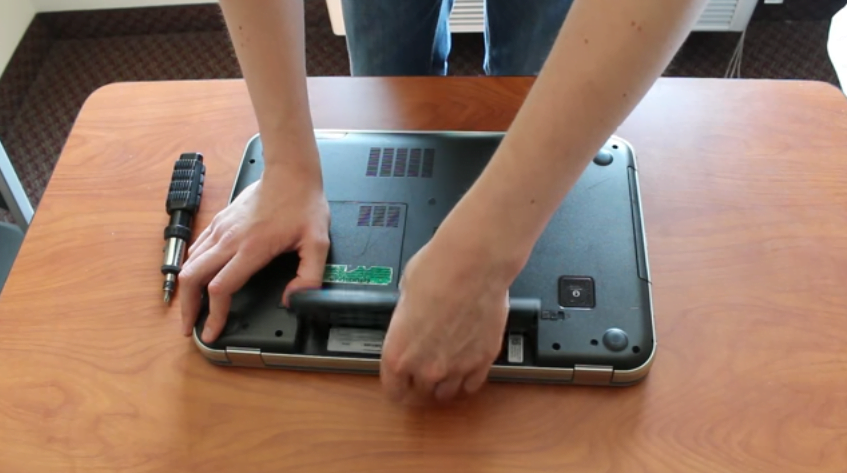
Most laptops operate at 19-20 volts. Opening and touching components on the motherboard won’t really give a risk of electrocution on your part. However, the static electricity on your body can harm small components that you touch.
Before taking out the RAM modules which we’ll learn a little later, first discharge yourself from static electricity by touching a metal surface. After doing this, get to your laptop, turn it upside down and remove the battery. Make sure that the charger is also unplugged from the device.
Drain all charge from the laptop by pressing the power button for 10 seconds. Doing this will ensure that the device is free from any amount of electricity that can interact with the static charge of your body. Wear something on your feet as well and don’t let skin touch the floor.
Step 2: Locate the RAM Cover Flap and Remove It
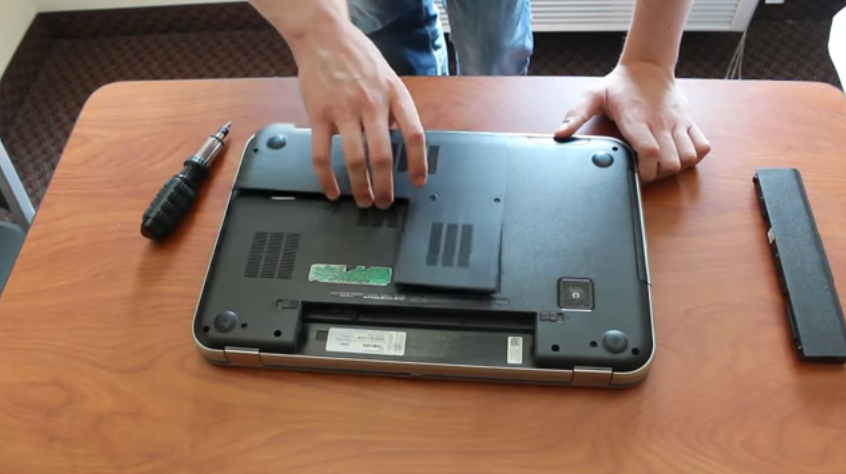
Most laptops have different flaps fastened with their own screws into the main laptop body. These flaps are intended for different hardware components installed in the device like the hard drive, RAM, WiFi adapter and others. There are mostly three flaps in general but there could be more depending on the laptop brand and model.
Other laptops also have a single flap so you need to make sure every screw that holds it in place are removed before trying to take out it out and reveal what’s under the hood. In this instance, having a user manual would greatly help especially if you don’t know how RAM modules look like.
Be careful to turn the screws to the right direction and apply just enough downward pressure on them with the right size screw driver so as not to destroy the head.
3. Find the RAM Module/s and Remove It
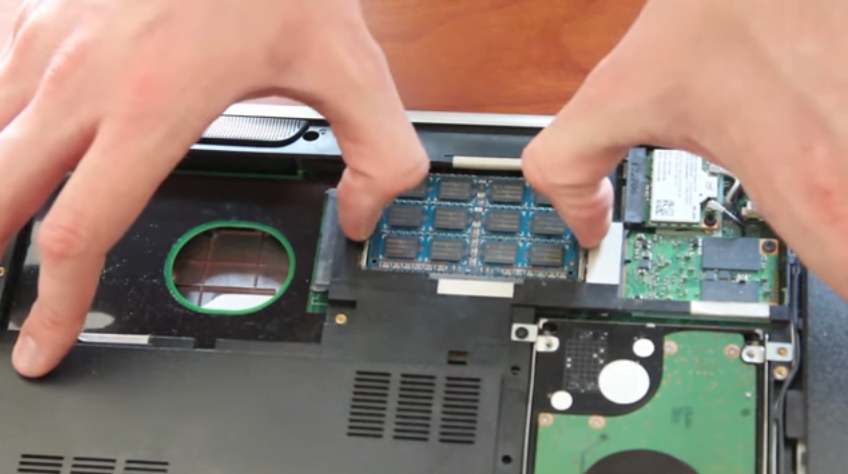
Be very careful on this next step because the RAM module sticks are being held by a pair of flexible metal at the sides so you shouldn’t pull it out by force. To take out the modules, just push those two metals away from the module and you’ll see it move towards you automatically.
When the RAM is already in a 45 degree position, that’s the time you’ll pull it out from its slot and it should come off very easily. There’s usually two modules in a laptop so be sure to check for the other one and remove it in the same way you removed the first.
4. Install the New RAM Module
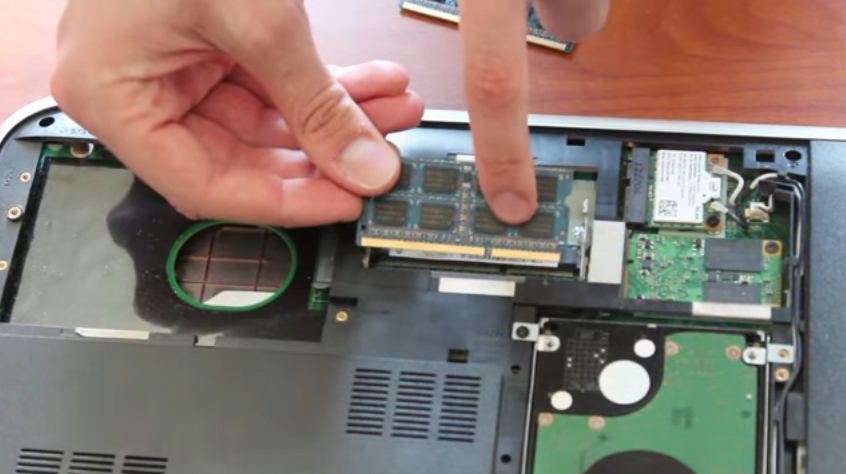
This would be the last step in the process. Once you’re done removing the old RAM, you will need to install the new one into the slots. Be sure to watch out for the grove that is present along the pins on the slot. This matches to the RAM modules so the blank space along the RAM should be placed properly along the slot.
Once the new RAM is fitted into the slot nicely, you can push it down until you hear a click which comes from the two flexible metal holding clips on both sides of the RAM slot. After installing the first RAM, do the same thing with the other one and that’s it!
Your machine is now ready to be used with its newly installed hardware. If you’ve been suffering from hangs and freezes before then you shouldn’t be experiencing it now. If you want a step-by-step demonstration of the process. Just click on the “Play” button in the video below.
If you want more of our tutorials, you can get them delivered by us straight to your inbox when you subscribe for our email newsletter. Have you experienced problems when you upgraded your RAM recently? Let us know what happened by joining the discussion in the comments section below.