Introducing Windows 8.1’s Mail App
Emails and email accounts are one of the required credentials when you sign up to a social network or any other website that allows users to join and become members. Managing different email accounts was such a tedious task back back in the days of Windows XP, Vista and Windows 7 since you’ll need to open them in separate Windows (if you have multiple email accounts in one email provider) or in different tabs (if you have email accounts in different email service providers) and this was often disappointing especially when you’re using a slow connection to the Internet.
Everything has changed significantly in Windows 8.1 with the introduction of some built-in modern style apps which are all pinned on the Start Screen. Checking all your emails now is now done with just a few simple clicks but of course, before you can do this, you will need to do some tweaks to setup the “Mail” app and that ‘s what we will be learning in this tutorial so get your Windows 8.1 machine prepared to follow the steps that I will be showing below.
Accessing the Mail App
There are multiple ways in accessing the Mail app just like any other modern style app that is built-in with the Windows 8.1 operating system but we will only learn one easy way for the benefit of the novice users who are trying to use the app for the first time so. First, you will need to click on the Start Button or press the Windows Key in order to open the Start Screen and once you are on it, just click on the Mail tile.
Doing Some Tweaks with the Mail Tile
The Mail tile is one of those tiles which you can do a lot of tweaks with like resizing and turning the live tile feature on or off and to do these tweaks, simply right click on it from the Start Screen and look for the option which corresponds to the tweak that you want to do from the bottom app bar.

To resize the tile, simply click on the option at the bottom left-hand portion that says “Resize” and select from the tile sizes available on a small box that appears. There are four sizes to choose from and they are “Large”, “Wide”, “Medium” and “Small”. From these options, simply click on the one that you want to choose and the tile will automatically take the size you selected.

You can also choose to make the Mail tile display what it contains and doing this tweak is very simple. Just go to the Start Screen again then once you are on it, simply right-click on the Mail tile and look for the option that says “Turn live tile on” from the app bar that appears at the bottom.

Adding an Account
The Mail app does not work the same as your ordinary browser in providing access to your email inbox and the awesome thing about it is that it allows you to link multiple email accounts so you can have a one-stop-app for managing your emails and responding to those urgent ones in just a few clicks and if you want to use the app to the fullest then you’ll need to learn how this is done and that’s what I’m going to show you here.
The Mail app is automatically linked to your Microsoft email if you logged in to your Windows 8.1 machine with a Microsoft account so what’s left to do now is to link another email to the Mail app so that the email syncing process would start. You can do this by getting to the Mail app’s main screen and once you are on it, simply access the Charms bar and click on the Settings charm. After doing so, the Mail app’s setting screen will appear and from here, just click on the menu that says “Accounts”.

Another shorter way in accessing the Mail app’s settings screen is by pressing on the Windows + I keys while you are on the app’s main screen. When the “Accounts” menu opens, all you need to do is click on the “Add an account” link found at the bottom of the linked email accounts list.

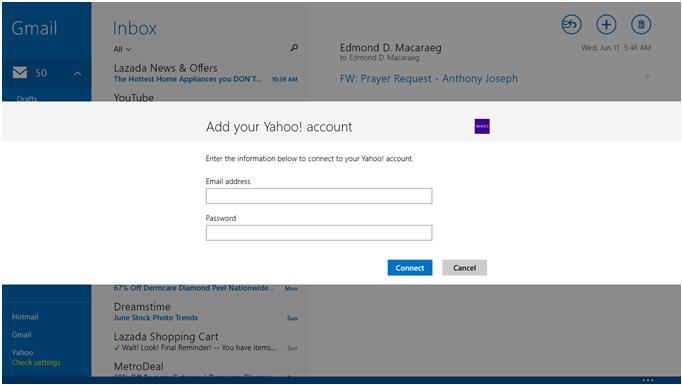
After doing so, you will be taken to the email service provider selection screen. From here, all you need to do is choose the provider that corresponds to the account that you are going to link to the Mail app and once you find it, you will need to click it.

After clicking on the email service provider, there will be two input boxes which will appear where you can enter your email address and its password. Just input these required credentials and after checking them and making sure there are no errors with the email address and the password, it is time to start the syncing process by clicking on the “Connect” button.
Parts of the Main Screen
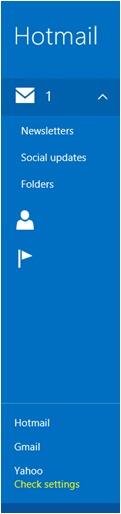
On the Mail app’s main screen, you will find some buttons which does certain tasks and if you want to master this very useful app, you will first need to learn some basic tasks that you can do in it which are exactly what the buttons on the main screen would help you do but first, let’s know the part. At the left of the screen, you will see a narrow pane which bears the available sections and folders in your email account and a list of all linked emails at the bottom.
Next to it going to the right is another pane but this time, its background color is a bit grayish instead of blue and it is also wider. This pane shows all the emails that you have in a certain folder like the inbox which you can simply click or tap to open and lastly beside this pane to the right is the widest one which is where the content of the email will open. All of these three panes combined will look like the screenshot below.
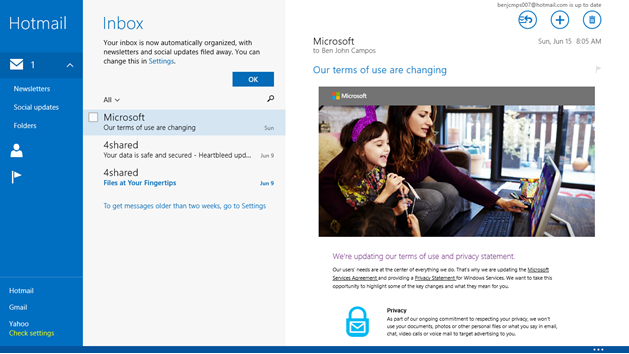
Finally, at the upper-right portion of the screen, you will see three buttons sitting one beside the other. These three buttons are called the “Respond”, “New” and the “Delete” buttons respectively. To use the “Respond” button, all you need to do is open the email that you want to send a response to and once it appears on the screen, simply click or tap on the “Respond” button or press the “Ctrl + R” keyboard shortcut combination. Next, if you want to compose a new email which you want to send to a selected few, you can do so by hitting the “New” button or pressing the “Ctrl + N” keys.

Finally, select a group of messages from the list of emails and hit the “Delete” button. As you can see, the Mail app is easy to manage and tweak but there are still other things that you need to learn about it especially the options that appears on the app bar when you try to right-click an empty space on its main screen so watch out for our next tutorial which will tackle on these things only here on windowstechies.loc!