Introducing the New Start Menu: Tips and Tricks for Changing its Appearance (Part 2)
Previously, we have talked about the methods in launching the new and improved Start Menu in Windows 10 and as well as made you familiar with its new layout. We have also changed the color of this very important feature in the Windows operating system but that’s not everything yet, there are still a lot more tweaks that you can do to the new Start Menu which we reserved for this second part of this tutorial series.
No matter which Windows operating system version were you using before you upgraded to Windows 10, the Start Menu will look exactly the same in all Windows 10 versions after the upgrade so if you already have Windows 10 installed on your computer, let’s now continue discovering some other tricks that can be done to the Start Menu so it would work exactly as you want it to.
Moving Tiles to Different Locations
Now, as we have mentioned in Part 1, you can still move the tiles that are found on the right section of the Start Menu into different positions and arrange them to your choosing. Doing this is just the same as how you moved tiles on the Start Screen in Windows 8 and Windows 8.1 but if you’re not familiar with the process then here’s how:
First, you will need to point on the tile that you want to move to a different location on the right hand portion of the Start Menu and once you are pointing on the specific tile/shortcut, just press and hold the left-click button of your mouse and drag it towards the new position where you want it to be in.
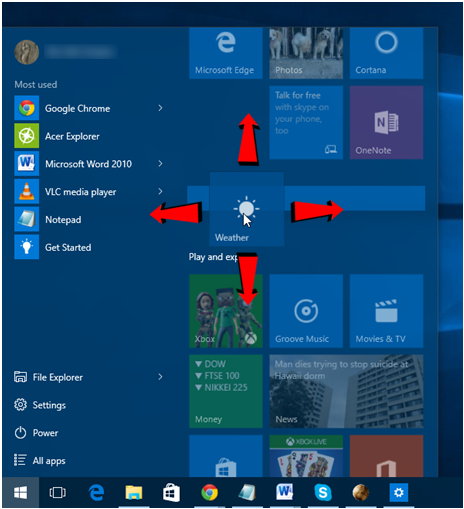
Once you’re on the spot where you want to place the tile or shortcut that you want to move somewhere else, all you need to do is release the left-click button on your mouse and the tile/shortcut will simply drop into its new location of the Start Menu.
Changing the Size of Tiles and Shortcuts
Another tweak that you can do to the tiles and shortcuts that are found on the right portion of the Start Menu is changing its size. This tweak has been available in both Windows 8 and Windows 8.1 but in Windows 10, the available tile/shortcut sizes has increased. To change the size of a certain tile that is found on the Start Menu, all you need to do is first point on it then press the right-click button of your machine’s mouse. After you do so, a right-click menu will appear and from here, simply point on the option that says “Resize”.
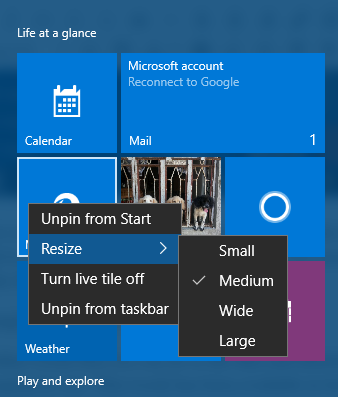
After pointing on the “Resize” option, another box will appear which will now show all the available sizes that you can apply to the tile/shortcut that you want to change the size of. From these available sizes, you should be able to see that the one which is currently enabled has a check mark on it as shown on the screenshot above.
Renaming Each Tile Group
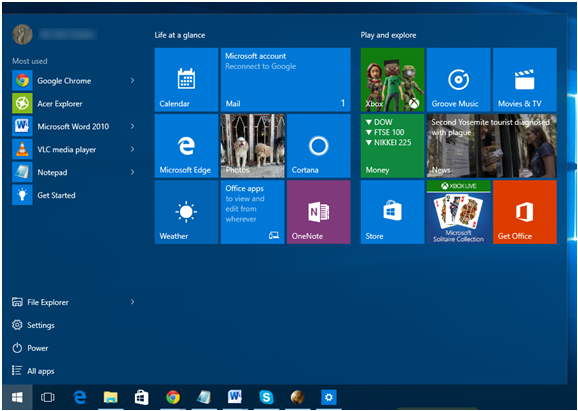
Another tweak that you can do to the items that are found on the right hand portion of the Start Menu is renaming each group of tiles and shortcuts that are found in it. If you look into this portion of the Start Menu, you will see that there are two groups of tiles in it which are labeled as “Life at a glance” and “Play and explore”. To change any of these group names, all you need to do is click on any of them and you will see that it will instantly be enclosed in an input box as shown on the screenshot below.
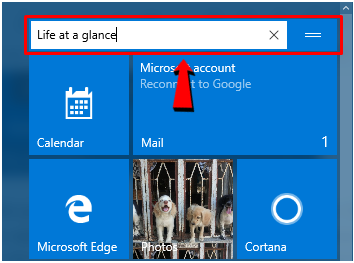
In this input box, you will simply need to delete the group name that is already in it then type in the new name that you want to assign to the group. You can also do this to all of the other tile and shortcut groups that are found at the right hand portion of the Start Menu.
Make the Start Menu Wider
Now, if you feel like the Start Menu is quite narrow and you want to increase its space or make it wider, all you need to do is open the Start Menu first and once you see it on the screen, just point the most to the right edge of it until the pointer turns into an arrow that points to the left and towards the right as shown below.
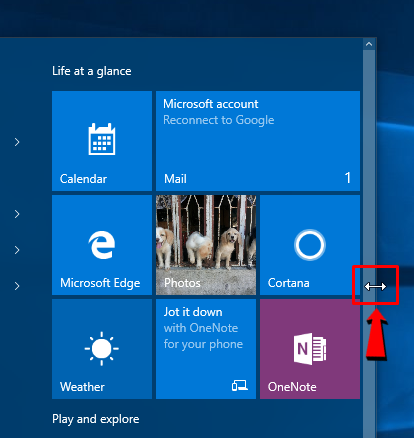
Once the mouse pointer turns into an arrow which looks the same as the one that is highlighted on the screenshot above, you will now need to press and hold on the left-click button of your mouse then drag it towards the right until you see the Start Menu become wider.
As you can see on the screenshot above, the Start Menu now has a wider space and all of the tiles which used to be below the “Life at a glance” group are now transferred to the right portion. If you install new apps and pin new shortcuts to the Start Menu, they will automatically take the space just below the existing tile groups. Making the Start Menu wider is an alternative especially if you don’t like its full screen mode just as how it appeared back in Windows 8 and Windows 8.1.
Activate the Full Screen Start Menu
Now, if you feel like the full screen version of the Start Menu works better especially if you already have a lot of apps that are installed on your computer which tiles seem hard to view on its narrow version, you can choose to turn it into its full screen version. To do this, simply click on the “Settings” link that is found on the bottom-left portion of the Start Menu and after doing so, the modern Settings Window will appear as shown on the screenshot below.
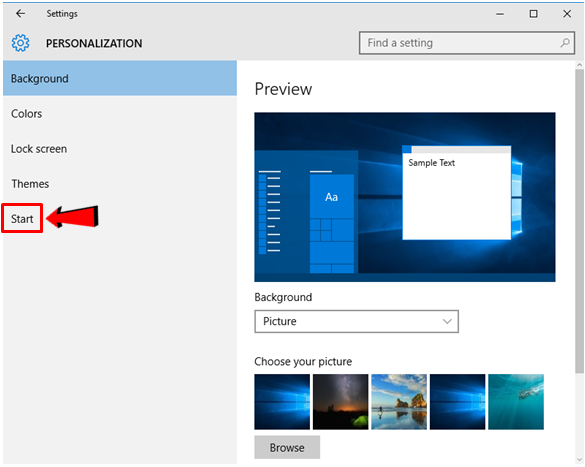
From this modern Settings Window, simply click on the link that says “Start” which is found on the navigation pane at the left and after doing so, you will be taken to the section where you can find some tweaks that you can do to the Start Menu.
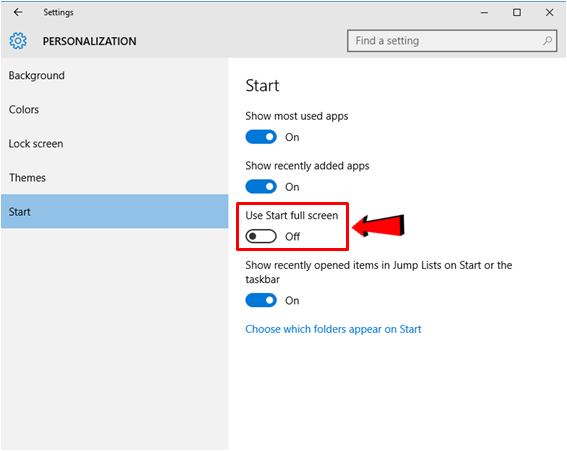
After flicking the “Use Start full screen” switch to the “On” position, you can now press on the Windows key or click on the Start Button and the Start Menu should now turn into its full screen mode as you can see on the screenshot below.

Customizing the Folders that Appear on the Start Menu
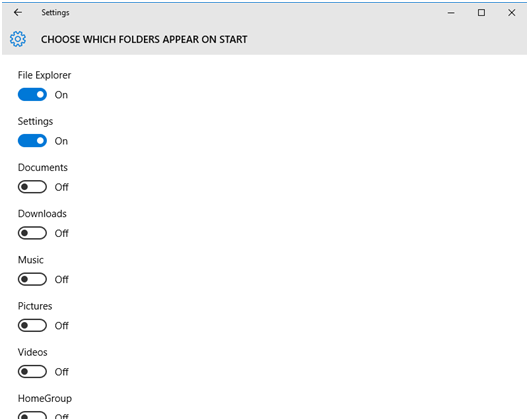
Now, still on the Start section of the Personalization category in the modern Settings Window that we have opened earlier, you can see a link at the bottom of all the options/switches that are displayed on the screen which says “Choose which folders appear on Start”.
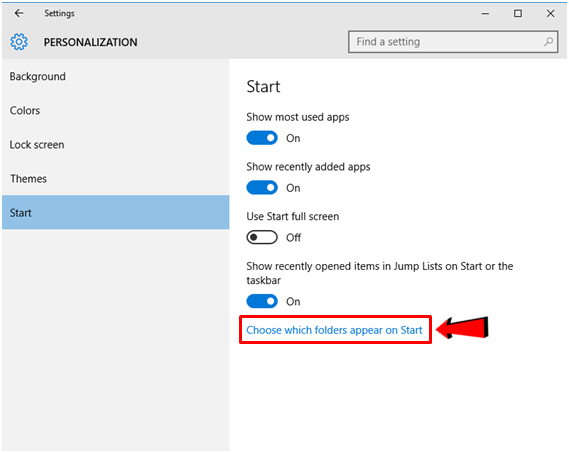
When you click on it, you will be able to access a list of folders with corresponding switches on the right of each one of them as shown below. There are currently only two folders that appear at the bottom-left portion of the Start Menu which are the “File Explorer” and “Settings” folder but if you want to turn on some others, simply click on their corresponding switches and the folder will display right away at the bottom-left portion of the Start Menu together with the File Explorer and Settings folder which are turned on by default.
A Better Start Menu for the Best Windows Yet
As you can see, the version of the Start Menu which is found in Windows 10 has really been made a lot better than the Start Screen in Windows 8 and Windows 8.1. It is now a very good epitome of what the combined Desktop and Mobile world is all about. Are you having problems with the Start Menu that is found in your newly upgraded Windows 10 computer? We would like to hear from you, please let us know through the comments section below and we’ll do our best to help you solve any problem that you’re experiencing on your computer.