Making Some Tweaks on the Desktop Environment
Windows 8 is a combined world of PCs and Tablets which is why you’ll find a metro environment (the one represented by the Start Screen and the Charms) and as well as the traditional Desktop environment which we all have grown very familiar with. Both of these environments are designed to look plain and dull especially on machines which are freshly taken out of the box but as you have seen on our previous tutorial, there are some tweaks that can be done on the Metro environment to make it look better.
Just like the metro environment, Windows 8’s Desktop together with its visual aspects and user interface can also be tweaked. Advanced users of the previous Windows versions are surely familiar with these tweaks and configurations but if you are an average who knows barely enough about changing some aspects of the Desktop screen then this tutorial will surely be a handy guide.
How to Access the Desktop
After turning Windows 8 on and getting through the Lock Screen, you will be welcomed by the Start Screen instead of the Desktop as previous Windows versions normally do. New users get confused on this matter which is why we can find a host of negative reactions about Windows 8 over the Internet but the only problem here is that people don’t actually know how to access the Desktop. As you can see below, the Desktop tile is located at the bottom-left portion of the Start Screen. Clicking or tapping on it will take you to the Desktop Screen.

Personalize Your Themes
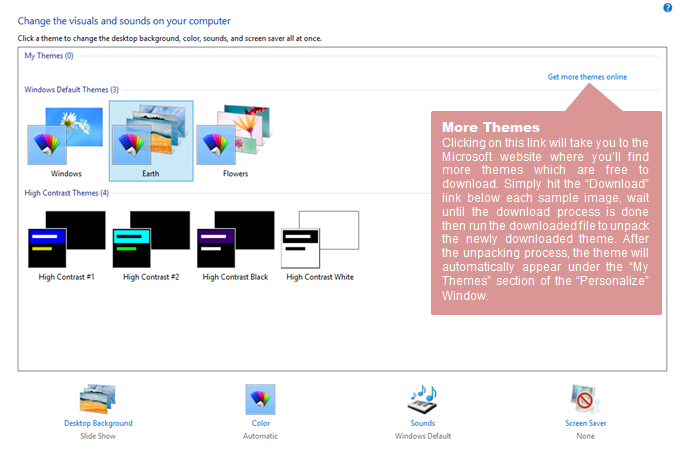
Windows 8 is equipped with built in themes but Microsoft offers even more themes available as a free download on their website. To access the section where the themes are located, simply right click an empty space on the desktop then on the contextual menu that appears, hit “Properties”.

Get More Themes Online
On the upper-right portion of the Personalize Window, there’s a link that says “Get more themes online”. Clicking on this link will open a new Window that would take you to the Microsoft website directly on the section which shows all themes that are available for as a free download.
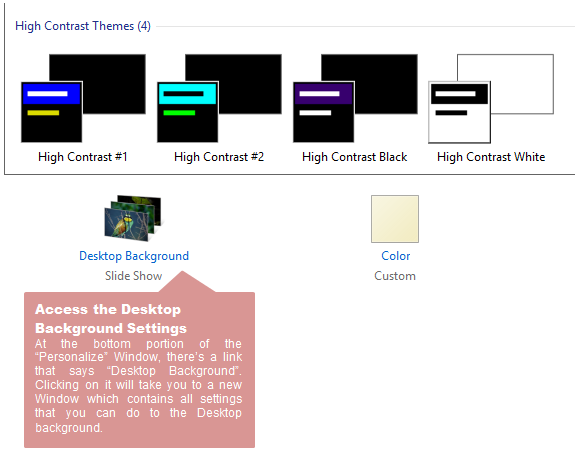
Making Adjustments on the Desktop Background
After changing the theme into the one you’ve chosen from the “Personalize” Window or the one you’ve downloaded from the Microsoft website, it is time to learn how you can customize the image used and tweak how often the Desktop background changes. To do this, you would need to click on the “Desktop Background” link found at the bottom section of the “Personalize” Window.
Next, after landing on the “Desktop Background” settings Window, you’ll see several sections where you can do some tweaks to better improve the appearance of your computer’s desktop screen.
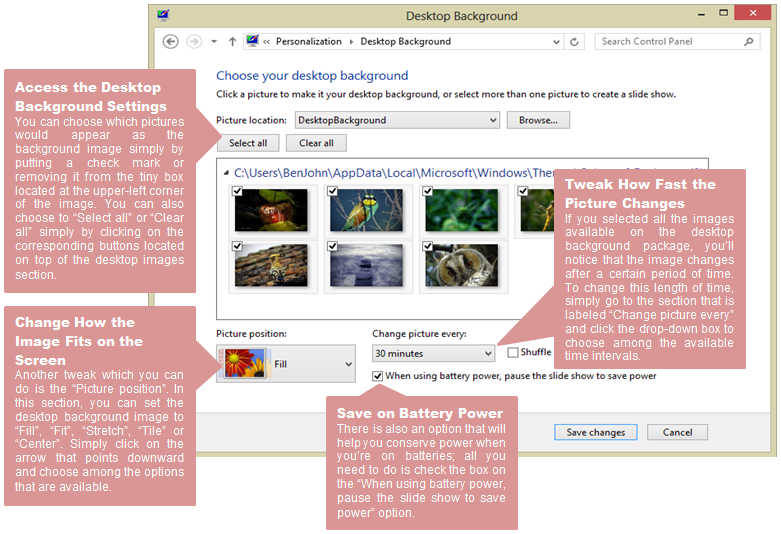
Be sure to click on the “Save changes” button after doing tweaks on the desktop background settings to make the changes take effect.
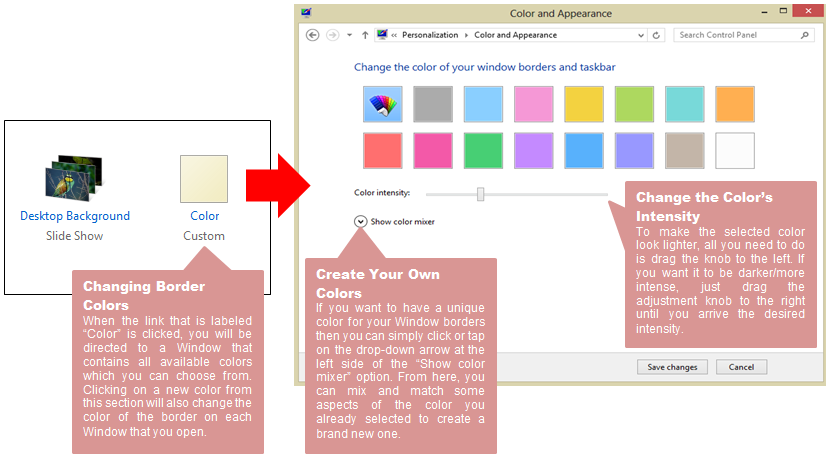
Changing the Window Border Color
Just beside the “Desktop Background” link at the bottom section of the “Personalize” Window is another tab/link labeled “Color”. Clicking on it will take you to a Window labeled “Color and Appearance” which contains 15 colors.
Change Display Sizes
On the navigation pane located at the left portion of the “Personalize” Window, you’ll find a “Display” link near the bottom. clicking on it will open the Window where you can make other changes and tweaks in the size of texts or all of the items that appears on the screen.
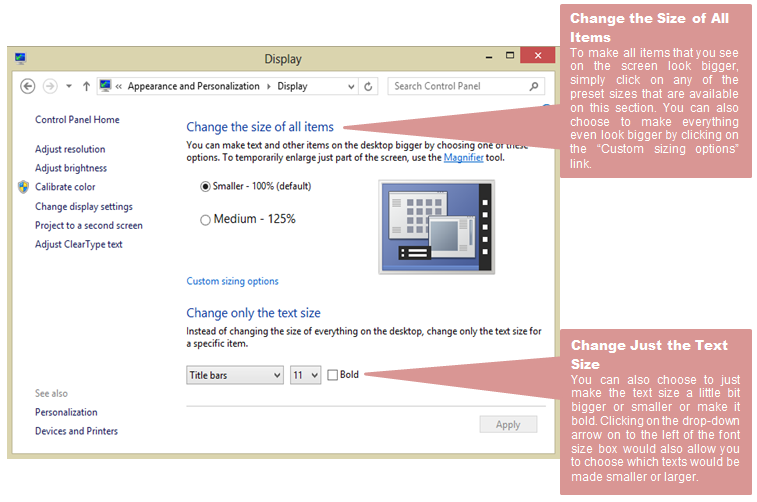
After making all the desired changes on this section, simply click the “Apply” button at the bottom-right portion of the Window to make all changes final.
Other Tweaks on Display Settings
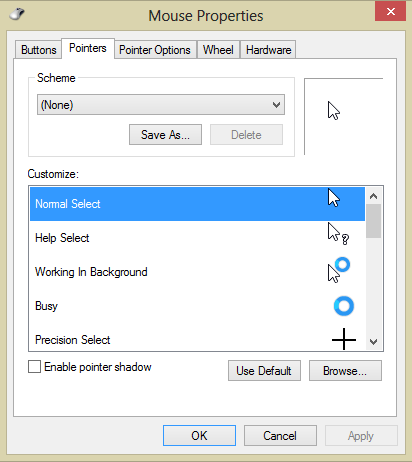
On the navigation pane located at the left portion of the “Personalize” Window, you’ll also find some other tweaks represented by the “Change mouse pointers” and the “Change desktop icons” link. Tweaks like changing the mouse pointers, assigning mouse buttons and the scroll wheel to do different tasks can be done.
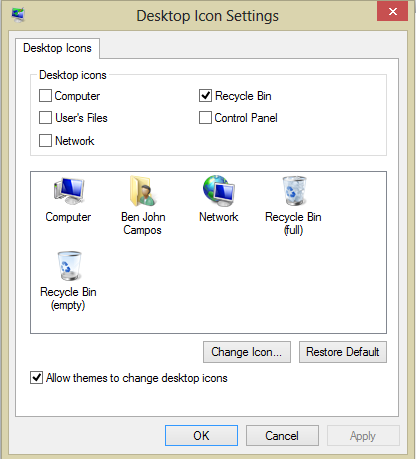
On the other hand, changes on the desktop icons and further improvements on how everything appears are also possible when the “Change desktop icons” link is clicked. Just change everything according to your choosing then click the “Apply” then “OK” buttons to make the changes take effect.
Create an Awesome Looking Windows 8 Machine
We’ve gone through all the basic things that you need to learn in customizing the metro environment and dug a little bit deeper into the settings and tweaks that can possible be done on the desktop screen but we’re just starting the journey to a whole new world of tablet and PC combined. Stay connected with us to learn more tips and tricks for Windows 8 and be aware of the latest news regarding Microsoft’s latest operating system.