Move, Group and Tweak Tiles and Shortcuts in Windows 10’s Start Menu
We all want the tiles and shortcuts that appear on Windows 10’s Start Menu to be organized and arranged well in order to make searching for certain items a lot easier. While most of us are already familiar with what shortcuts are, there might still be others who are not familiar with its modern counterpart which are called “Tiles”.
Shortcuts have been around for a very long time and were mostly found on the Desktop or pinned on other locations such as the Taskbar or even on the Start Menu but in Windows 8, Windows 8.1 and even in the new Windows 10 operating systems, there are some other items found in it which were made available after the modern Metro environment was combined with the traditional Desktop platform.
What are Tiles?
As I have mentioned earlier, Tiles are the modern counterpart of the shortcut icons that are found in older Windows editions such as XP, Vista and Windows 7. Unlike the traditional shortcuts, Tiles are only found on the Start Screen in Windows 8 and Windows 8.1 and on the Start Menu in Windows 10. If shortcuts represent Desktop programs, Tiles represent all the modern apps that you install into your Windows machine from the Windows Store and even the modern app tools that are pre-loaded. The screenshot below shows Tiles that are found in Windows 10’s Start Menu.
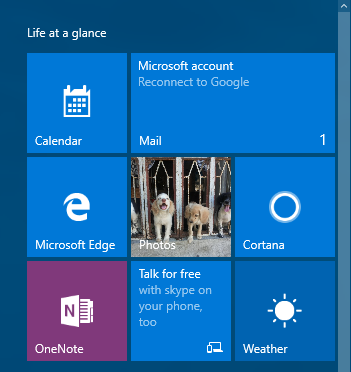
There are tiles that only show the logo of the modern app that it represents and there are others that show live information and images of its contents. The latter are called “Live Tiles”. In Windows 8.1, there are only selected tiles that can be turned on to show live feed of its contents but in Windows 10, all tiles that represent pre-installed modern apps can be turned on in order to show live content feed. A Live Tile looks like the one shown below.

How to Turn On Live Tile Feature
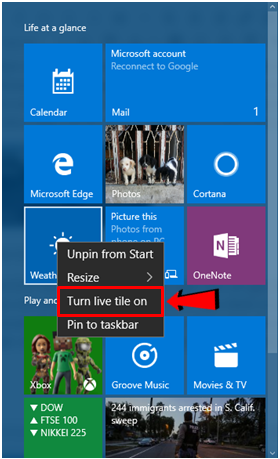
The Live Tile feature for all of the apps that are pre-loaded in Windows 10 is turned on or enabled by default but in case you have installed a new modern app which you want to turn the Live Tile feature for then what you need to do is locate its tile on the right-hand portion of the Start Menu and once you find it, simply right-click on it and on the right-click menu that appears, simply click on “Turn live tile on” as highlighted on the screenshot below.
In case the tile for the newly installed app doesn’t appear at the right-hand portion of the Start Menu, you will need to put your attention into the left-hand side and you should be able to see the the newly installed modern app under the “Recently added” list. From here, you can simply right-click on the shortcut then hit the “Pin to Start” option from the menu that would appear.
All apps that you install from the Windows Store automatically has the Live Tile feature turned on once you pin their shortcut/tile into the right hand portion of the Start Menu.
Moving Tiles Within the Right-Hand Portion of the Start Menu
Now, if you have already installed plenty of modern apps from the Windows Store and you want to group or move them to certain sections for easier access, all you need to do is look for the app tile that you want to move first then once you find it, simply place the mouse pointer on its top portion, click and hold it then drag it towards the location where you want to place it.
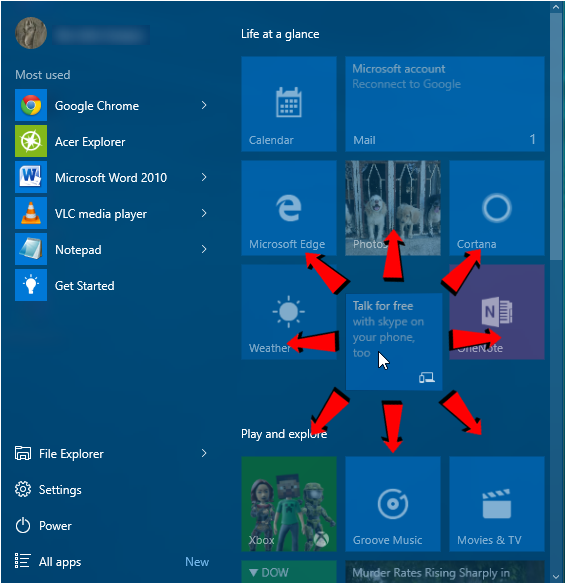
Once the tile is already on the location where you want to move it into, all you need to do is drop it by releasing the left-click button and the tile will now be on its new location. Just do this same thing with all the other tiles that you want to move and group together.
Renaming a Group of Tiles
When you first open the new Start Menu in Windows 10, you will immediately notice two groups of tiles on its right-hand portion which are labeled “Life at a glance” and “Play and explore”. These are the labels that are set for the first two groups of tiles which represent the built-in modern apps in this new Windows OS. However, both of these labels are not permanent, this means that you can still change them anytime you wish to do so. Doing this is very simple, just click on the group label and it will automatically be enclosed in an input box as shown on the screenshot below.
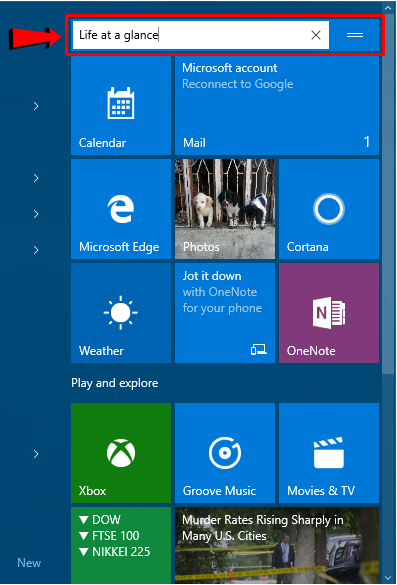
Once the default label is enclosed in a box, simply press the “CTRL + A” keys then hit the “Backspace” key in order to delete everything inside the input box then start typing in the new name that you want to assign to the group. You can also do this to the “Play and explore” app group and as well as to all of the other groups that appear on the right portion of the new and improved Start Menu.
Resizing the Start Menu
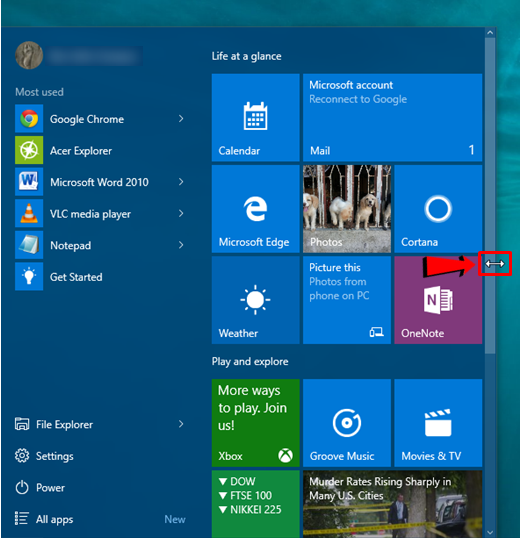
The Start Menu in Windows 10 is better than its full screen counterpart in Windows 8 and Windows 8.1. It is now set to open and take just a portion of the screen instead of taking the whole screen which is a welcome change especially to the users who are quite confused with the Start Screen but in case you don’t want to be scrolling that much just to find a modern app, you can make the Start Menu wider to give more space for tiles and lessen the scrolling on your part. To accomplish this, all you need to do is point on the right-edge of the Start Menu and once the mouse pointer changes into a right and left-pointing arrow as shown below, you will need to click-and-hold the left-click button then drag this edge towards the right.
Once the Start Menu is adjusted to a wider size, you will simply need to release the left-click button and it should now look like the one shown on the screenshot below. If you already have plenty of tiles on the right-hand portion, everything should now move and take the new space that was created after you adjusted the size of the Start Menu.
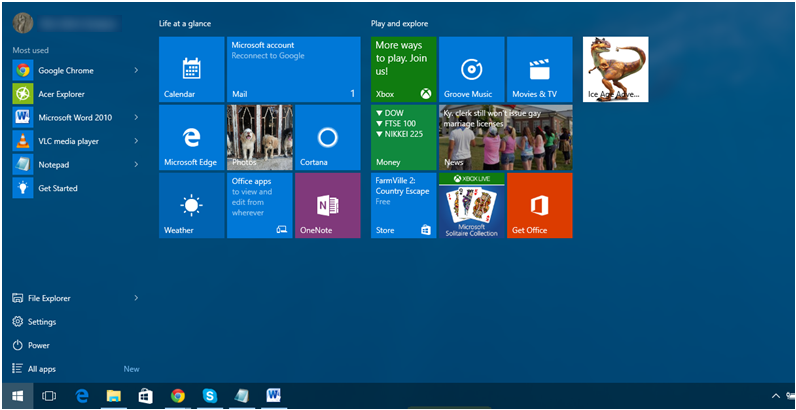
As you can see, making the Start Menu become wider has made room for the tiles that were arranged in a narrow space and needed some scrolling to be beside each other in a wider space and in the test computer that we used for this tutorial, you will see on the screenshot above that expanding the Start Menu completely eliminated the need for scrolling down on the right-hand portion of the Start Menu just to find a certain app.
Master Windows 10 Here in WindowsTechies!
While most of the features that are found in previous Windows editions were carried over to Windows 10, there are still some new innovations and changes in this latest Windows version that you might not be aware of. We will be talking about them in our future tutorials so be sure to catch them hot and fresh only here in WindowsTechies.com!