The New File Explorer
Any operating system will not work in its supposed task without a very important tool which does the work of helping users locate, edit and do some other tweaks to the files that are saved on the hard drive and in other drives connected to the computer itself. Back in the days of Windows XP, Vista and Windows 7, there existed this type of tool and it was named “Windows Explorer” since it does the job of helping users explore the entire Windows system with the use of systematically arranged files and folders properly grouped into main categories with some tools available in tabs and buttons on top of the Windows Explorer Window and as well as in right-click menus. This tool worked efficiently and was an effective tool in managing drives and the files stored in them coming from all over the Windows operating system but in Windows 8, it received a new name and had some improvements and make-overs.
Yes! The tool is not anymore called “Windows Explorer” but the new “File Explorer” and a big part of the options that once stayed in the right-click menu are now on the top portion of the Window called the “Ribbon”. Are you somewhat intrigued of the facts that you have just read? Just read on to learn even more of what the new “File Explorer” has to offer!
Why File Explorer?
Perhaps the question that currently plays inside your mind is why would it be renamed as “File Explorer”? The name “Windows Explorer” already sounds perfect so why change something that most people already got used to? Only Microsoft knows the real answer and all we can do is speculate. If you really look into the Windows 8.1 operating system platform, you’ll notice that the search feature has really been improved to work almost anywhere within the operating system. It works in the desktop and as well as in the Metro environment in searching for links leading system locations and even file shortcuts.
This might be the reason why Windows Explorer was changed to File Explorer. Since the presence of the improved search feature makes it a lot easier to explore the entirety of the system which includes the desktop and the Metro environment. Windows Explorer is now left to be used for files stored in different drives and partitions in the desktop scene since it only works in the desktop environment alone and not anywhere else hence, it was given the name File Explorer.
What’s new in File Explorer?
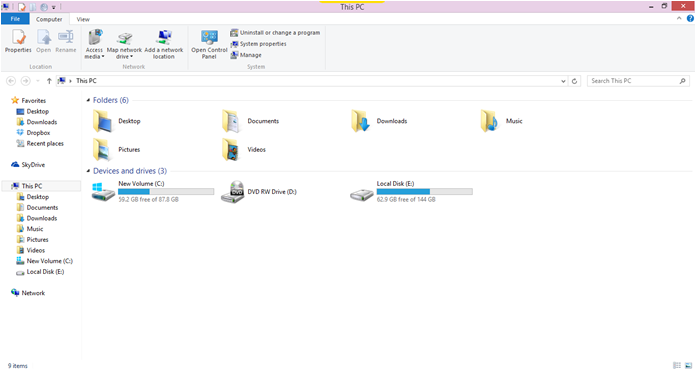
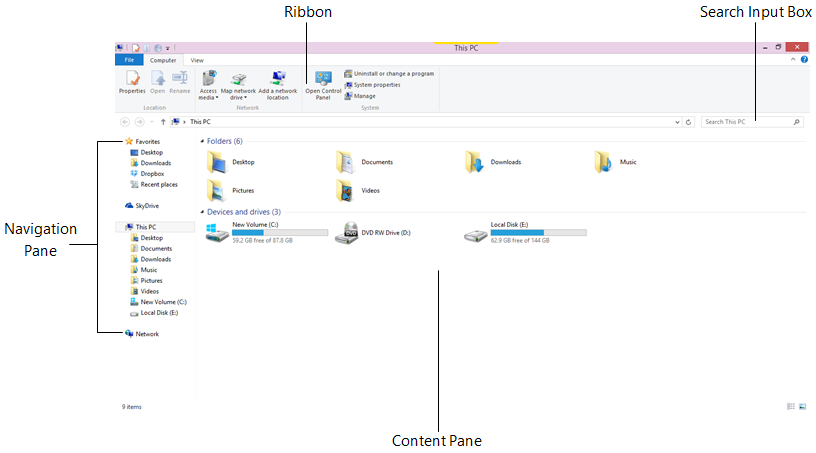
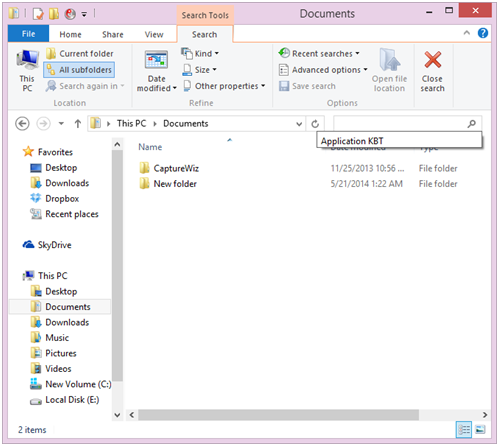
First of all, you’ll need to remember that the File Explorer tool only works on the desktop environment. If you’ve been working with some older Windows editions, the File Explorer Window should look familiar to you. To introduce you to some of the improvements and as well as get you acquainted with the new features added to it, just check the screenshot below.
File Explorer, just like the Windows Explorer tool in previous Windows versions gives you access to all the drives of your machine which includes the hard drive, DVD drive and even external USB drives and other portable storage drives. It helps you explore the files that are stored in these drives and makes it a lot easier for you to manage them further by creating new folders and renaming other files. File Explorer also allows you to group files according to certain sorting rules and delete the ones which are not used anymore. Here’s a quick guide which you can follow in using File Explorer.
1. Creating a New Folder
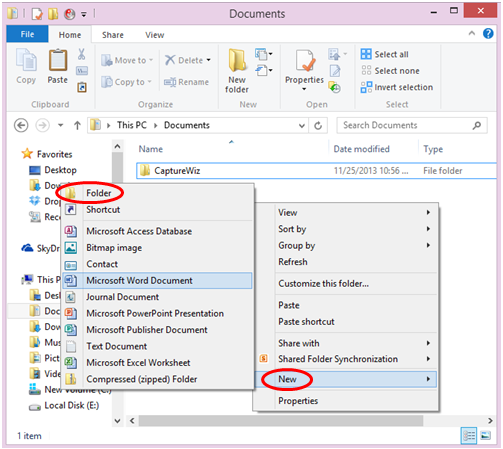
To create a new folder, you first need to go to the location where you want to create it. Once you’re in that location, all you need to do is check on the ribbon located at the top of the File Explorer Window and click on the option that is labeled “New Folder”.

Of course, the old way of creating a new folder is still available, just right-click on an empty space inside the “Content Pane” then select “New” then “Folder” from the right-click menu that appears.
2. Renaming a File
Renaming a file is now made simple. File Explorer and the new ribbon-based options in it is designed to help lessen the use of the right-click menu which is somewhat time consuming. To change the name of a certain file, simply select it then click the “Rename” option from the ribbon located on top of the Window.
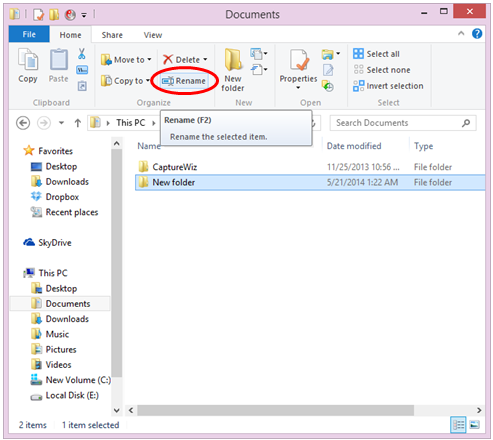
Of course, the traditional method of renaming a file which is done by accessing the right-click menu and clicking on “Rename” still works. Most of the options found in the right-click menu such as “Copy”, “Paste”, “Delete” and many others are now made available in the new ribbon-based options located on top of the File Explorer Window making it more comfortable to use but the old way of doing these actions which is through the right-click menu is still available.
3. Doing a Quick Search
The search feature represented by the search box in the File Explorer Window is also made even better and works harmoniously with the ribbon feature. To test this, simply open a folder in any location on your computer and click inside the search input box. After you do so, you’ll notice that the options in the ribbon will move into the “Search” tab and will display all available options to refine your search.
4. Explore the View Tab
Now, spare a little more time and click on the “View” tab. After doing so, you will again notice that a new set of options are now available which are all related to the look and appearance of the icons and images on the “Content Pane”. Take time to experiment on these options and feel free to use the option that best fits your eyes.

5. Get Acquainted with the Share Tab
To the left of the “View” tab is another one that is labeled “Share”. Again, when you click on it, you will be able to access a new set of options that are all geared towards helping you share files that are on the “Content Pane”. For instance, you will see an option for sending it as an email, turn it into a Zip file, burn it to a disc, print, fax or share it to certain people on your network. You can also access some settings for the security of some important files on this section.

File Exploring at its Best!
As you can see, the File Explorer tool doesn’t only look better but also feels and works better in many ways compared to Windows Explorer. Microsoft’s initiative of putting some important options to the ribbon also boosts productivity many times over. Are you still having problems in using the File Explorer tool? We’d like to hear from you. Just post any concern on the comments section provided at the end of this tutorial and we’ll do our best to help you solve them.