Organizing Your Photographs
Most of us really take a camera wherever we go. Whether its an 8 megapixel digital camera or an advanced SLR equipped with great features, it is always an advantage if we have something to snap photos with anytime. People really record their lives one picture at a time and these pictures that we collect will soon accumulate into a bunch of files stored in your computer which may become hard to manage.
To help managing photos a lot easier, you can use the built-in “Photos” app which will help you take designs within the Mobile UI and applies it to all of your photos which you can later on post and upload on your social media accounts. Flicking through your photos from side to side is also made easier with Windows 8’s touch-friendly interface. If you want to learn more of this app in your Windows 8 machine then keep reading on and you’ll surely be pleased with what you’ll find out.
Selecting Photos
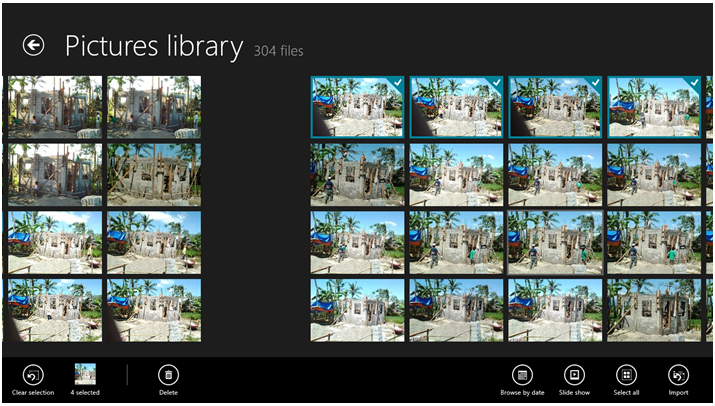
When you select photos within the “Photos” app, there will be a bar at the bottom that will tell you how many photos have already been selected. Choosing photos is done simply by right-clicking on them. Once each one of them gets selected, you can either import, copy or delete them altogether simply by clicking or tapping on the corresponding option found at the bottom.
Finding the Photos App
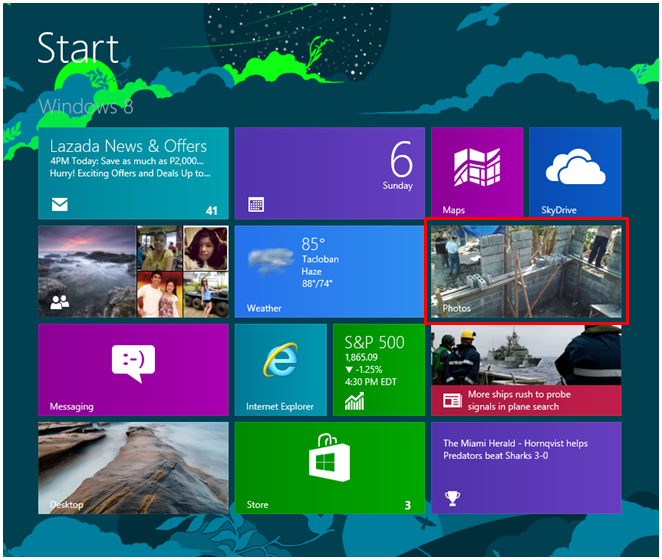
The very first step that you need to learn is accessing the “Photos” app on your Windows 8 machine. If you are new to Windows 8, you should be aware that the system is a combination of the PC and the Tablet environment and that mobile apps are all accessed through the “Start Screen”. To access the Start Screen, simply press the Windows key then start looking for a “Tile” labeled “Photos”. Once you find it, all you need to do is click or tap on it and the “Photos” will right away open in full screen. You can also move the tile to wherever you want it to be so you can easily access it together with your other favorite apps. The “Photos” app also looks a bit bare if your computer doesn’t have photos saved in it yet but if it already does, you’ll notice that one of the photos will display on the “Photos” app tile on the Start Screen as you can see in the screenshot below.
Using the Photos App for the First Time
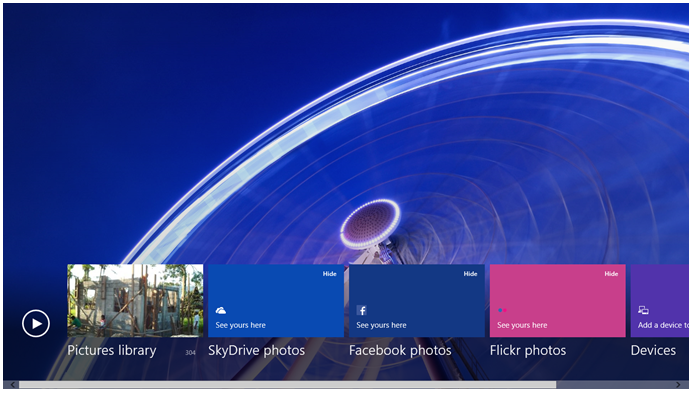
If you don’t have pictures on your computer yet then you’ll be able to see a tile that has a nice looking wheel at the background. To prove that the Photos app works perfectly, you can take a screenshot by pressing the “Windows + Printscreen” key together simultaneously or if you are using a touchscreen device, you can simply press the Windows button then press the volume key to take a screenshot with it.

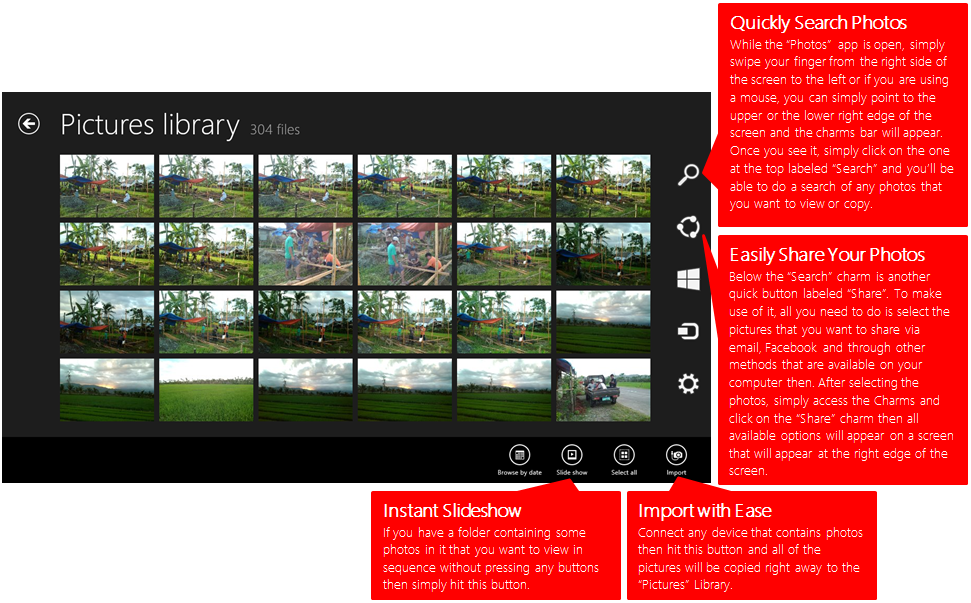
Quick Buttons to Take Note Of
When you’re working with your photos, you can do some things quickly using different buttons that can be accessed by doing some simple gestures while the “Photos” app is open. The screenshot below explains how these buttons are accessed and what they can be used for.
Connecting to a Service
If you want to link services like Facebook, Flickr and other accounts to the “Photos” app, all you need to do is select the link at the bottom of the screen that corresponds to the account that you want to get linked with then click or tap on the “Connect” button and log in with your usual details.
Zooming in and Zooming Out
By default, your photos will open as small tiles sitting beside each other in a grid format. To get an even better view on each one, simply click on the specific picture that you want to view better then once it gets bigger, you’ll need to click on it again to really view it in full screen. Once it opens, simply hover your mouse and move it towards the bottom right corner of the screen then you’ll see a “- +” button which you can click to Zoom in (+) or Zoom out (-). The “Photos” app has a powerful zoom feature which lets you view your photos in greater detail.

Perform Slideshow with One Click
While viewing an album, simply swipe from the bottom of the screen upwards or right-click on any part of the “Photos” app screen and a bar will appear at the bottom bearing some buttons that will allow you to perform such actions. From these buttons, simply look for the one labeled “Slideshow” and your photos will open in full screen and will just display one after another without requiring you to press any button.
Take Advantage of SkyDrive/OneDrive
All the images that you put into your SkyDrive folder will appear and can be viewed on the “Photos” app. No matter what type of device you are using. You can create a viewable web gallery of pictures . This is a perfect way of showing your friends some snapshots that you took without stuffing their inboxes with huge photos.
Take Control of Your Pictures
Windows 8’s photos app will really take photos management to the next level without the complicated processes that can confuse new users. Sharing and securing your life’s snapshots can also be done easily in just a few clicks. Are you still using an older Windows version? You are missing a lot then, upgrade to Windows 8 now and get the most out of your device in many ways. Do you have questions about your Windows machine? We’re here to help you, just post your concern on the comments section below and we’ll do our best to get it solved.