Restoring You Windows 10 Machine to a Working State with System Restore
Problems are common in almost all Windows computer. No matter what version of the operating system your machine runs, there will always be unfortunate instances where it would just crash and become unusable due to certain errors caused by malware and other forms of viruses that can hinder it from working properly.
What do you normally do when this happens? Do you panic right away and go for the most common solution which is a clean install or a machine reformat as they call it in older Windows operating system versions? Or if you are using Windows 10, do you just go for a computer reset which would either delete your third-party apps and programs and preserve your personal files or delete everything if you choose the other option for doing a complete factory reset.
If you’ve been doing these painful solutions in all instances where your computer suddenly crashed then you definitely have not heard about a built-in Windows tool called System Restore. This feature has been around for a long time now but only few really care to use it and those who did saw a great difference and were saved from the pains of losing their personal files and the hassle of installing third party programs again.
In this tutorial, we will be showing you how to access this tool in your Windows 10 machine and as well as demonstrate how you can use it in three simple steps so be sure to get your Windows computer fired up and follow the steps that are going to be shown below.
What Does System Restore Do?
Before you can take advantage of the System Restore tool, you will first need to make sure that you created a restore point at a time when your computer works good. This restore point is then going to be the used when your machine gets into trouble and refuses to work as it is supposed to. So it basically restores your computer to a previous working state and all of the changes that were made to your computer after the time you created the restore point will be gone.
This includes programs or applications that you have installed and even some changes that you did to your Windows machine. The good thing about System Restore is it does not affect your personal files and folders so if you created some files and saved them into certain folders then you can still access them after you revert your computer to a previous working state. Even your browsing history, emails and your latest password/s will not be touched so the only thing that you need to be concerned of is installing the software that will be affected after the restore process.
If you want to learn more about this tool and how you can access and use it in your Windows 10 machine, please feel free to refer this previous tutorial which outlines the complete steps in creating a restore point and making sure that Windows saves an image of your machine’s working state automatically.
How to Access System Restore in Windows 10
Now that you know what the System Restore tool really is, it is time to learn how you can access to tool in your Windows 10 machine. We’ve shown some available methods in doing this on one of our previous tutorials but to help you save time, we’ll show two of the easiest methods here.
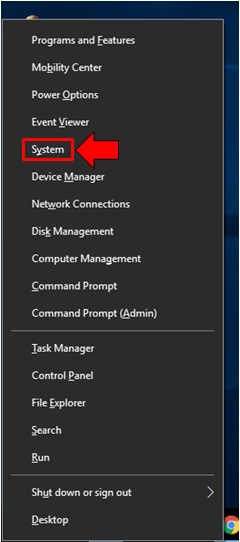
First, you can access System Restore from the System Window of the Control Panel. To launch this Window quickly on your Windows 10 machine, all you need to do is launch the WinX menu by pressing the Windows + X keys and after doing so, the menu should appear at the bottom-left portion of your computer screen. From here, simply click on the link that says “System” as shown on the screenshot below.
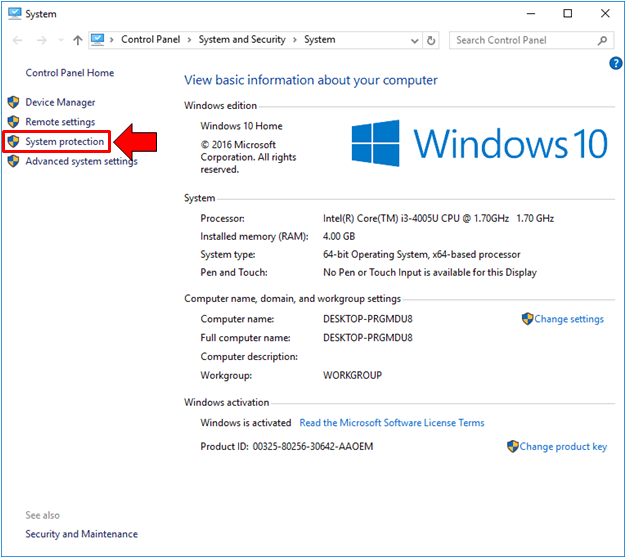
After clicking on the “System” link, you should be able to launch the System Window section of the Control Panel and from here, all you need to do is to pay attention on the links that are found on the left, look for the one that says “System protection” and once you find it, simply click on it in as you can see on the screenshot below.
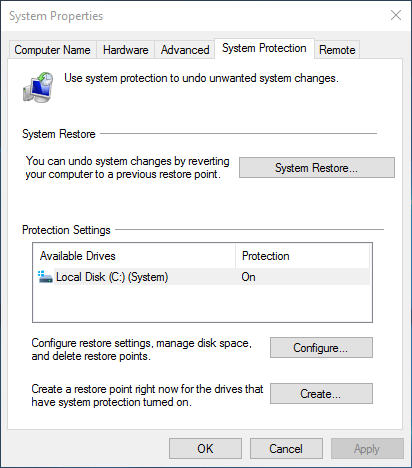
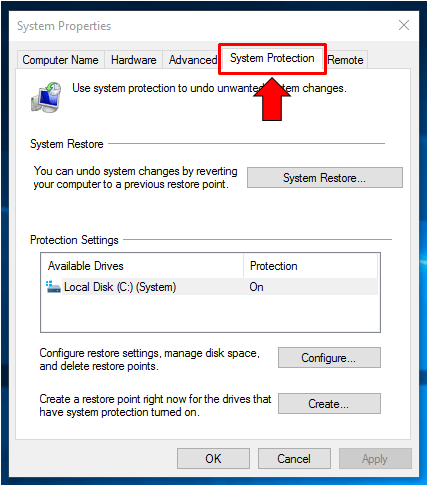
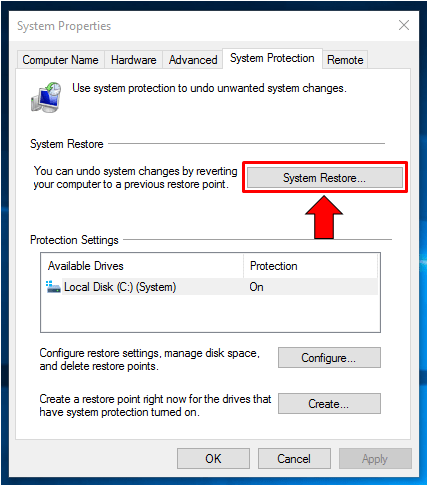
A small Window which is labeled “System Properties” will then open right after you click on the “System protection” link and it will automatically show the contents of the “System Protection” tab as you can see on the screenshot below.
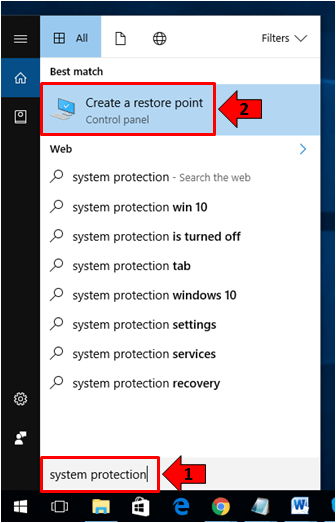
Another method that you can use which is quite quicker than the previous one that we’ve shown above is done using the Search feature. To launch Search on your Windows 10 machine, all you need to do is press the Windows + S keys and Search should slide-up from the bottom-left portion of your computer screen. Once the Search feature launches, all you need to do is type the words “system protection” into the Search input box that is found at the bottom and after you do so, the search results should appear just above the input box where you will need to click on the shortcut that says “Create a restore point” as you can see being highlighted below.
Right after clicking on the “Create a restore point” shortcut that appeared as one of the search results, you should be able to open the same small Window that is labeled “System Properties” as we have shown above and it should show the contents of the “System Protection”. These are two of the simplest methods in launching the System Restore tool and now that you have it opened on your computer screen, let’s start learning how to use it in reverting your troublesome computer into a previous working state.
How to Use the System Restore Tool
Let’s assume that you already have a restore point which you have created in the past when your computer was working good. To be able to revert your machine to this previous working state, you will first need to learn the steps in how you can use the System Restore tool and in order to make things easy for you, we broke down the whole process in using System Restore to three parts. So now that you have the System Protection section opened on your computer screen, the rest of the steps are shown below.
Step 1: Start the System Restore Wizard
The System Protection section of the small System Properties Window isn’t the System Restore tool yet. It is just the place where you can configure the Settings for the System Restore feature on your Windows 10 machine. In order to launch the System Restore wizard on your computer screen, all you need to do is click on the button that is labeled “System Restore…” as you can see on the screenshot below.
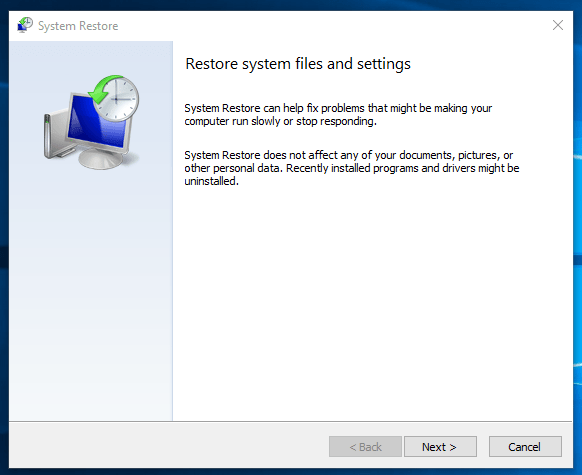
The System Restore Wizard should then launch after you click on the “System Restore…” button and from here, you will simply need to click on the button that is found on the bottom-right portion which says “Next >”.
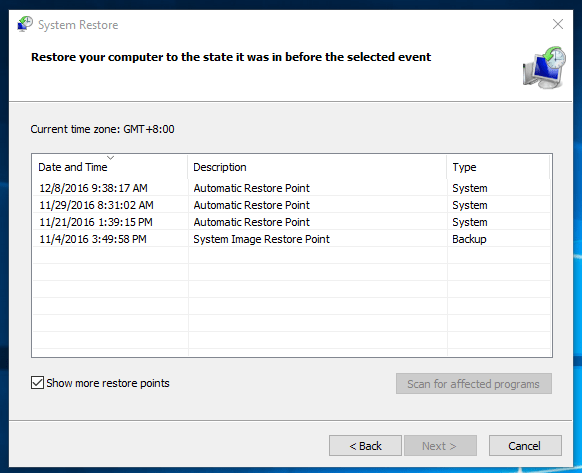
After clicking on the “Next” button, you will now need to proceed to the next step which is selecting the Restore Point that you want to revert your machine into. Our test computer is set to save Restore Points automatically and we recommend that you do this same thing as well on your Windows 10 machine.
Step 2: Choose Your Desired Restore Point
Now, the next step is choosing the restore point that you want to revert your computer into. One rule of thumb is to remember when a certain problem started occurring on your computer because there might be a Restore Point that has been created on this same time so you will need to choose one that has been saved earlier by the System Restore tool.
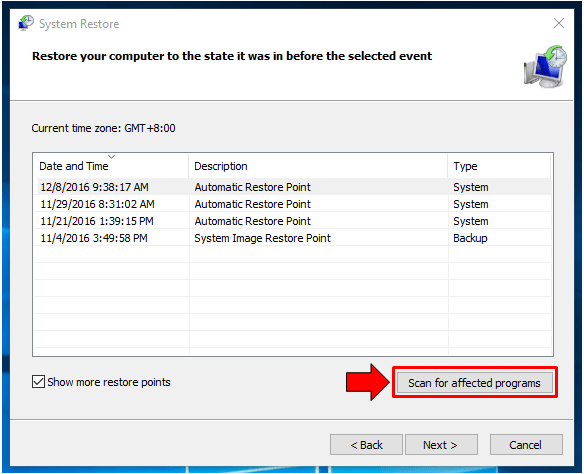
If you want to see all Restore Points and even system images (if any) that you created manually in the past or those that were automatically created by the System Restore tool, all you need to do is click on the “Show more restore points” option that is found on the left portion of the Window.
NOTE:
Before proceeding with the System Restore process, you can choose to check which programs are going to be removed after you do system restore. This will help you to see which programs need to be installed again after your computer is reverted to a previously working state so you can continue with your usual tasks that you do on your Windows 10 machine. To scan for affected programs, all you need to do is first select the Restore Point that you want to revert your computer into and after doing so, simply click on the button that is found at the right hand portion which says “Scan for affected programs” as shown on the screenshot below.
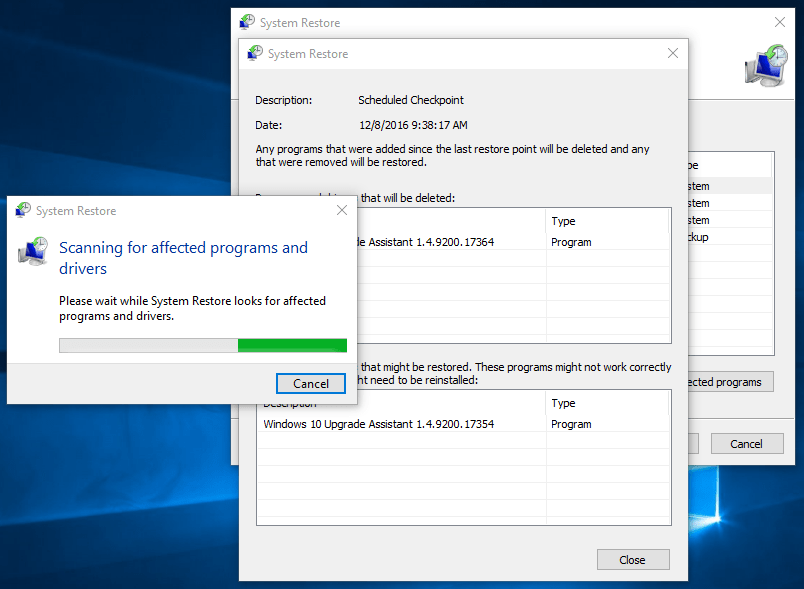
After clicking on the button, the System Restore tool will now scan for programs that will be affected after your system is restored to a previous working state as you can see on the screenshot below. Just wait until the wizard is done scanning for programs and once it is finished, you should be able to see a list of these programs that will be removed and you will need to reinstall right after the process is one!
Step 3: Perform the System Restore Process
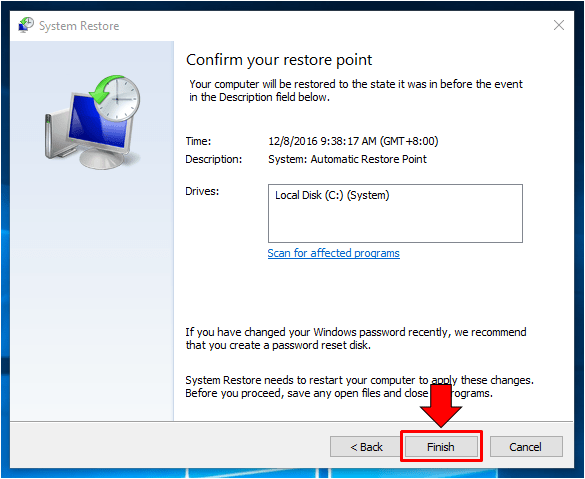
Finally, after choosing the Restore Point that you want to revert your computer into and keeping a list of programs that will be affected so you can reinstall them after the process is finished, all you need to do is click on the “Finish” button that is found at the bottom-right portion of the System Restore wizard as shown below.
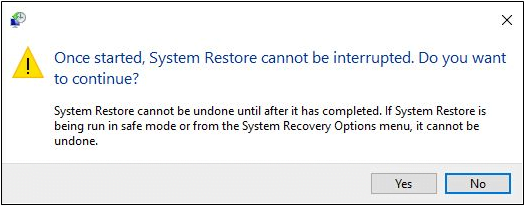
Right after clicking on the “Finish” button, you should be able to see a warning message telling you that the System Restore process cannot be undone. This means that you cannot cancel once the tool starts restoring your machine to the restore point that you have selected earlier so this would be your last chance to either continue or cancel the process. If you are sure to push through with the restore process, just click on the button that says “Yes”, otherwise, click the one that says “No”.
If you clicked “Yes”, System Restore will now start doing its job and your computer screen should turn blue with a message that says “Please wait while your Windows files and settings are being restored. System Restore is initializing…”. Just keep your computer turned on and be sure to plug it in to make sure that the process won’t be interrupted.

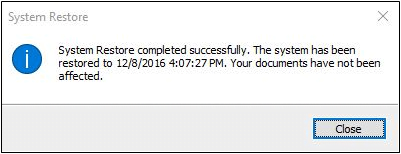
Once the system restoration process is done, your computer should reboot and after you log in to it, you should be able to see a notification that looks exactly like the one that is shown below informing you that the process was successful. It would also tell you that your documents were not affected so you don’t need to worry about them being lost after the System Restore tool does its job.
An Easy Way to Fix Your Computer
As we have mentioned at the start of this tutorial, there is actually a solution for a troublesome computer that is less painful to do and it comes in the form of the System Restore tool. As long as you have set this handy tool to create restore points automatically or you created one yourself before, you will be able to fix your machine easily by reverting to that restore point in case something wrong happens in the future.
In case you’ve already done a restore process after you’ve read this tutorial, you will now need to be reinstalling any software or even drivers that might have been removed after your system was reverted to a previous working state. If you encountered any problem while using the System Restore tool then please feel free to tell us about it by posting and describing the problem on the comments section below and we’re going to try to solve it in one of our future tutorials.