Setting App Notifications on Windows 8
Missing an important email or failing to attend an important appointment is really disappointing to most people and almost everyone of us experiences such situation. These incidents could be avoided with the use of some features which are already available on most smartphones and other mobile devices but only a few knows how to configure this important stuff that can surely help in reminding people at all times.
Microsoft has taken the next step by putting this notification and alarm features on Windows 8 and this is something that is not found on previous versions of Windows. However, using these notifications takes some tweaks and adjustments for them to function the way you intend them to be. In this tutorial, I will be showing you the basics in tweaking app notifications on Windows 8 but of course, I will first tackle the process of installing an app on your machine and how to access the App Settings Section so we can make some tweaks on the important apps that needs to show notifications both on your desktop and the lock screen.
How to Install Apps on Windows 8
Windows 8 can both hold apps and programs altogether making it handy and unique compared to its predecessors. Its redesigned start screen has gained enough praises and criticisms alike.
Installing apps on Windows 8 is not that hard and looks very much the same as doing it on an android device. Before you configure notifications for a certain app,you first need to ensure that it is already installed on your machine. Windows 8 already has pre-installed apps like “Mail, Calendar, Messaging, Music, Video, Windows Defender etc.” but if you want to add more unique apps to improve your productivity then you should search for the right app from Microsoft App Store. To access this section, just follow the steps below:
- While you are on the desktop screen, simply press the “Windows Key” on your keyboard to open the Start Screen.
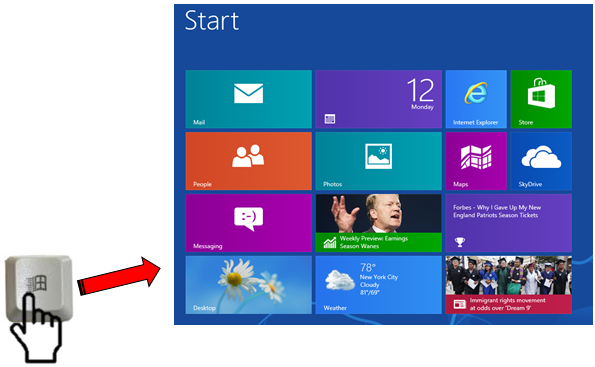
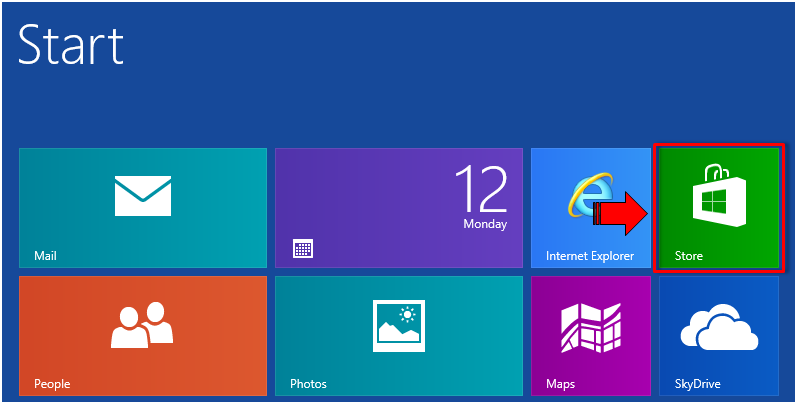
- Another way of getting to the Start Screen is by pointing your mouse to the bottom-left edge of the screen or tapping on the same area so that the “Start Tile” would appear. Just click it and you will directly be taken to the Start Screen. From here, click on the “Store Tile” to open Microsoft App Store.
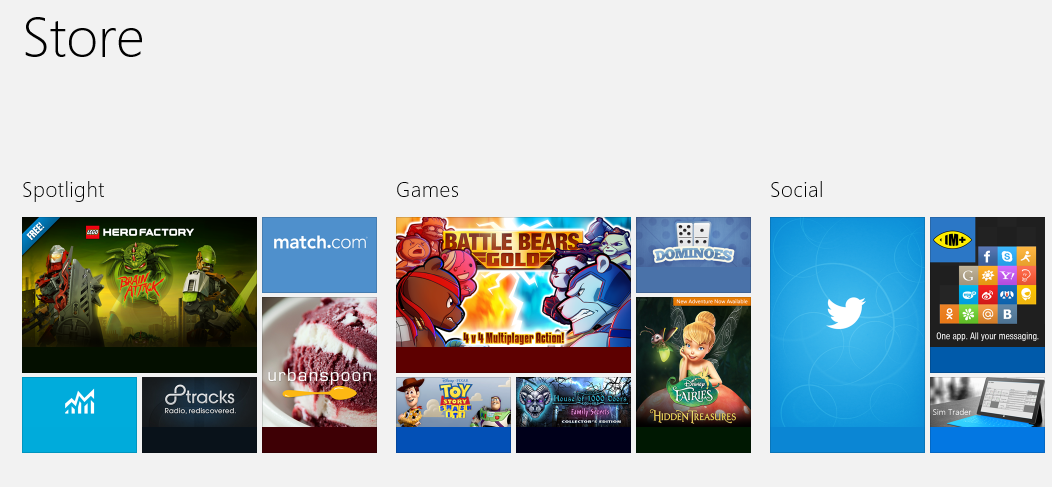
- After clicking on the “Store Tile”, Microsoft App Store will open, from here, you need to select the category where the app that you are searching for belongs and and once the Apps category opens, just scroll through until you find the right app.
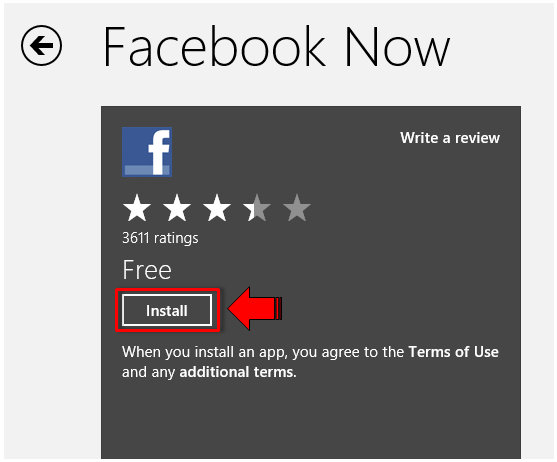
- Once you find the app that you’re looking for, simply click or tap on it and on the Window that follows, click on “Install”.
Accessing the App Notification Settings Section
Now that you learned how to install apps, it is time to learn how to configure app notification settings so that each app shows important messages and sounds an audible “ring” when something urgent needs your attention.
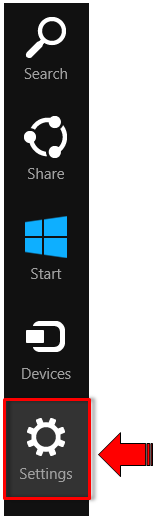
- To access the App Notifications Settings section on your Windows machine, just click on the “Settings” charm which can be found by pointing or tapping on the upper-right edge of your computer screen. After doing so, the charms would appear and you need to click on the “Settings” Charm found at the bottom.
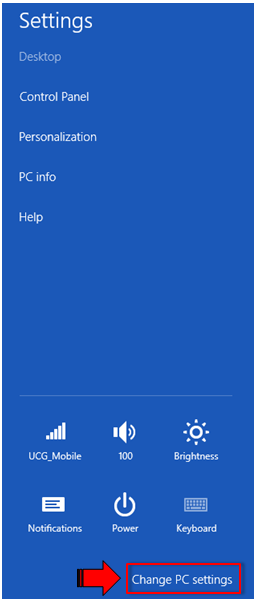
- The next section will appear like the screenshot below. From here, you need to click on the “Change PC settings” tab found at the bottom.
- On the next Window, simply click on “Notifications” then on the right side under “Notification” settings, be sure that the “Show app notifications, Show app notifications on the lock screen and Play notification sounds” options are turned on. Doing this will ensure that all installed apps will appear at the bottom list of apps which we will be doing some tweaks on in greater detail. After turning on these options, simply scroll down to the list of apps and you’ll see that each of them have sliders on the right side so you can easily turn them on or off.
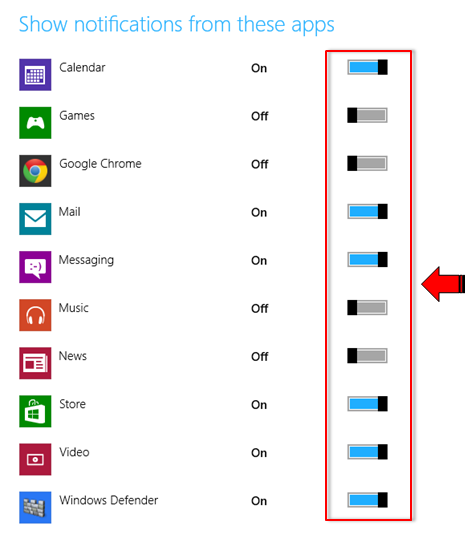
- I would recommend that you turn on notifications for apps like “Calendar, Messaging, Mail, Windows Defender and News” as these are important ones but you can also choose to turn on notifications for other apps depending on your needs and lifestyle.
Tweaking Lock Screen Notifications from PC Settings
Some apps can also show notifications and play an audible sound even if your machine is locked. To change the settings for this feature, just follow the steps below:
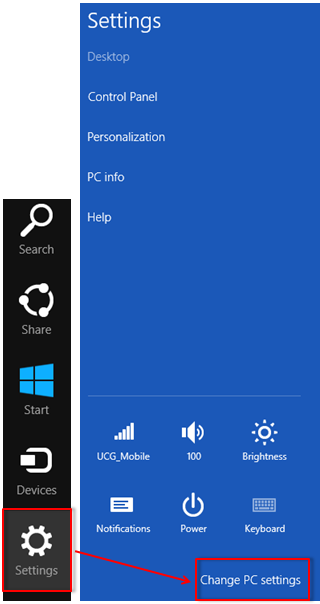
- Access the charms again by pointing your mouse on the upper-right edge of the screen or tapping/touching the same area with your finger if you are using a touch enabled device then when the charms appear, click on the one labeled “Settings” found at the bottom. When the charm opens, click on the “Change PC settings” tab found at the bottom.
- The “PC Settings” section will then open. From here, click on the “Personalize” tab to open the lock screen app notification settings.
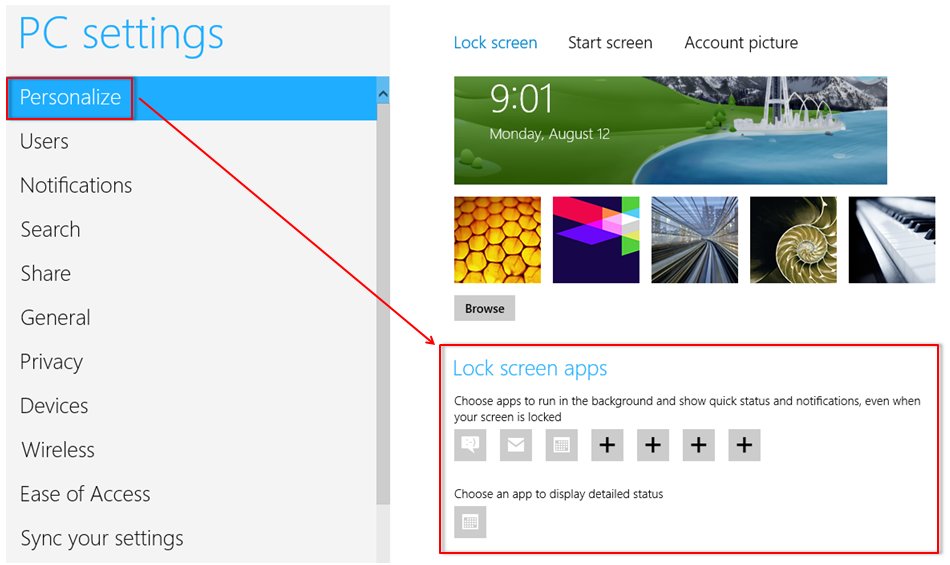
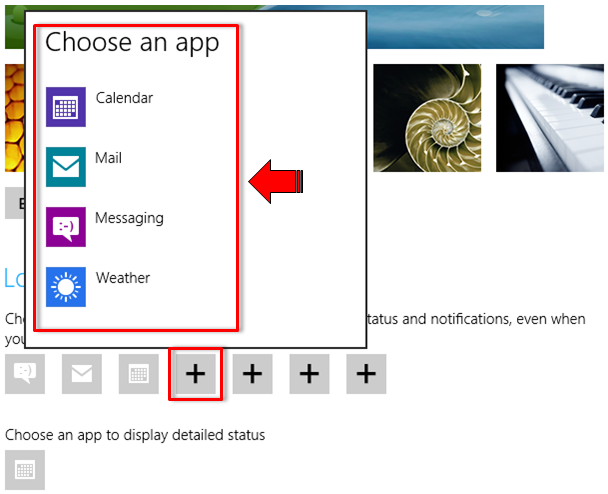
- To add apps that can display notifications on the lock screen, simply click on the boxes that has a “+” symbol inside under the “Lock screen apps” section then on the pop-up list that appears, just select the all that you want to add.
- To remove an app from the list of lock screen apps, simply click on the app icon then click on the link that says “Don’t show quick status here” just above the list of apps that would appear or choose another app to replace the one that you want to remove.

Configuring Windows 8 Mail Notifications
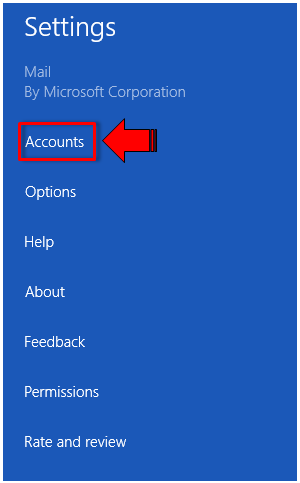
If you are always watching for some important email then it would be helpful if you configure Windows 8 Mail app to show and play sounds when new notifications are available. To do this, simply open the “Mail” app then open the charms and click on “Settings”. Once the “Settings” charm opens, click on the “Accounts” link.
- On the next section, click on the account that you want to change/turn on notifications for to open its settings.

- Once you get to the settings section for the email account you have chosen, you would need to scroll down until you see an option that says “Show email notifications for this account” and if it is turned off, turn it on.

Just follow these same steps for all your other email accounts so you can always get a notification and hear an alert sound whenever important emails arrive at your inbox.
More Than Just a PC
Windows 8 provides more features than an ordinary PC has. The notifications feature and its ability to hold apps and programs at the same time is just one proof of this. This Windows version is truly an improved version which not only adds more productivity to every user but also incorporates other features so you can make the most out of your computer hardware. All it takes is a little bit of familiarization and once you get acquainted with Windows 8’s new features, you’ll surely love using it but if you wan to retain Windows 7 and try Windows 8 at the same time, you can dual-boot these operating systems on your computer and compare how one differs from the other.