Setting Up Different Accounts in Windows 8.1
In our previous tutorial, we’ve taught our readers how to access the metro section where adding an account can be done and explained the difference between the three types of accounts that can be created in a Windows 8.1 computer. Accounts are very important in every Windows computer that the absence of one will render it useless. Just imagine your house when you lost its key and you can’t enter in to check what’s going on inside. The same thing happens in a Windows machine without a user account that is registered to it. You would not be able to do anything even the basic tasks that users usually do in a laptop or PC. This is the reason why you need to learn how to setup an account in your Windows 8.1 machine. In this tutorial, we will take you through all the steps involved in creating all three types of account that can be registered to your Windows 8.1 computer so be sure to get your brand new machine ready and follow the steps that will be shown below.
How to Access the Accounts Section
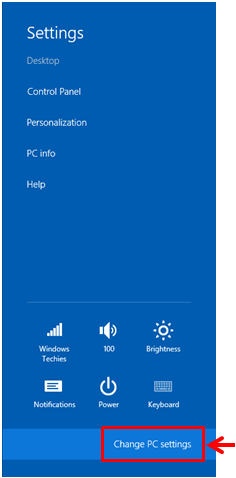
To create an account in your Windows 8.1 machine, you will first need to learn how to access the “Accounts” section in it. There are many ways in doing this but we will teach you the easiest ones to save you time. First, you can access this section by pressing on the Windows+I keys and after you do so, the Settings screen will appear from the right edge. From here, simply click on the tab at the bottom that says “Change PC settings”.
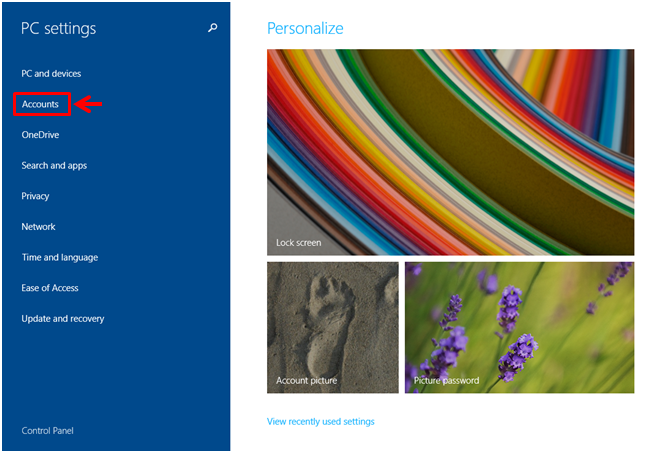
After clicking on the “Change PC settings” tab, you will be taken to the “PC settings” metro screen which contains a set of links located at the left edge that will take you to different settings and tweaks which you can do to your Windows 8.1 machine. From here, you will need to click on the link that says “Accounts” so you can access the section where adding an account is available.
Another way in accessing the section where you can initiate the adding of a new account is by using the “Search” feature that is perfectly integrated with your Windows 8.1 computer. To do this, simply press the Windows+S keys and the Search screen should appear from the right edge of the screen after you do so. From this screen, simply enter the word “Account” into the search input box provided and wait until the search results appears right underneath the box.
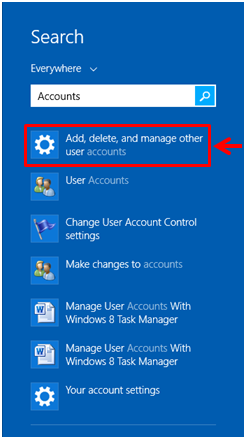
From the search results, simply click on the one that says “Add, delete, and manage other user accounts” and you will be able to access the metro screen where you can click the link that will initiate the account creation process. In the screenshot, you will see the “Accounts” metro screen which opened right after I clicked on the search result that I mentioned above.
Finally, we can now discuss how you can create a new Microsoft, Local or a Child’s account in your Windows 8.1 computer. Learning how to do these things will help you add one more layer of protection to the ones that already exists in every Windows 8.1 machine so be sure to follow the steps below and master everything that has to do with account creation in Microsoft’s brand new operating system version.
Creating a New Microsoft Account
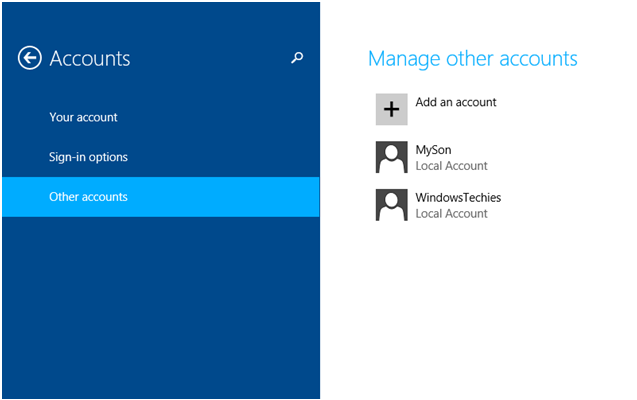
In previous Windows versions such as Windows 7, you can only create one type of account which is called a “Local account” in Windows 8.1. This type of account only allows users to work locally in his/her computer and transferring files to other devices and Windows devices would require a copy and paste or sending process via Bluetooth or a local sharing network. This would be a tedious task especially to the busy-type user. To help make things easier. Microsoft has developed an operating system that allows you to create an account which allows syncing of files, settings and other stuff to all other Windows 8.1 devices for as long as you are logged in to the other device with the same Microsoft account. To setup this type of account, all you need to do is click on the “Other accounts” link under the “Accounts” section of PC settings which we have accessed earlier.

From here, you will need to click on the “Add an account” item which is located at the right portion of the screen as shown on the screenshot above and after you do so, you will see a prompt asking you how the person that you are making a new account for will be able to sign in to your computer and what account type would you like to create for him/her. Since we are trying to create a Microsoft account on your computer, you will need to enter the person’s Microsoft email into the box provided.

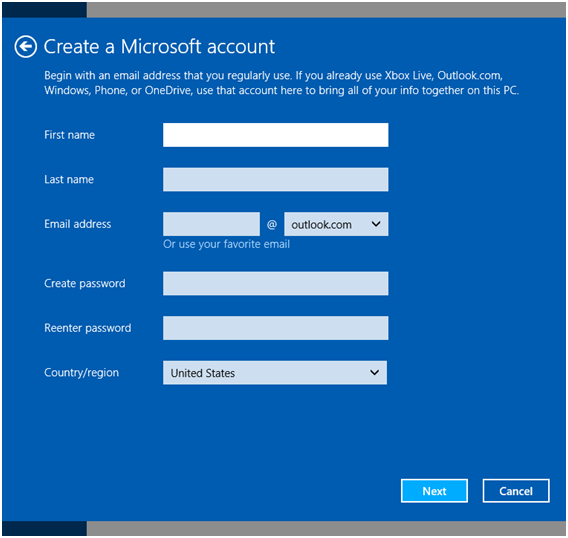
In case the person that you are creating an account for still doesn’t have a Microsoft email, you can sign up and create a new email simply by clicking on the “Sign up for a new email address” link which is located below the input box. After doing so, you will be directed to a screen that will require you to enter some information about the person that you are creating an account for, In case the person is around, you can allow him/her to enter all the required information then follow all the other steps that comes next so that the new account creation process would be completed.
Creating a Local Account
As I have mentioned earlier, a local account only allows local access to all the files, features and other stuff that are saved in your Windows 8.1 machine and setting it up is very easy. All you need to do is click on the “Add an account” link which you can find under the “Other accounts” section of the “Accounts” tab in PC settings. After doing so, you will be taken to the same screen that appeared earlier when you created a Microsoft account and from here, you will need to put your attention at the bottom portion where you will need to click on the link that says “Sign in without a Microsoft account (not recommended)”.

After clicking on the link, you will arrive on a screen that explains the differences between a Microsoft account and a Local account. At the bottom portion of this screen, you will find buttons which are labeled “Microsoft account”, “Local account” and “Cancel”. From these buttons, you will need to click on the one that says “Local account”.

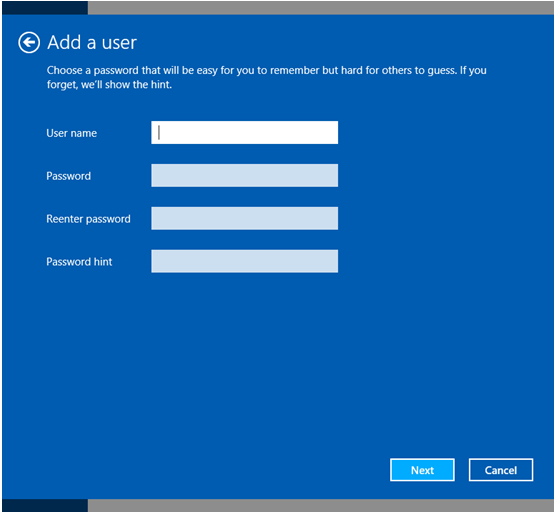
On the screen that follows, you will be required to enter the login details such as the “Username”, “Password” and “Password hint” (a word that will give you a clue about the password that you created for the account just in case you forget about it) that you want to assign to your new account. Just enter these required information and after doing so, simply click on the “Next” button at the bottom. Just follow all the other steps that comes next until you reach the final one.
Creating a Child’s Account
Adding a Child’s account is very simple. Just click the “Add an account” link which is under the “Other accounts” section and on the screen that follows, simply click on the link that says “Add a child’s account”. This link will take you to the section where you will be able to find the input box for the Microsoft email that you want to use for your child’s account. Using a Microsoft email will let you do even more in monitoring your child’s PC usage and assign better restrictions to it. There’s also a link near the bottom that says “Add a child’s account without email” which you can use if you want to create a simple account for your child without the other advanced features that a child’s account with Microsoft email has.

To learn more about this crucial step that you can perform in your Windows 8.1 machine, we will be dedicating a separate tutorial which will discuss all the details so be sure to tune in with us here in windowstechies.loc to learn all the latest tips and tricks for the Windows operating system!