Sharing Your Hard Drive Contents
In our modern world, technology has made everything a lot easier. From keeping in touch with our loved ones down to being updated of the latest news, most high-end mobile devices are already capable of doing these things and even more. The development of some operating systems that can run in mobile devices has also made a breakthrough in the sharing of files in a more secure manner. Taking a look back to the past, sharing files meant storing it in portable storage devices and handing them out to the people who needs to get a copy of them. When social media went extremely popular, sharing has become a lot easier with the use of the features that are offered by these networking platforms but if you are looking for a more localized method of sharing some important stuff between the devices that you have at home, Windows 8.1 has the perfect tool that will let you do it.
In this tutorial, we will be using all of the available sharing options which is located under the “Share” tab of the ribbon-based options in your Windows 8.1 machine but before we get into the details, I will first show you how to access the File Explorer Window so you can start viewing all the options that are available in the ribbon.
Quick Methods in Accessing File Explorer
Windows 8 and Windows 8.1’s file management system known as File Explorer (previously called Windows Explorer in older Windows editions) has some brand new features that you need to learn about so you can maximize its use in dealing with files, folders and some other stuff. These brand new features is collectively called the “Ribbon” but if you’re thinking that accessing File Explorer is done in the same way as you did in previous Windows versions then you are wrong.
Because of the absence of the Start Menu, accessing File Explorer in your Windows 8.1 machine is now done in a different manner than what you’ve got used to. One easy way that will help you open this tool is by using a keyboard shortcut combination. From your computer’s keyboard, just press the Windows+X keys and you’ll be able to access a hidden menu that will appear at the bottom left portion of the screen. Once this menu appears, all you need to do is look for the “File Explorer” link and click on it once you’re able to locate it.

Another method in accessing it is by using the search feature which can now be accessed on a metro screen. To summon this screen, all you need to do is press on the Windows+S keys and you’ll see it appear from the right edge. Just enter the words “File Explorer” into the search input box that is provided on this screen and just wait until the search results show up under the input box. From these search results, simply click on the File Explorer shortcut which should be the first item on the list and the File Explorer Window should open right away.

You can also access the Search screen by first accessing the Start Menu which you can open either by clicking the Start Button or pressing the Windows key and after doing so, simply click on the Search button that is located at the top-right portion of the screen as shown on the screenshot below.
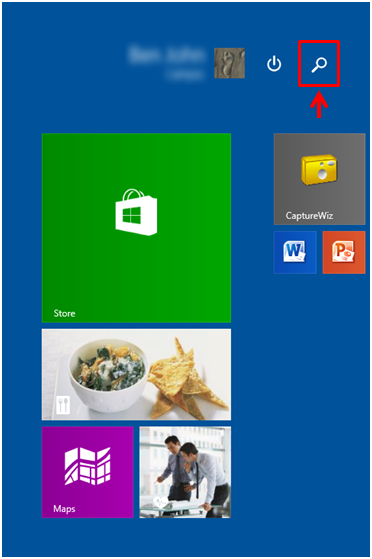
After clicking on the button, the Search screen should appear from the right edge and all that you need to do is enter the words “File Explorer” into the input box then wait until the search results appears at the bottom of it the same as what happened in the previous step.
Getting to the Share Options
Now that you are on the File Explorer Window, you will need to click on the tab that is located at the top which says “Share”. After you do so, the ribbon will show all available options which are related to sharing any file or folder that you have selected. We will be starting with the very first ones at the left portion and we’ll move to the right one by one as we move through with this tutorial.
Sending a File as an Email and Creating a Zip File
The very first option that you will see on the ribbon is the one that is labeled as “Email”. To learn what this option does, you will need to select a file to test it on. Ideally, a Word file would be a great one to test this feature with so just select one from any folder and hit the “Email” option from the ribbon. If you selected a file, it will automatically be sent as an attachment while if you selected a folder, you’ll be able to send a link that will lead the recipient to your Public files on OneDrive.

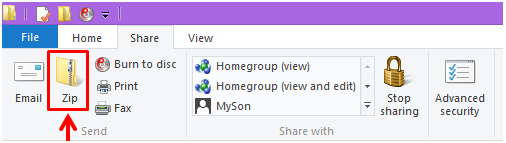
The next option which is labeled “Zip” will let you create a compressed version of any file or folder that you have selected. To learn how you can use this option, I have written a separate tutorial that shows the steps in creating a compressed file and how you can extract its contents using Windows 8.1’s built in file compression/extraction tool which is also part of the ribbon-based options.
Burning Files to a Disc
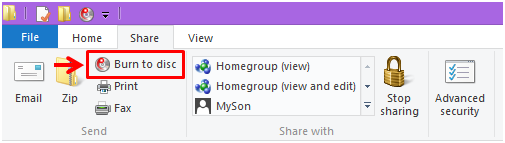
In order to use this option, you will need to secure a blank compact disc where the selected files would be stored. The process called “Burning” in computer terms means that you’re going to write data into a disc to preserve it or share it with others. Just insert a blank disc into your computer’s CD or DVD-ROM drive then select all the files that needs to be burned into it. Once all files are selected, simply click on the “Burn to disc” option and the process will start.
Printing and Sending Files Through Fax
Most printers at present can do many things aside from just printing the files that needs a hard copy. There are even models that can connect to your network and some can even send and receive fax. Printing a file in Windows 8.1 is very simple. Just make sure that all connections between your computer and the printer device are properly inserted in place and the power cable for the printer is also plugged in. When these things are all secured properly, just select the file that you want to print then hit the “Print” option that is found on the ribbon.

If you want to send files through fax, just select the file then hit the “Fax” option. Just follow any other step that the system will ask you to do after you click on the option and you should be able to have the file sent to the recipient without any problem.
Using the Options Under Share With
Another great thing about the Share options is that it also allows you to share files to your HomeGroup with either “view” or “view and edit” permissions. Just select the file/s or folder/s that you want to share and hit any of the sharing options under the “Share with” group After doing so, you might think that nothing really happened but the truth is the file has already been shared automatically to your HomeGroup or the user account that you selected. To stop sharing the file, simply hit the “Stop sharing” option and the file will automatically be removed from the shared files.

You will also find an option that says “Advance security” which seems to be separated from the others but we’ll discuss it in a future tutorial since it deals with some complicated tweaks which are not really needed for basic computer use.