Tweak Windows Firewall Settings With These 5 Steps
Previously, we’ve learned what the Windows Firewall does and explored the options and links that are found on its main Window but the Windows Firewall tutorial series will not just end there without really getting through the details of how it works and understanding why a certain option or feature should be activated or not and why an app or program should be allowed to get through the Firewall itself. Gaining a good understanding of these things will truly help you maximize the use of the Windows Firewall program in getting your computer become fully protected against illegal access and other forms of intruders. But before we start, let us first review the steps in accessing the Windows Firewall program so you won’t be having a hard time finding this tool in your Windows 8.1 machine
1. Open Windows Firewall
Novice Windows 8.1 users might find it hard accessing the Windows Firewall program in their brand new computers because of the absence of the Start Menu which used to be an easy access section for all Windows system locations, tools and even files that are saved within the hard drive and if you find your self in this situation, you will need to learn about a secret hidden menu that will easily take you to the Control Panel section where you will find the shortcut to the Windows Firewall. To summon this hidden menu, all you need to do is press on the Windows+X keys and after doing so, the hidden menu should appear at the bottom-left portion of the screen. From here, simply look for the item that says “Control Panel” then click or tap on it.

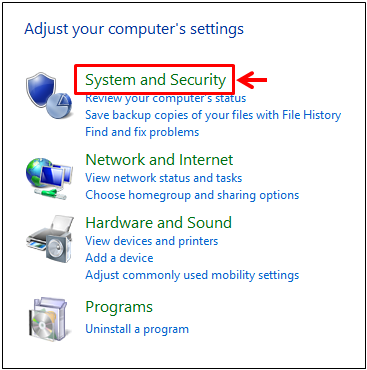
After clicking on the shortcut link, the Control Panel Window will open and from here, you will need to look for the section that is labeled “System and Security” which should be the first item on the Window itself and once you see it, you will need to click on it to open the system and security section.
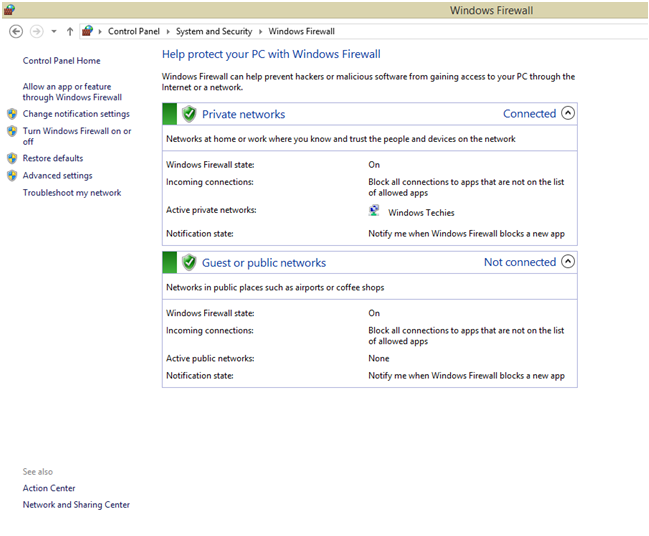
Next, on the System and Security Window, you will be able to find another link in it that says “Windows Firewall”. All you need to do is click on this link so you can finally open the Windows Firewall Window where all the settings for this program are located. From this Window, you will also see the current status of the Firewall and see some information about the network that your computer is connected to.
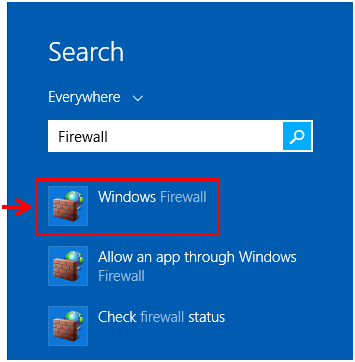
If you prefer an easier way in accessing the Windows Firewall program then you can use the Search feature simply by pressing the Windows+S keys and after doing so, the Search screen will appear from the right edge. On the search input box that is located on this screen, simply enter the word “Firewall” and wait until the search results appear just underneath the box then from these search results, simply click on the one that says “Windows Firewall”.
Finally, the Windows Firewall screen will open and from here, we will be learning how to use each of the options and links that you can see at the left portion and we will go through the important ones in greater detail.
2. Allowing an App or Feature Through Windows Firewall
The very first link that you will find on the left hand portion of the Windows Firewall screen is the one that says “Allow and app or feature through Windows Firewall”. When you click on this link, you will be taken to a Window that bears some tick boxes at the left for selecting the program or app that you want to allow to have access to your computer. At the right portion of it is another set of tick boxes for enabling the app or program through a private or public network as you can see on the screenshot below.

You might wonder why the tick boxes are not clickable and this is because this section is designed to work that way for additional security and protection. To start making changes with the apps to be allowed access through the Firewall program you will need to click on the “Change settings” button located on the top-right portion of the box where the apps and programs checklist are located and after doing so you will notice that all of the tick boxes will already be clickable so you can start putting on some check marks into each one that you want to add to the list of allowed apps and removing the check marks from the ones that you want to disable access through the Windows Firewall. Once you’re done making changes on this section, simply click on the “OK” button at the bottom to save all the things that you did.
3. Turning Windows Firewall On or Off and Changing the Notification Settings
The next two links which are “Change notification settings” and “Turn Windows Firewall on or off” will pull up the same Windows Firewall settings so it is best to put them into one section here. Try clicking on any of these links and you will be able to access the Window which looks like the one shown on the screenshot below.
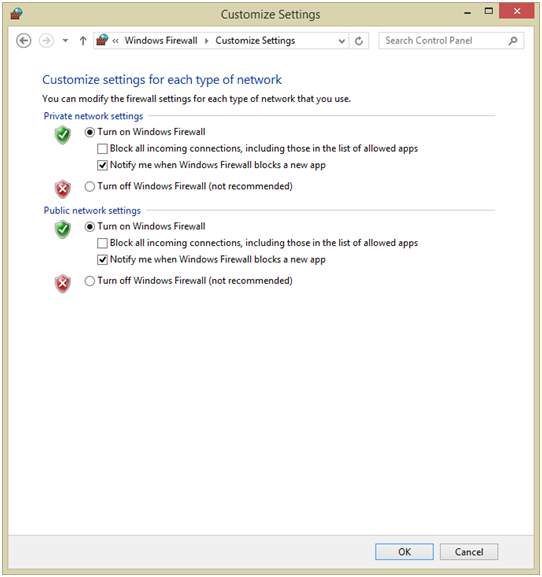
As you can see, you will have access to tick boxes again which will allow you to make changes on the notifications for public and private networks as well as other options for turning on the Windows Firewall feature in these network types. Just choose which settings would you like to set active or whether you’d like to turn Windows Firewall on or off and afterwards, just click on the “OK” button at the bottom to save all the changes made.
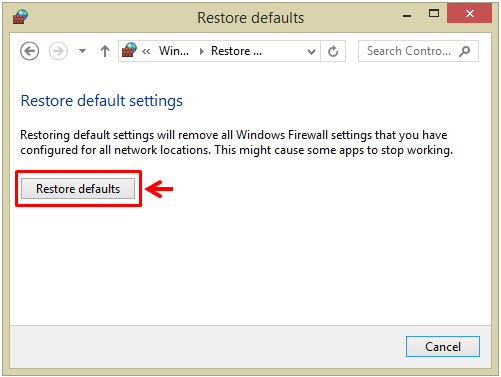
4. Restoring Windows Firewall to its Default Settings
The next link will now allow you to bring back Windows Firewall to its original state before you ever made changes to it. This means that all of the changes that you made for both private and public networks will be removed and because of this, some other apps may stop working as they previously did before the restore process was done. If you are sure with what you are going to do, simply click on the “Restore defaults” button.
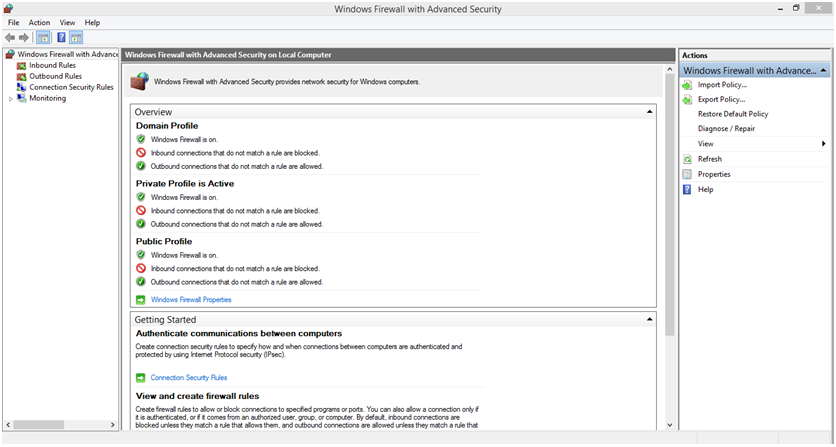
5. Changing the Advanced Settings
Lastly, you can also make some changes on the advanced settings of the Firewall program on your Windows 8.1 machine simply by clicking on the “Advance settings” link and after you do so, you will be taken to a Window that is labeled “Windows Firewall with Advanced Security”. Just take some time to explore on the settings that available here so you can learn what each one of them are used for but if you are not confident enough about what you are doing, it is best to just keep them as they are to avoid any other problems that can affect the apps and other programs that are installed in your Windows 8.1 machine.
That’s it! You now learned how to do some changes with the Firewall program that is built-in with your Windows 8.1 machine so the next step that you need to take is to find time in mastering these tweaks so you can raise your computer’s protection to the next level.