Tweaking the Mouse Pointer’s Appearance and Basic Actions in Windows 10
Imagine the Windows operating system if the mouse wasn’t invented? How can you navigate through links, click on buttons or go from one system location to another without this invaluable feature? Well, some might argue that there should have been another feature that must have been invented if the mouse and the pointer that it controls wasn’t developed and further reason that it might have been a better feature than what we currently have now but isn’t it true that the mouse and the pointer that we have right now seems to fit this description of the perfect feature?
How can it get any better if it already serves a lot of purpose in helping us work with the Windows operating system and any other computer OS that we have in our digital age? Everything from its design, controls, appearance and other features are already set in place in their default values to accommodate all kinds of users except for the ones who always want something that’s unique!
Yes! The mouse pointer, its color, appearance and movement can be controlled and in fact, you can add other actions and features to it if you wish to and Microsoft has made all of these things possible from within the operating system itself without the need of third-party software of some sorts.
If you’ve been wanting to tweak this feature because it looks quite boring to you then you have found the right article! In this tutorial, we will be doing some tweaks to the color, size, speed and sensitivity as well as many other aspects of the mouse pointer so you can get the appearance and performance of the it that you’ve been wishing for in a long time so be sure to get your Windows 10 machine fired up and follow the steps that we’re going to show below.
Accessing the Mouse Pointer Settings from the Control Panel
Windows 10 has two coexisting environments, the traditional Desktop environment and the new Modern environment. Each of these aspects of the operating system has some features that are identical. For instance, you have Control Panel for the Desktop environment and the universal Settings app for the modern environment.
The mouse pointer options are found in both of these features in your Windows 10 machine but for the benefit of those who have been used to older Windows editions, we will discuss the former first which is accessing the mouse pointer settings and options from the Control Panel and making tweaks in them.
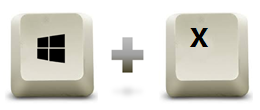
To access this section, you must first launch the Control Panel Window of course and if you’ve already spent many hours looking for the shortcut that will open this feature then you’re actually looking for it in vain. This is because the way in launching Control Panel in Windows 10 isn’t done through a shortcut icon but from a hidden menu which pops-up at the left hand portion of the screen whenever you press the Windows + X keyboard shortcut combination.
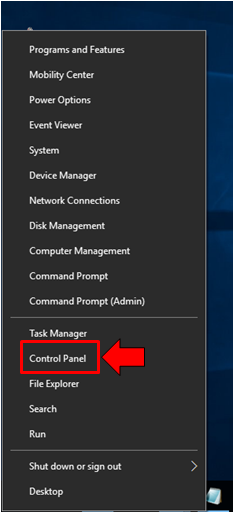
After pressing this keyboard shortcut, the hidden menu should show up in an instant. This feature is called the “Admin Menu” or simply the “WinX Menu” and from here, just click on the link that is found near the bottom portion which says “Control Panel” as highlighted on the screenshot below.
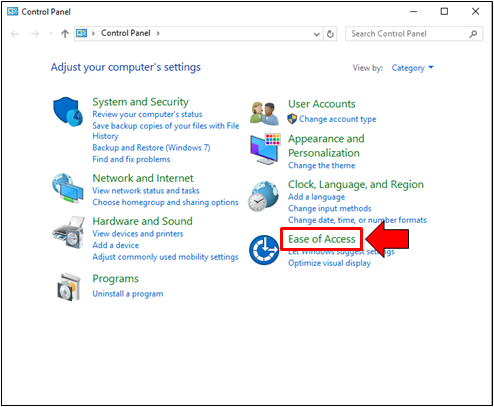
The Control Panel homepage section will then launch and from here, you will need to click on the category which is listed as the last one which says “Ease of Access” as shown on below.
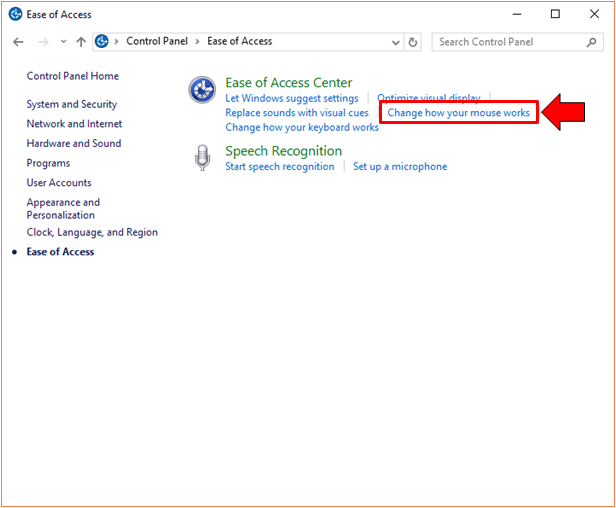
Next, on the Window that follows which displays all the contents of the “Ease of Access” settings category, you should click on the link that is found under the Ease of Access Center item which says “Change how your mouse works” as highlighted on the screenshot below.
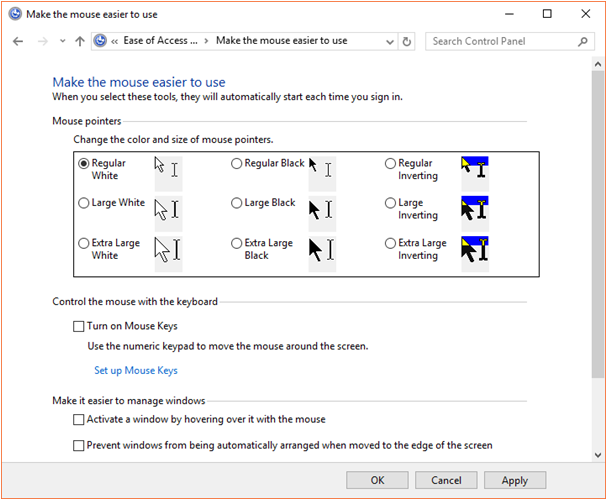
After you click the link, you will now be able to open a Window which is labeled “Make the mouse easier to use” and as you can see on the screenshot below, there are plenty of options that you can tweak or enable which will change the appearance and performance as well as add more features to the mouse pointer that what is already currently available by default.
Changing the Size and Color of the Mouse Pointer
So now that we have already accessed the section where the mouse pointer settings and personalization options are found, let us learn how you can actually change its size and color. If the default appearance of the mouse seems to be straining your eyes and you are having a hard time looking for it when you are on a Window that has a white background then you have to options. It’s either you need to make it larger or change its color to black for it to be easily noticed. You can do this by choosing from the preset mouse pointer sizes and colors which are found under the “Mouse pointers” section as you can see on the screenshot below.

As you can see, there are three main size and color options that you can choose from. There is the regular white mouse pointer, the black mouse pointer and the inverted mouse pointer option having three size options each which are “Regular”, “Large” and “Extra Large”. From here, all you need to do is click inside the small selection circle that is found at the left of each option and after choosing your desired mouse pointer size and color, simply click on the “Apply” then the “OK” buttons which are found at the bottom-right portion of the Window in order to save all the changes that has been made.
Controlling the Mouse with Your Keyboard
Moving down through the same “Make the mouse easier to use” Window of the Control Panel, you will find another option which will allow you to control the mouse using your computer’s keyboard. This is a very helpful option especially if the mouse that you are using fails often. Just activate this option by clicking inside the tickbox that is found at the left hand portion of the “Turn on Mouse Keys” option as shown on the screenshot below.
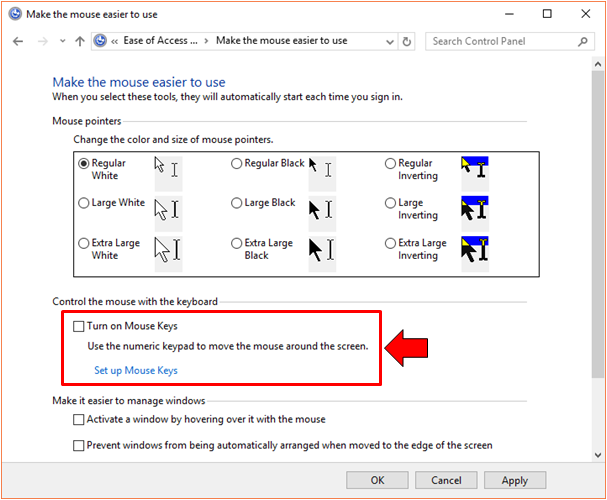
If you want to further tweak the aspects of the keyboard controls for the mouse, you will simply need to click on the “Set up Mouse Keys” link that is found just below the “Turn on Mouse Keys” option and you will be taken to the Window which shows more options for this feature. We will discuss this on our next tutorial so if you want to use this trick on your Windows machine, be sure to catch our next article that will further explain everything that’s there is for tweaking the mouse in your Windows 10 machine.
Tweaking Window Management Functions of the Mouse Pointer
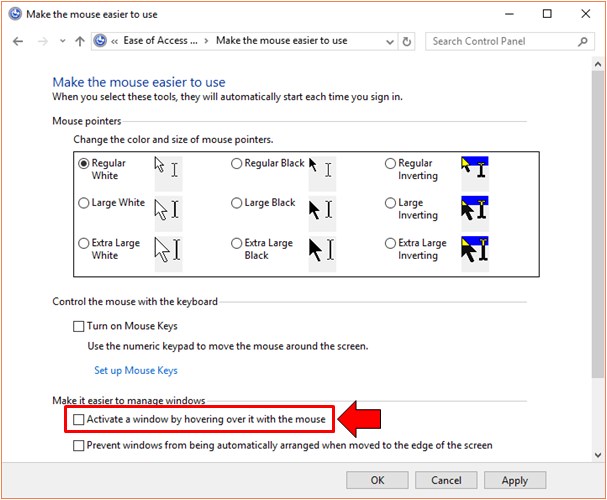
Lastly, we go to the options that are found at the bottom portion of the “Make the mouse easier to use” section in the Control Panel Window which are labeled “Make it easier to manage windows” as shown below. These options are generally for tweaking what the mouse does whenever you place or hover it over a Window and when you drag a Window towards the edge. Normally, there is no action that happens whenever you hover the mouse on an open Window of a program or app. The Window on which the mouse pointer is currently placed will not be set as active unless you click on an empty space within that Window.
If you want to disable this and make any Window on which the mouse pointer hovers on as active without having to click on it, you can easily do so by enabling the “Activate a window by hovering over it with the mouse” option as you can see being highlighted on the screenshot below.
Another default mouse pointer action that you can tweak is what it does whenever you click and drag a program or app Window towards the left, right or top edge of the screen. Normally, when you drag a Window to the right, it will automatically be arranged and take the right half of the screen and when you drag it towards the left edge, it will automatically be arranged and take the left half of the screen. Dragging a Window to the top edge will maximize it. If you want to disable this automatic feature that the mouse pointer does, all you need to do is enable the option that says “Prevent windows from being automatically arranged when move to the edge of the screen” as shown below.
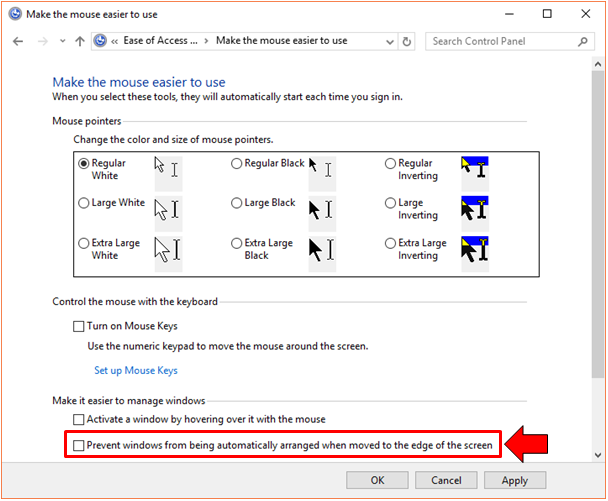
Once you are done tweaking the mouse pointer options on this Control Panel Window, you’ll need to click on the “Apply” then the “OK” buttons in order to save and execute all the changes that you’ve made for the mouse pointer on your Windows 10 machine. That’s how easy it is to make changes with the mouse pointer from the Control Panel, now, let us go to the steps involved in tweaking the mouse pointer from the universal Settings app in Windows 10.
Making Changes to the Mouse Pointer from the Settings App
As we have mentioned earlier, Windows 10 has a modern counterpart of the Control Panel and it is called the universal Settings app. To launch this feature, you will first need to click on its icon that is found on the Start Menu so go ahead and launch the menu by clicking on the Start Button or pressing the Windows Key and once it launches, simply click on the “Settings” icon that is found on the narrow vertical bar at the left as shown below.
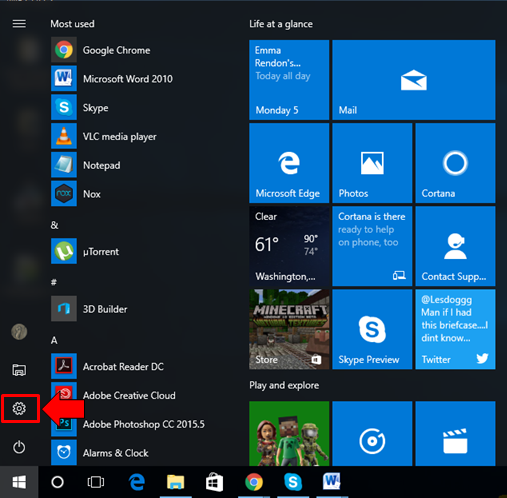
After clicking on the icon, the universal Settings app should then be instantly opened on your computer screen. If you want a quicker way in launching the Settings app Window, you can use the Windows + I keyboard shortcut combination. Now, on the Settings app homepage, you should be able to see 9 settings category and from here, you will need to click on the one that is labeled “Ease of Access” which is the seventh category counting from left to right as highlighted on the screenshot below.
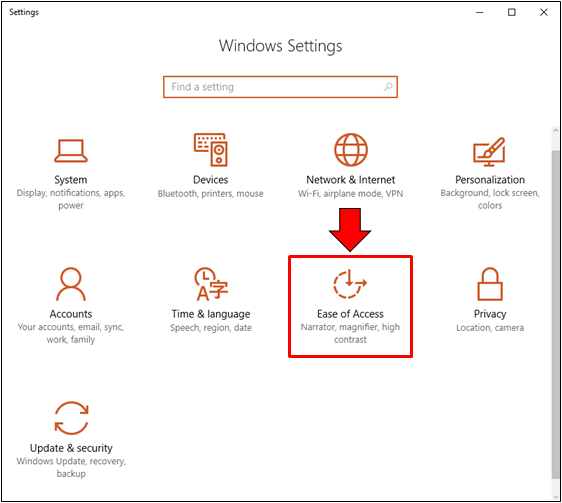
Moving on, the next Window will now show the settings and options that are found under the “Ease of Access” category. These stuff are arranged from top to bottom on the navigation pane that is found at the left as you can see on the screenshot below and since we are trying to make tweaks on the mouse pointer size and color, what we’ll need to click from the items that are listed on the navigation pane is the link that says “Mouse”.
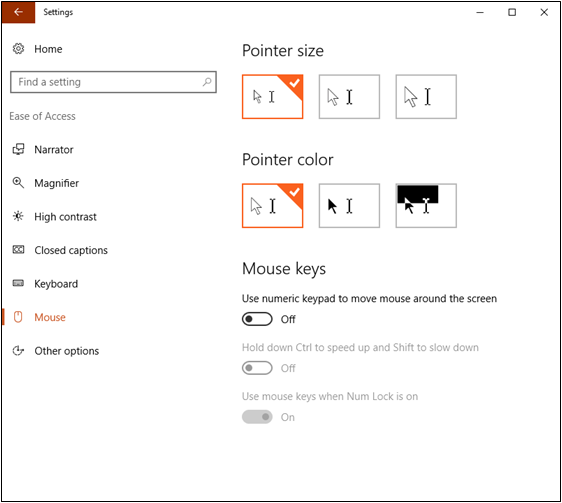
As you can see, the options under this “Ease of Access” item is just short and sweet unlike what we’ve taken up and discussed in the Ease of Access section of the Control Panel earlier. There are only three options here that you can tweak. First, you can choose the mouse pointer size by clicking on any of the three size options that are found under the “Pointer size” section on top as you can see on the screenshot below.

Now, for the color of the mouse that you want- whether you want it to stay white or switch it to black or take the tweak further by choosing inverted, you can do so by choosing the right option which is found under the “Pointer color” section as you can see below.

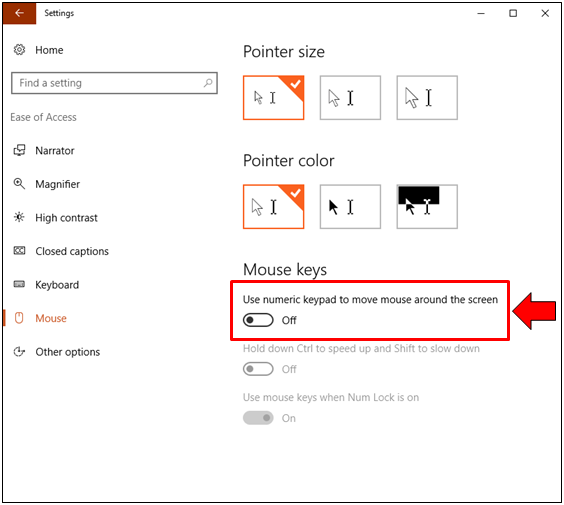
Moving down, there is one more option under the “Mouse keys” section which you can choose to activate and it is the one which is labeled “Use numeric keypad to move mouse around the screen” as you can see on the screenshot below. To activate this feature, all you need to do is click on the On/Off switch that is found on its left side.
Once you are done making the tweaks on this Settings app section, you can simply exit and close the Window without the need of clicking buttons that are labeled “Apply” and “OK” as you would normally do when you are working on the mouse pointer options and tweaks from the Control Panel. The settings available from this universal Settings app section are quite limited and are just for the basic mouse pointer changes that you can change. We therefore recommend that you make the tweaks from the Control Panel if you want to see more options that you can customize.
Make Windows 10 Easier to Use by Tweaking the Mouse Pointer
Windows 10 is by far the most advanced operating system that Microsoft has ever developed but as you can see, the mouse has stayed in it in an almost untouched state. The same options are for changing its appearance and basic actions are available in older Windows editions like Windows Vista, Windows 7, Windows 8 and Windows 8.1 and if the default mouse pointer setting are quite hard for you to deal with, feel free to tweak them by following the steps that we’ve shown above so you can have better user experience and navigate through the operating system smoothly without having to strain your eyes or get lost in the middle of nowhere.
What sort of problems are you having with the default mouse pointer settings in your Windows 10 machine? Did this tutorial help you solve the problem? We’d like to hear from you! If this tutorial helped you, please feel free to share them with your friends who are having the same problems as you do.