Using Some Options on the Paint App Ribbon
After learning some basic options under the Notepad desktop app which are important since they are also found in other desktop apps or even on some built-in Windows 8.1 photo editing software, it is time to get even more specific and take a more detailed look on the ribbon-based options that lie on top of more advanced desktop apps and in this tutorial, we will be exploring the Paint app which is also a bundled program in your Windows 8.1 machine so get buckled up and follow the steps that I’ll be showing in this tutorial.
Accessing the Paint App
Accessing the Paint app is done in the same way as the other desktop programs. You can get to it from the Apps view screen or find its shortcut using the Search feature. In order to do the former, you will need to first access the Start Screen then once you are on it, simply move the mouse pointer to make the round button containing an arrow down icon in it appear. Once it appears, simply click or tap on it to open the Apps view screen and from here, you will need to scroll a little bit to the right until you see the “Windows Accessories” group. Under this group, you should be able to find the “Paint” app.

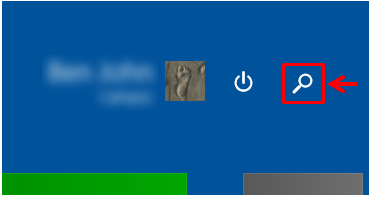
After finding the Paint shortcut, you can click or tap on it to finally open the app Window. Now, to find the Paint app using search, you will also need to access the Start Screen first and click on the search button located at the top-right portion of the screen just beside your account name and picture as shown on the screenshot below.
After clicking on the button, the search screen will appear and from here, simply type in the word “Paint” into the search input box provided. You will then be able to see that the search results will appear just under the input box. From here, the shortcut to the Paint app should appear on top which you will simply need to click or tap to finally open the Paint app Window.

Ribbon-Based Options on the Paint App
After learning the steps in accessing the Paint app, it is time to meet some of the available options found on top of the app Window which is collectively known as the “Ribbon”. First, we will start with the tab found at the extreme-left portion which is labeled as “File”. When you find it, try to click or tap on it and you should see another box containing some options for what you can do to the file that you are working on such as “Save”, “Print”, “Send in email” and many others.

Now, notice that most or even all of the options that are available under the “File” tab has a single letter underlined in their description like “Save”. The underlined letter which is letter “S” in “Save” actually represents the letter key on your computer’s keyboard which you will need to click together with the “Alt” key in order to execute the option. For instance, if you want to do a “Save” action without clicking on it from the options box, simply press on the “Alt+S” keys and the action will be executed right away.
The Home Tab
Now, still found on the ribbon just beside the “File” tab is another one which is labeled “Home”. The contents of this tab is what displays by default whenever you open the Paint app and as you can see, it contains all of the edits and other tools that you can use whenever you are editing a picture with Paint. The tools and options here are grouped into 5 sections which are “Clipboard”, “Image”, “Tools”, “Shapes” and “Colors” as shown on the screenshot below.

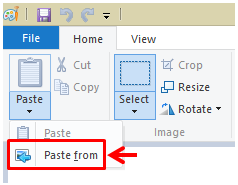
You can use the “Clipboard” section if in case you are planning to edit a picture that is saved in your hard drive. To do this, simply click on the arrow down button below the “Paste” option and hit the “Paste from” option that appears in a small box.
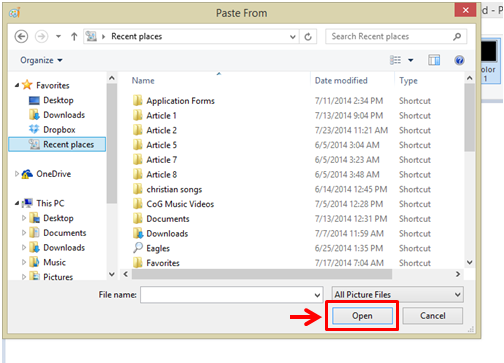
After doing so, you should be able to access a Window where you can browse to the location of the picture that you want to paste into the Paint app screen and once you find it, simply select it and hit the “Open” button located at the bottom-right portion of the “Paste from” Window.
The Image Section
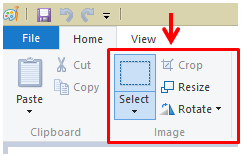
The next set of options that you can find on the ribbon under the “Home” tab is labeled “Image” and if you don’t have a picture that is pinned on the Paint app screen then all of the items that are under it will all be grayed-out. The options under this section are just focused on doing some tweaks to an image such as “Crop”, “Resize” and “Rotate”. You can also find some custom “Select” options in this section which is very useful if you want to just do some tweaks on a certain part of the screen.
The Tools Section
Next, you will see the “Tools” section which shows all available that you can use while doing some edits to a picture that you have pasted or creating an artwork using the Paint app. For instance, you can use the “Pencil” tool to create fine lines on your project or fill an area with a specific color using the “Fill with color” option. If you want to add some text then you can use the “Text” option and erase some part of a picture or drawing with the use of the “Erase” tool. Another awesome option under the Tools section is the one that is labeled “Color picker” which allows you to pick a color from any part of a picture and use it in editing your artwork or project.

There’s also a “Magnifier” tool which will help you edit or put color to certain areas of a picture in greater detail since it allows you to zoom in and see the part where you’ll need to put color or erase certain stuff from. Finally, after all the six main tools is another one that is labeled “Brushes” and when you click on it, some brush options will appear. From here, all you need to do is click the one that you want to use and the cursor will automatically change according to the option you have selected.
The Shapes and Colors Section
The last two sections under the “Home” tab are the Shapes and Colors section. If in case you’d like to insert a shape into your project, you can simply choose from the available ones and click on the shape of your choice. The same steps also applies with the “Colors” section. Simply select the ones that you’d like to use and the brush will automatically change its color to the one that you have selected.

Learn From One, Master Them All
Most of the options that are found in the Paint app are actually found in some other desktop program’s ribbon options especially those that are used in editing pictures or creating drawings so mastering the options under it is like getting to know the ones that are present on the rest. Take time to experiment on the options that available here and you’re on your way to mastering the ribbon-based options that is part of the brand new features included in Windows 8.1.