Why Set a Connection as Metered and How To Do It in Windows 10
Getting Internet connection on any device has become a need in our modern digital age but if it slows down whenever you connect a number of devices to your network then it would be no more than a useless one. This is true if most of the devices that are connected to a network are mostly running in Windows 10.
But why could this happen while using the latest Windows edition dubbed as the best one yet? Well, the answer is simple. Because of Microsoft’s efforts to really make Windows 10 become an operating system that would need minimal user intervention in terms of updating and doing other things that would keep it up-to-date, it’s default setting now demands most of your upload and download bandwidth without asking any permission.
If you want to cancel this default setting and take control of your device’s bandwidth usage, you will need to set a connection as metered. This step is essential especially to some kinds of connection like one that has a data cap such as mobile hotspots, dial-up connections, satellite Internet and many others.
If you’ve been experiencing a very slow Internet connection lately even if you are seldom using your Windows 10 device then this could possibly be the reason and in this tutorial, we will be explaining why you should set a connection as metered and show the steps in how you can do this in your Windows 10 computer so be sure to have it fired up and follow the steps that we will be demonstrating below.
Benefits of Setting a Connection as Metered
There are several things that happen when you set a connection as metered but in a general scope, this tweak prevents Windows from eating up too much bandwidth that greatly slows down your upload and download speeds. If you want to really know the details of what really happens then here they are:
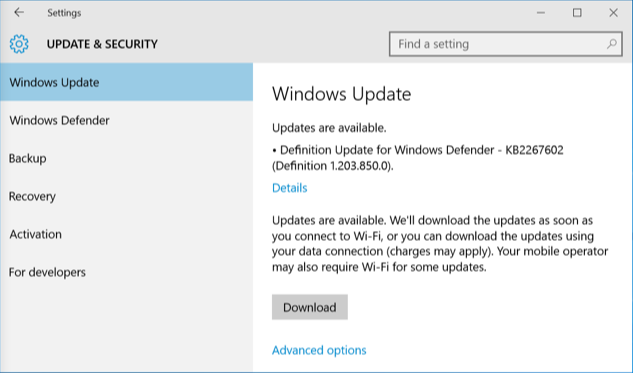
- Automatic Windows Update Gets Disabled- If you set your current connection as metered, all of the automatic updates for Windows and any other Microsoft products installed in your Windows 10 machine will be disabled and instead, the system will ask you if you want to install certain update/s by providing a “Download” button which you can choose to click or tap if you want to install them.
- Automatic Updating of Apps is Disabled- Since Windows 10 is not just about the traditional Desktop environment that we all got used to and now includes a modern Metro environment, the apps that you install from the Windows Store also get regular updates if your Internet connection is not metered. It is therefore important to set it as metered to disable this. However, your Desktop programs such as browsers will just continue updating themselves as normal and will not be affected by the metered connection tweak.
- Live Tiles May Not Show Updated Information- We haven’t observed this in our test computer probably because we’ve only set the Internet connection that we were using as metered for 1 day but Microsoft says that even the Live Tiles will not show updated information when your connection is metered. This could probably be true if it has been metered for almost a week or so.
- Peer-to-Peer Update Uploading is Disabled- In metered connections, your Windows 10 machine will not use your bandwidth in sharing updates with other computers and devices on your network and are sharing a common Internet connection with your computer. This is a clever setting by Microsoft which eats up your limited upload speed in order to lessen their bandwidth bills. Just imaging how much bandwidth savings they get for their outgoing connections by doing this to unsuspecting Windows 10 users all over the world.
- Different Behavior in Other Apps- When you set your Internet connection as metered, other apps such as the ones that really take a significant amount of Internet bandwidth can behave differently, this could mainly be observed with modern apps that you installed from the Windows Store and as well as torrent clients like BitTorrent, utorrent and many others which may stop downloading files on a metered connection.
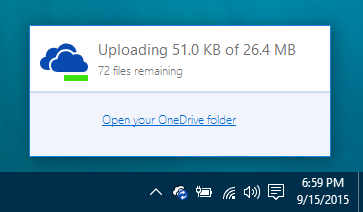
In older Windows editions such as Windows 8.1, OneDrive respected metered connections which means that it stops syncing files when a connection is set to a metered one but the latest OneDrive version in Windows 10 won’t do this anymore. It would still sync files even after setting a connection as metered which is quite a set back compared to the version found in Windows 8.1 especially that syncing files eat up a significant chunk from your Internet connection’s bandwidth capacity.
The good news is if we all provide feedback to Microsoft about this then OneDrive could be changed back to its more favorable setting in the future.
When Should a Connection be Set as Metered?
We’ve already mentioned the general rule on when a connection should be set as metered earlier. However, there’s a greater detail on the rules that govern the metered connection option but of course, everything still depends on your discretion. To help you decide whether to enable metered connection or not for a certain network that your computer and other devices are connected to, here are some scenarios that can help you decide to do it:
- Mobile Internet/Data Connections- If your computer or Windows 10 device is using a connection that originates from an integrated mobile data connection, Windows 10 will automatically enable the metered connection feature for it but again, you can always choose to disable it in case you’re confident enough that your mobile data plan can handle the load.
- Home-based Internet Connections that has Bandwidth/Data Caps- While there are Internet Service Providers that are generous in terms of bandwidth, others still implement strict data bandwidth limits which can easily be consumed on Windows Updates and many other data consuming stuff. To prevent this from happening, you can simply turn on metered connections on your Windows 10 computer.
- Smartphones and Mobile Hotspots- Most smartphones at present have a tethering feature which enables you to share your mobile data with your other devices. There are also devices such as Mobile Wi-Fi and others that can provide Internet connection by using mobile data service providers. These type of Internet connections are not detected by Windows 10 so there’s a possibility that you will easily consume your data cap that’s why you will need to enable the metered connection feature to prevent it from happening.
- Satellite and Dial-up Internet Connections- As we have mentioned earlier, there are Internet connections that are relatively slower than the current trend of mobile data internet service providers. If you’re still using these type of Internet connections, you will need to make sure that the metered connection feature is enabled to prevent Windows 10 from feeding on your very limited bandwidth while you are using it.
- Any Other Instances Where You Want to Control Downloads and Updates- Again, the main culprits that really eat up the bandwidth provided by your Internet service provider (ISP) are updates and downloads and so if you want to save bandwidth allotment for more important stuff then enabling the metered connections feature is the best way to do it than choosing to manually disable these default settings and features.
NOTE:
Windows 10 will only allow the metered connection feature for Wi-Fi networks and mobile data Internet Service Providers (ISPs) that are integrated with a device. It will not be possible to set a wired ethernet connection as a metered one and the same is also true for connections that are tethered from a smartphone or those that are provided by mobile Wi-Fi devices that are currently popular among users.
What’s the Way to Limit Bandwidth Usage on Wired Internet Connections?
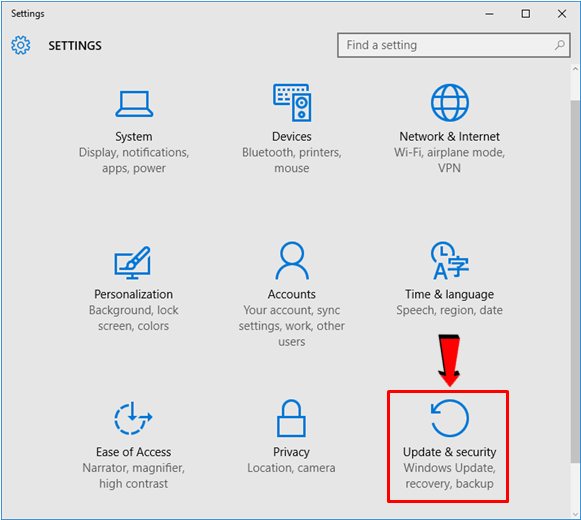
Well, it’s true that you can’t use the metered connection feature for wired ethernet and as well as Mobile Wi-Fi networks but that doesn’t mean that you can’t control bandwidth usage in them at all. There’s actually a way to limit it in these types Internet connections and in order to do so, you will simply need to launch the modern Settings Window and once it opens, simply click on the “Update & Security” category as highlighted below.
Once the “Update & Security” section opens, simply click on the link that says “Advanced options” that is located at the bottom section of the contents pane as highlighted on the screenshot below.
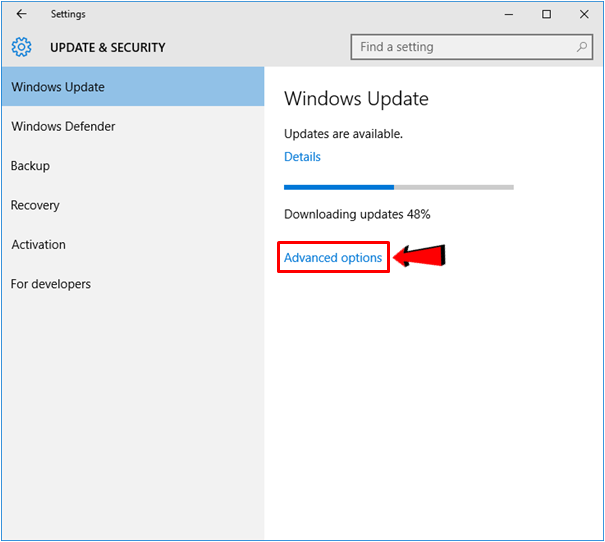
After “Advanced options” is clicked, you will now be able to open the section where all of the advanced tweaks for the Windows Update feature is found. From here, you can choose to “Defer upgrades” but if you are using the basic Windows 10 edition, this option will not be available. The “Defer upgrades” option is only available on Windows 10 Pro and higher Windows 10 editions and doing this on your computer will surely save you on bandwidth usage because it stops Windows from automatically downloading and installing updates.
The Steps in Setting a Connection as Metered
Back in Windows 8 and Windows 8.1, setting a particular Internet connection as metered simply required that you right-click on it from the list of available networks then hitting “Set as metered” from the right-click menu that would appear but in Windows 10, everything changed. You can’t do this same simply step anymore but the good news is it is still possible!
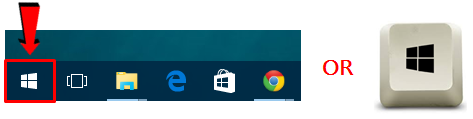
To start, you will need to access the modern Settings Window. If you don’t know yet how this is done, you can read and follow the steps that are shown in our previous tutorial or if you want to learn the simplest step in doing this, you will first need to open the Start Menu by clicking on the Start Button or pressing the Windows key on your machine’s keyboard.
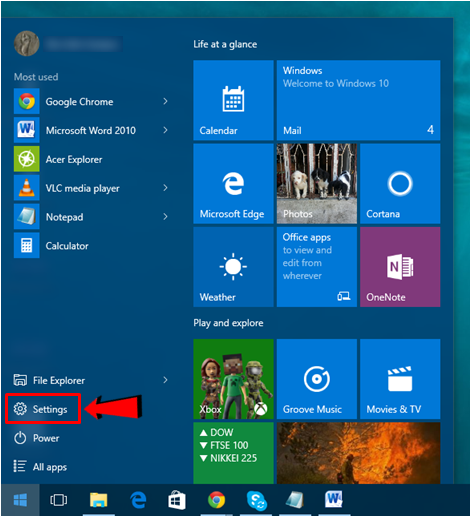
Now, when the Start Menu screen opens on your computer screen, you will now need to put your attention on its bottom-left portion and from here, just look for the link that says “Settings” as highlighted on the screenshot below. Once you find it, just click or tap on it and the modern Settings Window should open in an instant.
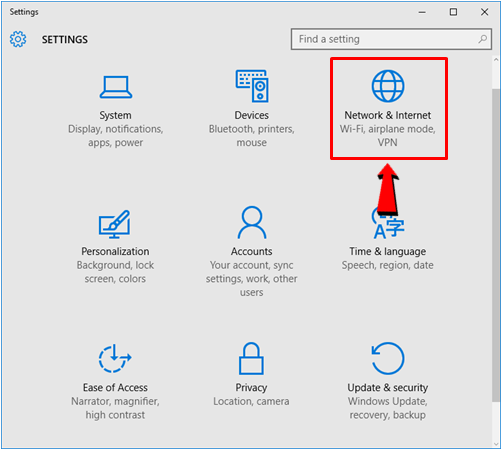
On the modern Settings Window that had just opened, you will see different categories of settings and tweaks that you can do with your Windows machine and from here, you will need to click on the one that says “Network & Internet” which should be the third one as you can see on the screenshot below.
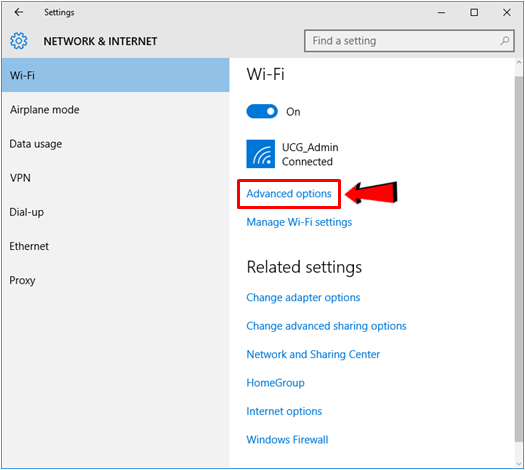
After you do so, you will be able to open the tweaks and settings that are available for your computer’s network and Internet connection but you might notice from here that the metered connection option is not readily seen. Well, that’s because Microsoft has somewhat had it hidden somewhere else instead of displaying the feature directly. To go to the switch that would enable the metered connection feature, all you need to do is click on the link that is located right under your wireless network’s name which says “Advanced options” as shown below.
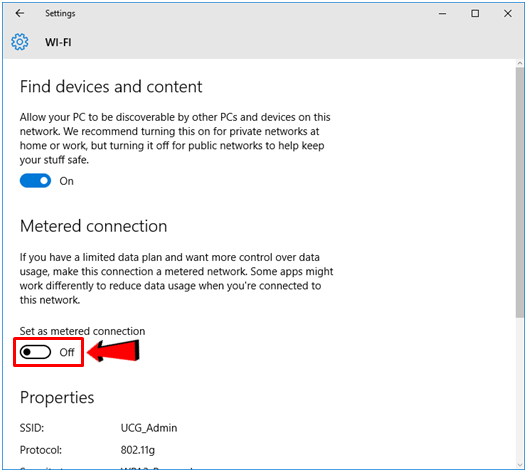
Now, when the “Advanced options” section opens, you will be able to see two flip switches on it and the second one under “Metered connection” should be turned off by default. To turn on metered connection for the wireless network that your computer is currently connected to, all you need to do is click on the switch that is found under it as highlighted on the screenshot below and after doing so, it will be turned on instantly.
Again, after a wireless network connection is set as metered, you might see some changes with how your computer works in terms of Windows and app updates and some apps as well as Desktop programs in it will also work differently so don’t panic. It’s just normal and it is your operating system’s way of cutting-off with the bandwidth usage on your Internet Service Provider (ISP).
Under the “Metered connection” section of the “Advanced options” Window is labeled “Properties” and if you scroll down some more, you will see some information about the network that your Windows 10 machine is currently connected to such as its SSID/Network name, Protocol, Security type, IPv4 address and IPv4 DNS Servers. From here, you will also see some information about your Wi-Fi adapter hardware like the name of its Manufacturer, Description, Driver version and Physical address. These information would be very useful especially when you’re troubleshooting you’re troubleshooting your connection or when you’re trying to find the right driver for your computer’s built-in Wi-Fi adapter.
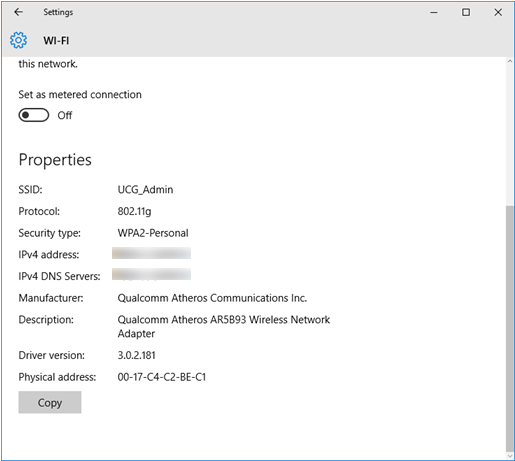
What’s good about these information being displayed under the “Properties” section is that you can easily copy them. To do this, you will simply need to click on the button that is located at the bottom which says “Copy” and after doing so, just open a text-editing software like Microsoft Word or even a simpler one like Notepad or WordPad then Paste the information there so you can save it for future use! Such a very handy and clever idea which would surely help more advanced users who need some information about a certain network for troubleshooting purposes.
Say Goodbye to Sluggish Internet with the Metered Connection Feature
As you can see, Windows 10 has really got a way in helping you improve your Internet connection speed and it does so by cutting-down on your bandwidth usage for some stuff that you don’t really need that much. We’ve learned about this in the reasons on why you need to set a connection as metered and found out the right time when you can turn it on.
Just follow that steps that we have shown in the last part of this tutorial and you should be on your way towards getting better Internet speeds especially when you need it the most. Take note also that before turning on the metered connection feature, you will first need to be connected to the wireless network that you want to turn it for and after doing so, you can start browsing towards the “Advanced options” section of the modern Settings Window that is available in your newly upgraded Windows 10 machine!