Working with Mouse Properties on PC Settings
Previously, we’ve talked about some of the settings and tweaks that you can change in Windows 8.1’s Mouse Properties but there are still some details about this section of the Windows 8.1 system and as well as other methods in accessing it that you need to learn so you can be on your way to mastering this aspect of Microsoft’s brand new operating system but before really getting into the details, you first need to understand that Windows 8.1 is a combination of two environments working together to give users a whole new experience when using a PC or a laptop computer.
Because of this latest innovation by Microsoft, there has been some features in it that was taken out and was replaced by even better ones and accessing some features also changed. The normal reaction from users of course is a combination of positive and negative ones. For instance, some loyal users got outraged because the Start Menu was taken out while less skeptical ones were thrilled by the brand new features that were included with the operating system itself like the Charms and the Start Screen among others. All of these changes in the Windows 8 and Windows 8.1 operating systems are truly obvious no matter which side of the operating system you take a view on and as loyal Windows users, all that we can do is adopt and get acquainted with what’s new until Microsoft releases a new operating system version to finally settle every issue that users complain about.
In this tutorial, I will be taking you through a brief tour with the new features in Windows 8.1 and as well as show the steps in changing some other aspects of the mouse settings from the PC settings screen. In the later part, some methods in accessing mouse properties and tweaks will also be described so be sure to get your computer ready and carefully follow all the steps that are shown below.
PC Settings and the Control Panel
In the tutorial that preceded this one, I have shown how to access the Mouse Properties section from the Control Panel and also described all options and settings under it but there’s another way in making changes in your computer’s Mouse Properties and instead of doing it from the Control Panel, we will do it in some other ways which includes the PC Settings section- Windows 8.1’s metro version of the Control Panel itself.
Changing Mouse Orientation from PC Settings
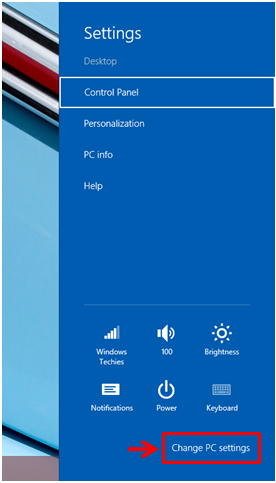
While using Windows 8.1, you need to know that some settings are not just located in the Control Panel Window but is also accessible even from the “Metro section” which is Windows 8.1’s mobile environment. For instance, you can change the mouse orientation quickly from the PC Settings screen just in case you are a left-handed person. To do this, just access PC Settings by first pressing the Windows+I keys and after doing so, you should be able to see the Settings screen that will appear from the right edge. From here, just move your focus to the bottom and hit the tab that says “Change PC settings” as highlighted on the screenshot below.
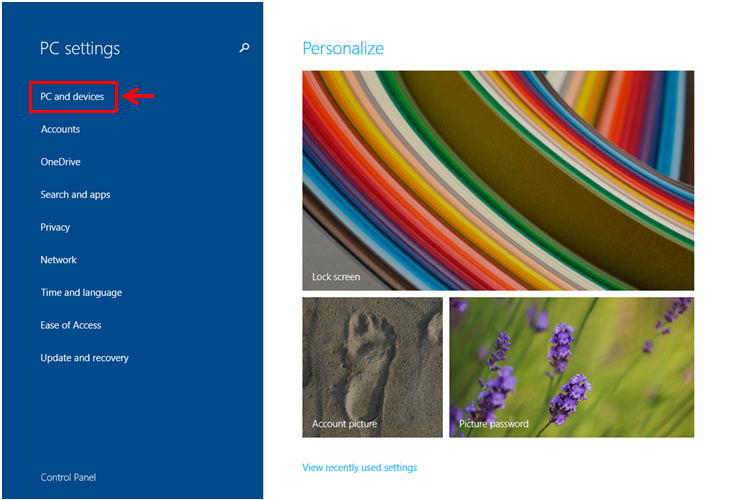
Once the PC settings screen opens, you will see some links on the navigation pane at the left portion which will lead you to different sections for changing and tweaking some aspects of the Windows 8.1 system. From here, you will need to look for a link that says “PC and devices” which should be the first one on the list and once you find it, just click or tap on it to open the section where the link that opens the mouse settings is found.
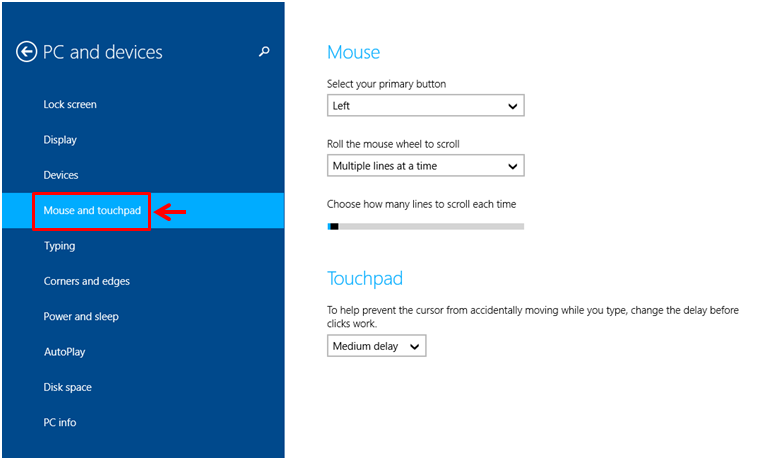
On the screen that follows, you’ll need to look for the link which is still located on the navigation pane at the left that says “Mouse and touchpad”. If you are using a Windows 8.1 machine that has the latest Windows update installed, you should see it as the fourth item on the list of links. Once you are able to find it, you simply need to click or tap on it so you can finally open its contents which will appear at the right portion of the screen.
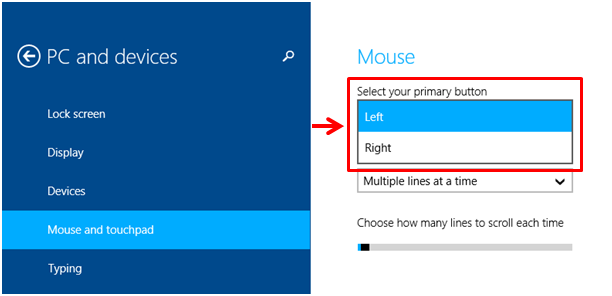
To change the mouse orientation from right-handed to left-handed, all you need to do is click on the drop-down box that is labeled “Select your primary button” and the “Left” and “Right” options will appear. If you are a right-handed person, your primary mouse button should be set as “Left” which is the default setting in any brand new Windows 8.1 machine while if you are left-handed, you will need to change the primary button and make it as the “Right” so you can move your mouse to where your left hand is and still be able to use your index finger for the main mouse controls and gestures since the right-click button is now set to do the functions that are supposed to be done by the left-click button.
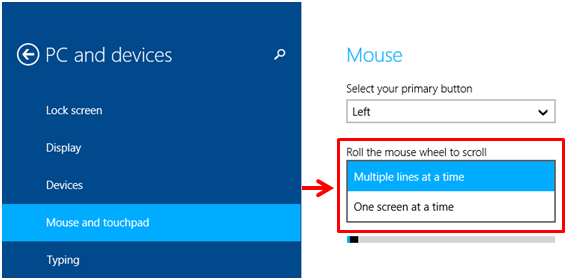
Next, there’s also an option for changing how the scroll function works and is labeled “Roll the mouse wheel to scroll”. When you click on the drop-down box that is located underneath it, the options that will appear includes “Multiple lines at a time” and “One screen at a time”. Just select your desired scroll settings from these two options and once you are done, simply exit from the screen and the changes you made will just be saved automatically.
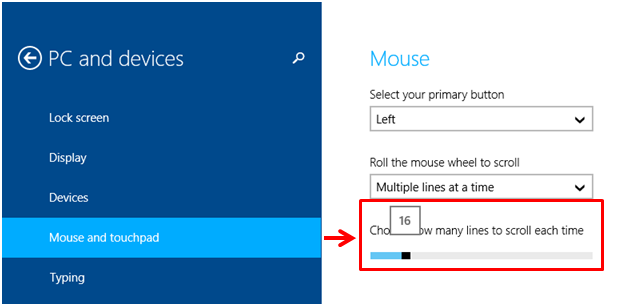
If you have chosen the option that says “Multiple lines at a time”, you will now need to set how many lines to scroll through each time you use the scroll wheel of the mouse. To do this, simply click and hold then drag the black button which is located under the “Choose how many lines to scroll each time” option. While dragging the button, the number of lines will appear so you will know when to stop dragging as shown on the screenshot below.
Lastly, you can also change how the touchpad works so you can prevent it from accidentally being moved while you are doing something on your computer. To do this, simply change the value in the box found below the option that is labeled “To help prevent the cursor from accidentally moving while you type, change the delay before clicks work”. The options which are found in this section are shown on the screenshot below.

The good thing about changing some settings and values from the PC settings section is that you don’t need to click an “Apply” and “OK” button just to save all the changes made. Everything is automatically saved the moment you change them so all you need to do is just close the metro screen where you made changes on and proceed with what you have been working on previously. There are still a lot of things to discover in this same section where the mouse options are available but since we’re running out of space on this tutorial, we will just discuss them in the upcoming articles that will be published here on windowstechies.loc.