Working with Pictures Using the Camera App
Cameras are common in today’s mobile devices like smartphones and tablets and the rise of social networks has also made it become more popular. We’ve seen our world evolve from a simple snail mail generation to a more complex one equipped with devices that help facilitate faster communication between friends and families wherever they are in the world and one way that people do this is by taking videos and still images and having them sent to the other end with social networks and other ways. Of course, these things will not be possible without a Camera app that will do the job of recording video clips or capturing still images.
In the most recent tutorial that I have covered, we’ve learned the basics in using the Camera app in Windows 8.1 such as recording videos, capturing snapshots and as well as accessing all the images and videos that you were able to take using the app but that’s not everything yet. The Camera app built-in with every Windows 8.1 machine still has a host of other options that you need to learn especially in editing pictures that you took with it and that’s what we we’ll be talking about in this tutorial. But first, you need learn some awesome features that has been added to the functions of modern style apps which you can get by installing the latest Windows Update.
What’s new with Windows 8.1 Modern Apps
Before meeting the other options for the Camera app head on, you will first need to become familiar with some improvements done to the ways they can be handled but first, you will need to make sure that Windows is updated to the latest version on your computer. If you’re sure that you have already installed the latest update then you will be able to access these improvements without getting lost.
For instance, there’s already a “Minimize” and “Exit” button located at the top-right portion of the app screen which hides automatically when you don’t need them. To access these buttons again, all you need to do is let the mouse pointer touch the top edge of the screen and the narrow black bar containing them will appear.
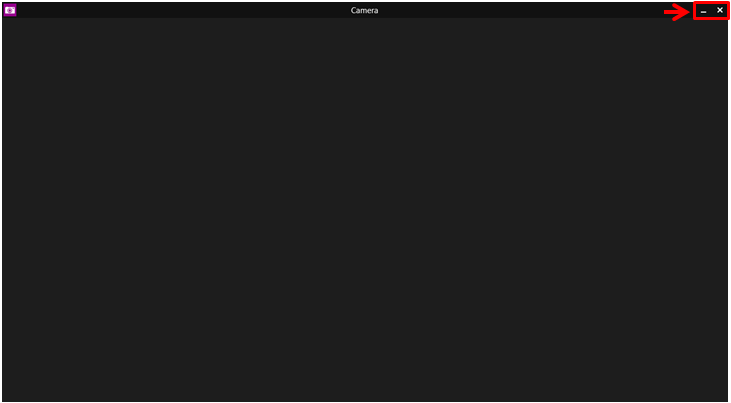
When you click on the app icon on the top-left portion of the screen which also lies on the narrow bar that contains the “Minimize” and “Exit” buttons, you will also be able to access some other app screen options that will let you take control of the position of the Camera app. These app screen options are also available in other apps aside from the Camera app by simply clicking on the icon on the same location of the screen.

Now, try to minimize the Camera app and you will be taken back to the Desktop screen right away and you will notice that the Camera app’s thumbnail is on the taskbar. To open the app again, simply click on the thumbnail just like what you do with desktop programs that are minimized on the taskbar.

Quick Tip
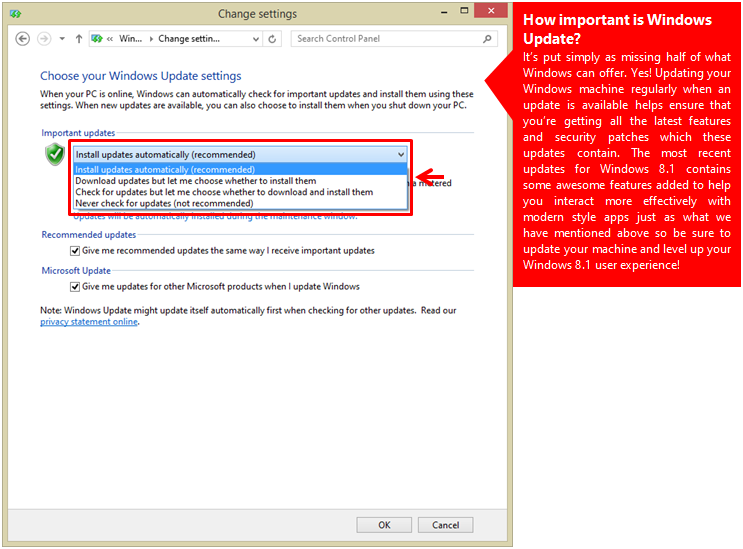
To have all important updates installed regularly, you need to set the Windows Update feature so it happens automatically without requiring you to do anything. To do changes on Windows Update’s settings, all you need to do is access the Control Panel Window by pressing the “Windows + X” keys. After doing so, you will be able to access a hidden menu where you will need to click on “Control Panel”.

Once the Control Panel Window opens, you will need to click on the “System and Security” link. After doing so, simply and when you arrive on the Windows Update screen, just click on the link that says “Turn automatic updating on or off” located under the “Windows Update” section.

On the next Window that opens, simply click on the drop-down options box under the “Important Updates” section and click on the option that says “Install updates automatically (recommended)” to enable automatic updating of your Windows 8.1 operating system. After selecting the option, just click on the “OK” button located at the bottom-right portion of the Window.
Other Camera App Options
In our previous Camera app tutorial, we’ve taught our readers on how to access the images and videos that were taken using the app. And now, you will need to access the “Camera roll” section again so you can access some other options that are available in the app itself. First we will be working with still images or pictures as we commonly know them.
Editing a Picture
The Camera app lets you edit the pictures that you have taken with it. To do this, all you need to do is open the picture that you want to edit by accessing it from the “Camera roll” and once you are on it, just right-click anywhere on the screen. After you do so, the App bar will appear at the bottom of the screen and from here, simply click or tap on the “Edit” option located at the extreme-right end of the bar.

After doing so, all available picture editing options will appear at the left edge of the screen. Just take time to explore what these options contain for now and we’ll just be covering the details in doing this in our next Camera app tutorial series.
Cropping a Picture
Just beside the “Edit” option that lies on the App bar is the “Crop” option. If you have a picture that has too much background on it then you can choose to remove all the other background stuff on it and create a new photo or update the picture itself into something that focuses in just one section of the image like your face, body etc. Doing this isn’t really that hard but we’ll discuss everything in greater detail on our next tutorial. For now, you can experiment with the option and learn things by yourself using some trial and error steps on test images.

Rotating Your Pictures
You might have a photo that is positioned upside down or any other position instead of the normal one which you want to rotate and correct so you can upload it to Facebook or do other editing tasks to it. If this is the case then you can use the “Rotate” option that is also located on the App bar.

After doing so, the picture will rotate to another position. Just keep on clicking on the “Rotate” option until the picture turns to the normal position.
Even More Options Available
As you can see, the Camera app has more than the needed options that you can use in working with the pictures that you took with it but the ones I have shown here are not everything yet. There’s still a lot more options, tweaks and settings that are accessible from the App bar which will help you deal even with the video clips that you took with the app but since we are running out of space and to save you the reading, we will be covering them on our next article for the Camera app series which will come up after this!