Working with File History from the Settings App in Windows 10
In our previous tutorial, we have talked about one of the very useful tool in the new Windows 10 operating system which can help you safeguard your files from being lost or corrupted but just like any other features found in the Windows operating system, this tool can also be accessed and tweaked from other locations apart from the traditional Control Panel Window.
Yes! There is actually a way in using File History on your Windows 10 computer which is a lot different from what we have shown in the previous article and that’s what we’re going to learn about in this tutorial.
Control Panel’s Modern Counterpart
Many users have been furious upon seeing what Microsoft did to Windows especially when the modern version dubbed as Windows 8 was released. This hasn’t stopped even in its supposed improved version called Windows 8.1 but thankfully, at the release of Windows 10, users have finally found some modern features more useful compared to the ones that came ahead (Windows 8 and Windows 8.1) especially when Microsoft decided to bring back the Start Menu and make it a lot better than before.
Now, Windows 10 is not just about the resurrected Start Menu and the colorful universal apps. It is also about the modern counterparts of the traditional features that makes it look and feel more awesome than its predecessors! One of the newest additions in these series of modern Windows OS (starting from Windows 8 down to the latest one called Windows 10) is the Settings app.
Yes! The traditional Control Panel Window which all of us surely went to whenever something needs to be tweaked now has a very functional modern counterpart called the Settings app. Accessing this feature is done in several ways just like all other features and tools in Windows and we’ll be showing you all the available methods in this tutorial.
Accessing the Settings App Using the Search Feature
One of the awesome improvements in the Windows 10 operating system is the Search feature that has expanded its capabilities and is now found almost everywhere within the OS itself. To find out how this tool performs, we will be using it to find the File History feature in Windows 10.
First, you will need to summon the Search app using a very simple keyboard shortcut. To do this, simply press the Windows + S keys and the Search App feature will pop up from bottom-left portion of the screen as you can see below.
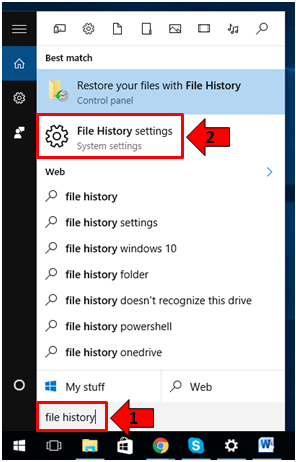
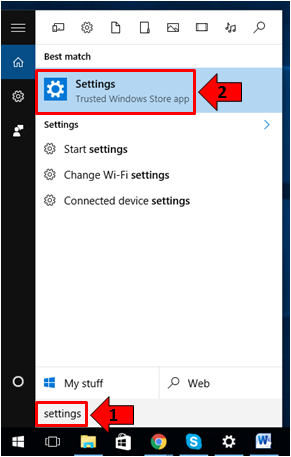
From this Search app screen, you will simply need to enter “file history” into the input box that is found at the bottom then hit the “File History settings” link from the search results. If you want to explore even more before going to the File History feature, you can type in “settings” and you’ll be able to open the “Settings” app instead simply by clicking on the “Settings” shortcut found at the top as highlighted on the screenshot below.
Aside from this quite complicated method in accessing the Settings app, there are also some other methods that are quite simple and that’s exactly what we’re going to tackle next.
Accessing the Settings App from the Start Menu
One of the things that we like best about Windows 10 when compared with its predecessors Windows 8 and Windows 8.1 is the resurrected Start Menu which now contains useful links that will help users access different aspects of Windows a lot faster including the new Settings app.
To launch the Settings app from the new and improved Start Menu, simply summon the Start Menu first by clicking on the Start Button at the bottom-left portion of the screen or you can also press the Windows key on your computer’s keyboard and the Start Menu should open instantly.
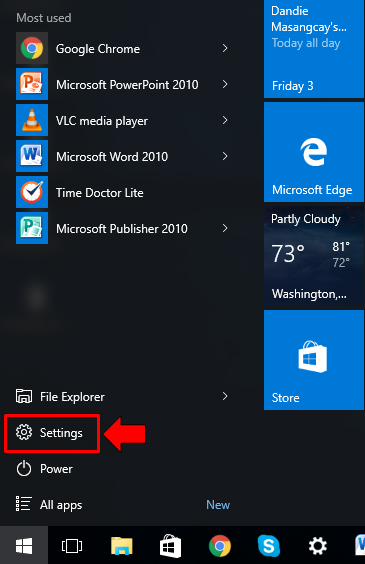
Once the Start Menu opens, simply click on the link that is found on its bottom-left portion which is labeled “Settings” as highlighted on the screenshot above and after doing so, the modern Settings app should launch right away sparing you of the lengthy process that we’ve shown in the previous step.
Accessing the Settings App Using a Keyboard Shortcut
If you want to learn the shortest method in accessing the Settings app in your Windows 10 computer then you would need to learn about the keyboard shortcut that is used in launching it. To do this, just press the Windows + I keys and after you do so, the Settings app screen should launch instantly without any other need of doing some additional steps.

As you can see, there are several ways in accessing the modern Settings app in Windows 10 and we’ve only shown the most familiar ones here. Now that you already know how to get into this new feature in the latest Windows operating system edition, let’s go to the next part which will now involve accessing the section where the File History settings are located so just read on and follow every step that we are going to show as we move on.
Accessing the File History Settings Section
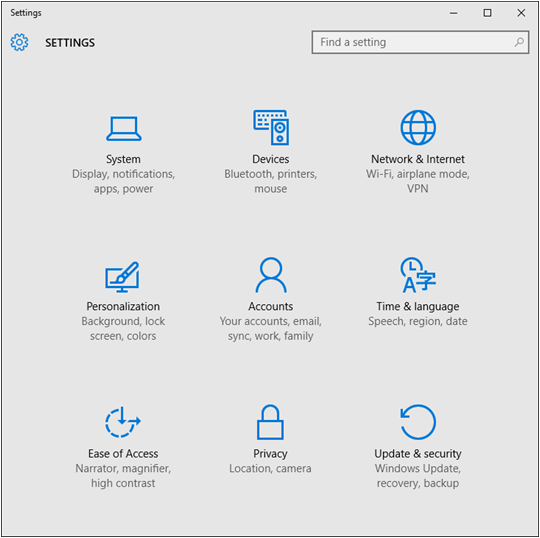
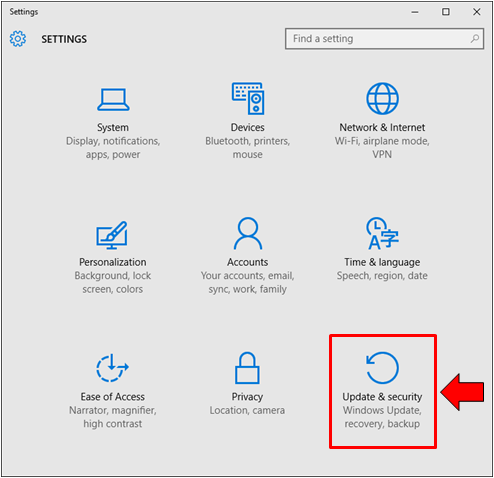
The main Settings app screen has 9 sections and in order to access the File History settings in it, you will first need to identify which section you would need to enter. Since File History is more of a security feature, you will simply need to click on the “Update & Security” section as highlighted on the screenshot below.
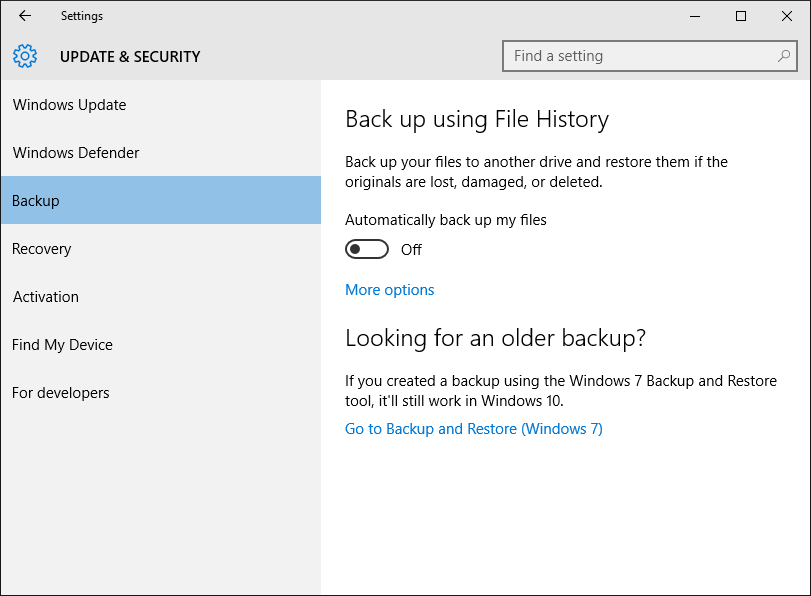
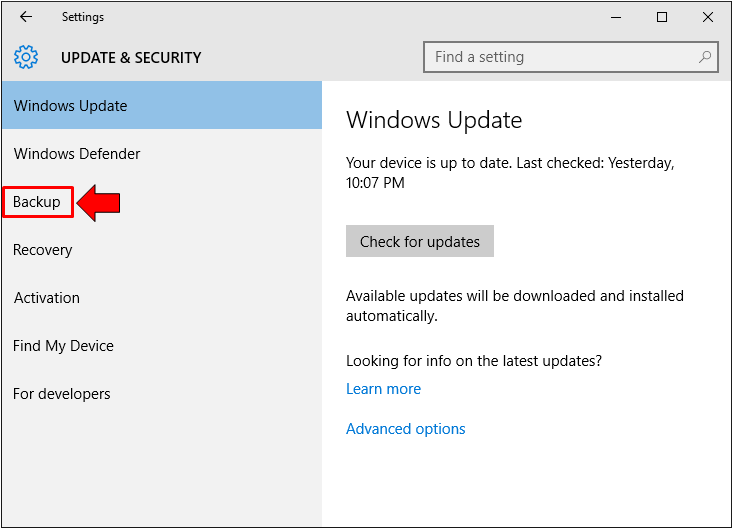
After clicking on the “Update & Security” link, you will now be able to enter the section where the settings for your computer’s update and security aspects are found. From here, you will see 7 links located on the navigation pane at the left and in order to access the File History settings, just hit the link that says “Backup” as shown below.
After hitting the “Backup” link, you will be able to see the File History switch which you can easily flip On or Off. Again, in order to use this feature, you will need to make sure that your File History backup drive is attached to your computer.
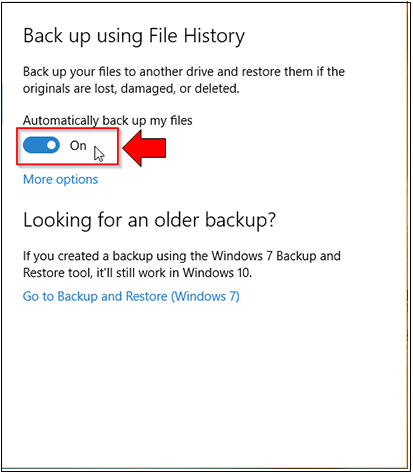
Now, if you look even closer, you’ll see another feature within the “Backup” section which has sadly been removed in Windows 8 and Windows 8.1 but is now making a comeback in Windows 10. This feature is called the “Backup and Restore (Windows 7)” feature and is very useful especially if you want to save backup of your important files just like what you were able to do in Windows 7 only this time, it is possible even in Windows 10.
In case you want to explore more about this classic feature, you should be able to notice that it will take you to the Control Panel Window so we will just be reserving it for our next tutorial.
Accessing More File History Settings and Options from the Settings App Screen
Aside from the On and Off switch that we’ve shown above, you can also access even more options in tweaking how File History works simply by clicking on on the link that is located just below the switch itself which says “More options”. After clicking on it, you will be take to a new screen where additional tweaks are found as shown below.
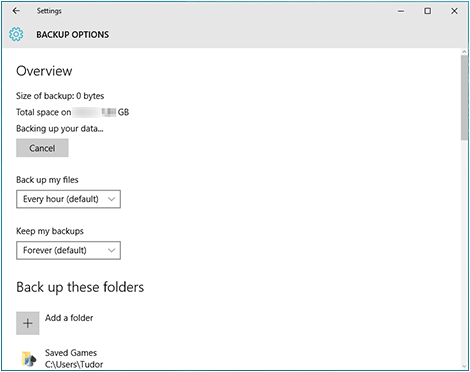
Just like the settings and tweaks found in the Control Panel Window as we have tackled in our previous tutorial, you can also set how often File History backs up your files from this Settings app section. It is done simply by clicking on the dropdown box that is found just below the “Backup my files” settings.
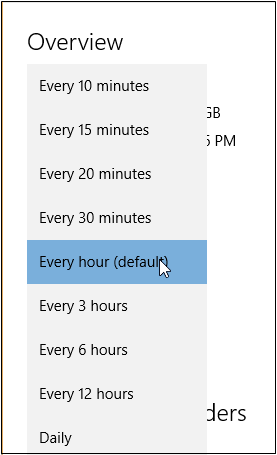
File History saves backup of your files every hour by default but if you don’t want this setting, you can simply select from the times that are available ranging from “Every 10 minutes” to “Daily” as you can see on the screenshot above.
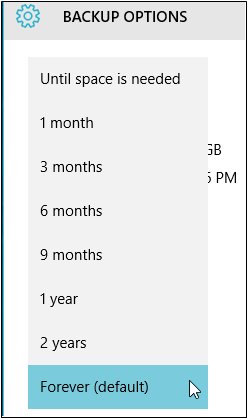
Another important tweak that is found under the “Overview/ More options” section of the File History feature is the one that allows you to choose how long backups are saved in the portable drive that you are using as a backup drive. The default option is set to “Forever” which brings the drive at risk of losing enough space so you can freely choose from other settings like a shorter period to avoid having problems related to the lack of storage space on your backup drive.
Choosing Which Folders to Backup
The next portion which is labeled as “Back up these folders” shows all available libraries and folders in your Windows 10 machine that are currently being backed up by File History and in Windows 10, this has been improved because users are now free to choose which folders to include or add to the stuff that are being backed up by the tool itself.
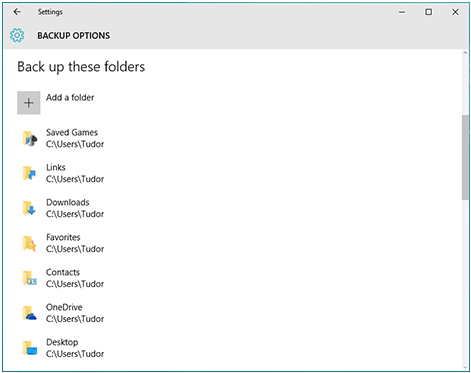
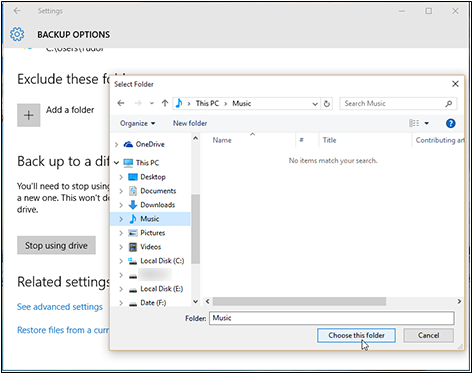
This is a big improvement compared to the File History tool found in Windows 8 which does not allow such tweak to happen so if you have saved some important stuff somewhere and you want it to be backed up to the drive that you are using then be sure to hit the “Add a folder” option and a new Window will open which will allow you to browse to the location of the folder that you want to be included in the back up. Once you find it, just click on it so it gets selected and hit the “Choose this folder” button at the bottom as shown on the screenshot below.
Now, if you can choose which folders to include in the back up, you can also choose which ones to exclude and that’s what we’re going to talk about in the next section of this tutorial.
How to Exclude Certain Folders from Being Backed Up
As was mentioned earlier, if you are allowed to choose which folders to back up, you should also be given the freedom to select the folders that you want to exclude from being saved or backed up.
You can do this tweak by scrolling downwards and hitting the “Add a folder” link that is found under the “Exclude these folders” section. After doing so, a new Window will appear which will now allow you to browse towards the location of the folder that you want to exclude then hit the “Choose this folder” button once you find it.
Now that you have already selected the folders to include and exclude from being backed up by the File History tool, it is time to learn how you can change the drive where back ups are saved just in case the current one suddenly runs our of storage space.
How to Change the Drive Where Back Ups are Saved
Finally, in case the drive that you are using as backup runs out of storage space, you can change to a different drive with bigger space simply by going into the “Back up to a different drive” section which is the bottom most one under the “Backup Options” screen. To do this, just hit the “Stop using drive” button and after doing so, you will be taken back to the main “Backup” Window where you will simply need to click on the “Add a drive” button.
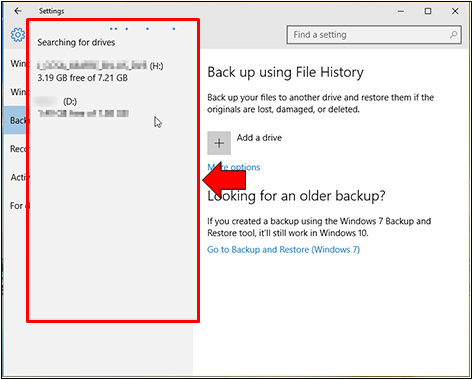
After hitting “Add a drive”, a menu will pop up where you will now see the available drives that you can select as the new storage for your back up files. Just make sure that the new drive is properly attached to your computer so it can be detected and would appear in the menu for your choosing as you can see on the screenshot above.
Do Tweaks Easier from the New Settings App
As you can see, Windows 10 has really been a great leap from its predecessors! It combines efficiency and improved productivity in one by providing a modern counterpart of the traditional Control Panel Window which is called the Settings app.
Now that you have learned how to use it in tweaking an important feature known as File History, you can explore even deeper into its inner workings and see which aspect of Windows can be tweaked from this modern feature. We’ll also publish even more tutorials showing some tweaks done from the Settings app so be sure to always stay updated with what’s the latest trend in your favorite operating system simply by subscribing to our newsletter!