Working With Hard Drive Partitions in Windows 8.1
The hard drive is one of the most important hardware that every computer has. It is where all your files are stored and where your computer’s operating system is installed. Taking care of this precious part of your computing machine is therefore a top priority but how can you do it if you’re just the average user who only knows a little bit of the basics? That’s what our website WindowsTechies.com is here for.
We would always want to make Windows operating system users more knowledgeable about the software that is running in their computers. Since we’ve started this website, we’ve already published close to 400 tips, tricks and tutorials for our readers to enjoy but that doesn’t end there. For this year, we are preparing some improvements and a lot more surprises for our regular readers as well as even more tutorials about the upcoming Windows 10.
But before you get too excited of all the stuff that we have revealed in the introduction of this tutorial, we will first get back to the real topic, how can you manage your computer’s hard drive and create partitions on it so you can save other files in a safer place? These things may sound a bit technical and they may even lead you to think that they can only be done by experts but in this tutorial, we will be showing you that taking care of your hard drive and creating partitions in it is a task that can be accomplished even by beginners. All you need to do is prepare your computer and carefully follow each of the steps that we will be showing below.
What is a Partition?
The practice called “hard drive partitioning” is one that has been available since the early versions of Windows. When you partition a drive, you are actually creating a separate logical storage where you can store important files or even install another operating system on. Partitioning in lay man’s term is the dividing of one physical hard drive into different independent storage portions. The partitioned portions of a hard drive will appear as different drives when you open the “My Computer” section of the Windows Explorer utility in Windows XP, Vista and Windows 7 or the “This PC” section of the File Explorer tool (new name for Windows Explorer) in Windows 8 and Windows 8.1.
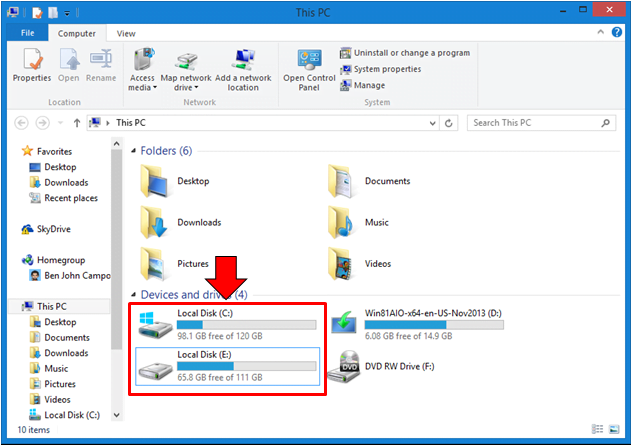
The screenshot above shows an example of two partitions existing in one computer. The hard drive partition where Windows is installed is always named “Drive C:” except if you change it upon installation. If you don’t find a partition that is labeled “C:”, just look for the one that has a Windows logo overlay and you already found the partition that has the operating system installed in it.
How to Rename a Hard Drive Partition
While on the “This PC” section of the File Explorer on your Windows 8.1 machine, you may choose to rename the partitions that are displayed under the “Devices and drives” portion. Changing the name of a hard drive partition is not the same as changing its label or the “Drive Letter” as others call it. For instance, on the screenshot above, you cannot change the “C:” ad “E:” drive letters but you can change the drive names “New Volume” and “System Reserved” into a different one. To do this, simply right-click on the subject drive and hit the rename option from the options box that will appear.
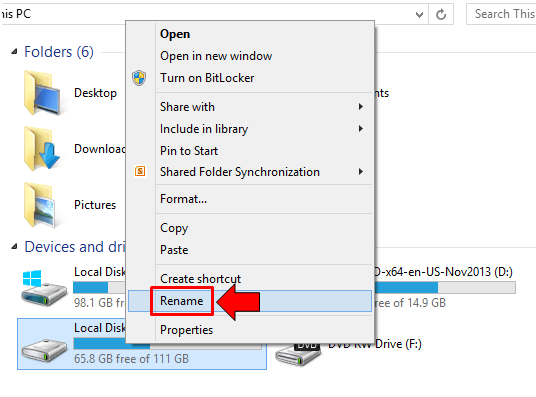
After clicking the Rename option, there will be an input box that will enclose the old name of the drive. Once you see this box, just click inside it and erase the old name of the drive then input the new one that you wish to set as the drive name. Once you are done inputting the new name, just click on an empty space within the Window and a prompt will appear that asks you to provide administrator permission. From this small Window, just click on the “Continue” button and the partition will now bear the new name that you have assigned to it.
Changing Hard Drive Letters
Now, we will go to the steps in how you can change partition letters. To start, you will need to open File Explorer then right-click on the “This PC” link that is located at the navigation pane at the left of the Window.
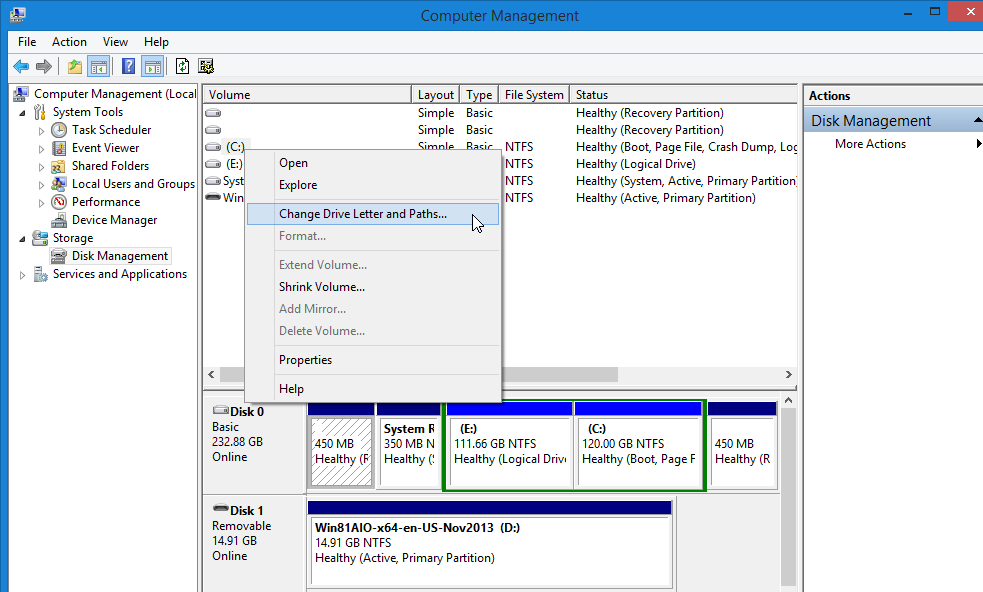
After right-clicking the link, there will be options that will appear inside a box. From here, all you need to do is click on the one that says “Manage” and the system will then initialize and load the “Computer Management” utility Window. In this Window, you will need to click on the “Disk Management” link that is located at the left and the hard drive partitions will display on it after a few seconds.
Once you see all available hard drive partitions, simply select the one that you want to change the “drive letter” for and right-click on it in order to access a menu box where you will need to click the option that says “Change Drive Letter and Paths…”. After the option is clicked, there will be a small Window that will appear and from here, just click the button that says “Change…”.
Now, another small Window will appear and from here, all you need to do is click on the button that contains the current drive letter and an arrow down icon beside it. After you do so, all available letters for the drive will appear in a drop-down options. Just select the new drive letter that you wish to assign to the drive then hit the “OK” button to save it.
Create Hard Drive Partitions and Do More Tweaks Using Third Party Software
Windows 8.1 actually has an effective hard disk management utility that is built-in with it but it has some limitations. For instance, you can’t combine two partitions to make a one partition with a bigger space or extend one partition by using unallocated drives. To do these things a lot easily, you can download a third party hard drive partition management tool like AOMEI Partition Assistant. This tool makes the task of combining partitions and doing even more tweaks to it a lot easier.
There are still a lot of other hard drive management tools which are available for free while others would charge you a free but whatever tool you use, just make sure that you are always taking note of the partition where the operating system is installed because it is the one that you need to take good care of no matter what happens. Any error that you commit may jeopardize the integrity of your computer and may even cause the contents of your hard drive to be lost permanently. If you are not confident enough to do the steps that we have shown in this tutorial then it is always best to ask help from a more knowledgeable person in order to safely perform the tweaks that you want to make.