3 Ways in Uninstalling Universal Apps From Your Windows 10 Machine
Windows 10 has been around for more than a year now and it all started with a great idea of merging two environments into one. Yes! The idea of an operating system for PCs that will have both the traditional Desktop programs and as well as handle mobile apps is the starting point of everything!
Microsoft simply wanted to merge these two separate worlds and the result as we can see in the latest Windows version is purely awesome! Not only is it easy to add features in Windows 10, the availability of mobile games also makes it more fun to use and PCs which used to be monotonous has now become all-purpose devices that can handle almost anything!
If you haven’t tried installing a universal app into your Windows 10 machine yet then you can try doing so by following the steps that are shown in this previous tutorial. Now, if you’ve added a lot of these apps into your computer and you’d like to remove some of them in order to free up some space, you can use any of the methods that we’re going to show in this tutorial so just read on to discover and learn how these are done.
1. Uninstalling Universal Apps from the Settings Feature
The very first method that we’re going to show is also the longest one but we decided to include it so you can be familiar of the new universal Settings app that is included in your Windows 10 machine. In order to launch this modern app counterpart of the Control Panel feature, all you need to do is press the Windows + I keyboard shortcut combination and the universal Settings app should launch instantly on your computer screen.
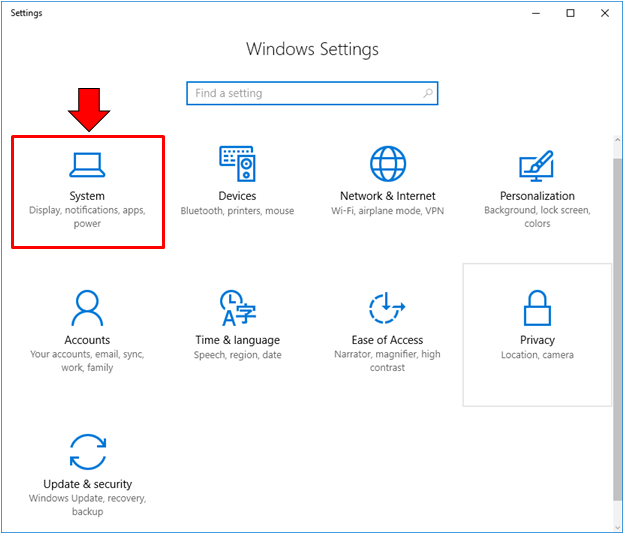
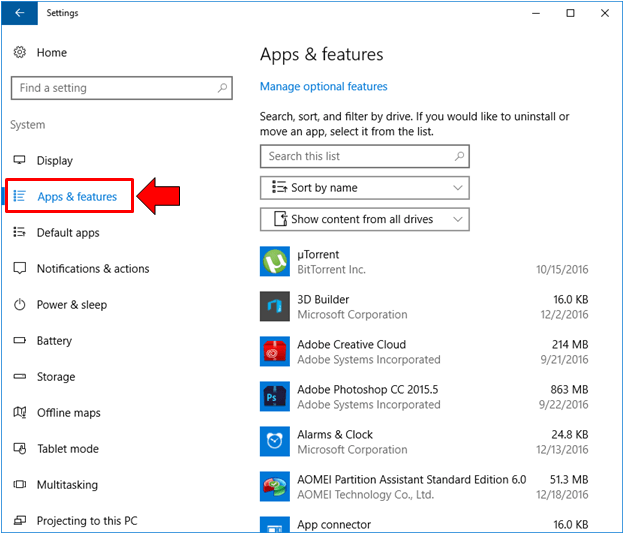
After you hit the “System” settings category, you’ll be taken to its contents and it should open to the “Display” section by default. In order to access the list of programs and apps that are installed in your Windows 10 machine, all you need to do is click on the link that is found on the navigation pane at the left which says “Apps & features” which is highlighted on the screenshot below.
A quicker way in accessing this section of the System settings category that is found on the universal Settings app is done using the Search feature. To launch Search, all you need to do is press the Windows + S keys and it should slide-up from the bottom-left portion of your computer screen. Once you have it, simply enter the words “apps & features” into the search input box that is located at the bottom as you can see on the screenshot below.
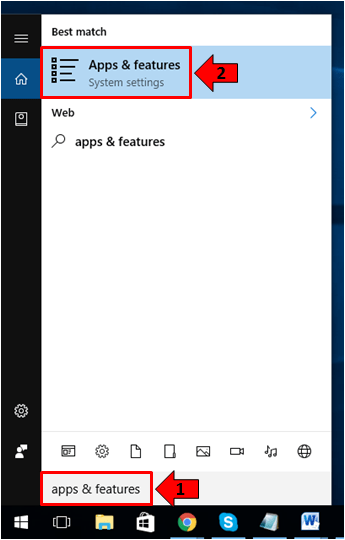
After typing the words “apps & features” into the search input box, the search results should appear just above it and from here, you will simply need to click on the shortcut link that is labeled “Apps & features” as you can see on the screenshot above. After you do so, you should be able to open the same section that we’ve accessed above and as you can see, it’s a lot quicker if you use Search. Now, in order to uninstall a certain app from your Windows 10 machine, all you need to do is look for the app itself from the list or you can also use the Search box that is found on top of the list in order to find it easily.
Once you find the app that you wish to uninstall, all you need to do is click on it and you should now be able to view two buttons on its bottom-right which are labeled “Move” and “Uninstall”. Since we are trying to completely remove the app, the “Uninstall” button is the one that you will need to click in order to initiate the app uninstall process.
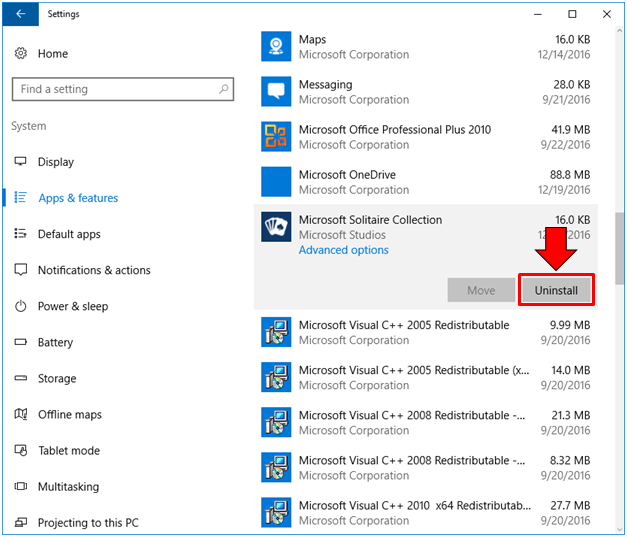
After clicking on the “Uninstall” button, you just need to follow the next steps that are going to appear until you reach the last one and successfully remove the app from your Windows 10 computer. Aside from this longest method in removing universal apps from your computer, there are also shorter ways in doing the same trick and that’s what we’re going to talk about next.
2. Uninstalling Modern Apps from the All Apps List of the Start Menu
Now that you know about the long method in removing universal apps from your Windows 10 machine, we’ll now discuss the other ways which are quicker and easier to perform. One of them is done from the “All apps” section of the Start Menu so the very first step that you will need to do is launch the menu first by pressing the Windows key or you can also do the same by clicking on the Start Button.
Once the Start Menu is open, all you need to do is look for the universal app shortcut from the “All apps” list that is located at the center portion and once you find the app, simply right-click on it in order to pull up some options that are available for tweaking the app itself as you can see on the screenshot below.

From these options that appeared inside a box after you right-click on the app that you want to remove, all you need to do is click on the option that says “Uninstall” in order to initiate the app uninstall process. After clicking it, just follow all the other steps that would follow until you reach the very last step and successfully remove the universal app from your Windows 10 machine.
3. Uninstalling an App from the Start Section of the Start Menu
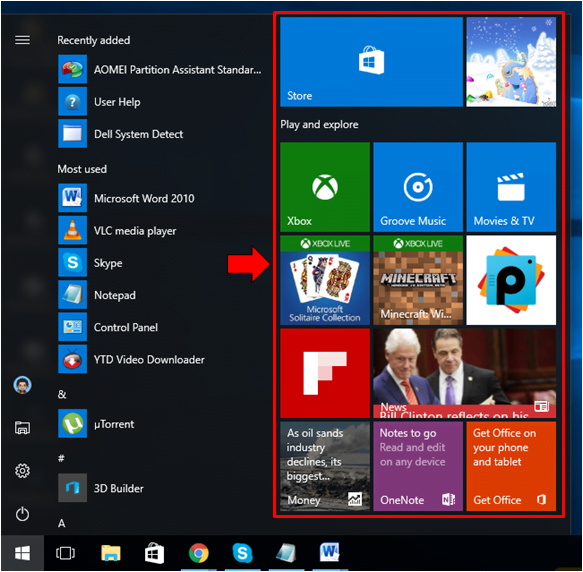
Now, aside from the “All apps” list, you can also view the universal apps that are installed on your Windows 10 machine from the Start section or the wide area that contains universal app tiles at the right portion of the Start Menu as you can see being highlighted on the screenshot below.
To be able to remove or uninstall a universal app from the Start section of the Start Menu in your Windows 10 machine, all you need to do is look for its tile and once you find it, simply right-click on it in order to access the options for tweaking the app itself as you can see on the screenshot below.
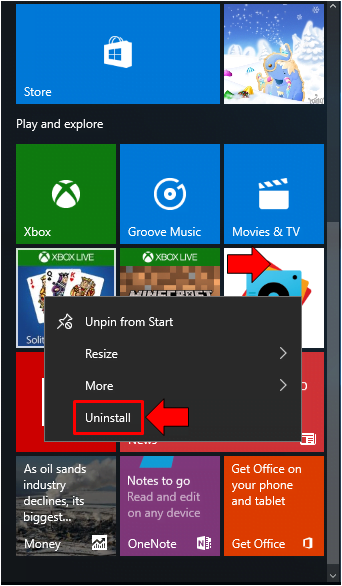
From this box of options that have just appeared on the beside the application tile that you have right-clicked, you should be able to see one that says “Uninstall” which is the last one on the list and all you need to do is click on it in order to start uninstall process for the selected app. After hitting the option, you will just need to follow all the other steps that would come up next until you reach the very last one and that’s it! You’ve now successfully removed the universal app from your Windows 10 machine!
Free Up Some Disk and Start Menu Space by Uninstalling Unused Universal Apps
Unlike Desktop programs, all of the universal apps that you install into your Windows 10 machine automatically creates a tile on the Start section of the Start Menu and in time as you install more and more of them, the Start Menu can become cluttered. That’s the reason why it is good to remove or uninstall unused universal apps from your Windows 10 machine and you can choose from the three methods that we’ve shown above for doing this trick.
Uninstalling universal apps can’t be done from the “Programs” section of the Control Panel feature since it is only intended for Desktop programs so no matter what you do, the modern apps that you’ve installed on your machine will never appear in it. If you want to learn the different ways in uninstalling Desktop programs from your Windows 10 machine then we recommend that you read our previous tutorial which shows 4 different ways in doing so.
Have you followed the steps that we’ve shown above but got stuck in one of the steps? If you did, please let us know using the comments section below and we’ll do our best to get your problem covered in one of our future tutorials.