7 Tips for Taking OneDrive’s Use to the Next Level
We’ve already talked about most of OneDrive’s features that you can take advantage of but there are still even more to this free cloud storage from Microsoft than what we’ve already discovered in the previous tutorials and this time, we will talk about them in detail so you can use this feature to its fullest. OneDrive takes cloud storage features to the next level and even adds more awesome stuff for Windows users to enjoy like adding so get your Windows 8.1 machine ready and follow whatever steps that will be shown as you read through this article from top to bottom.
1. Accessing OneDrive from the Desktop Screen
In a previous tutorial, we’ve discussed the steps in how you can access the OneDrive folder or what is also known as the OneDrive library from your computer’s desktop screen but in case you missed it, here are some simple steps that you can follow:
First, simply press the Windows key to access the Start Screen then get to the Apps view section by moving the mouse over the screen itself. Once you see a round button with an enclosed arrow down icon from the bottom-left portion of the Start Screen, you will need to click or tap on it so you can access the Apps view section. From here, all you need to do is scroll towards the right until you see the “Windows System” category where you should find File Explorer.
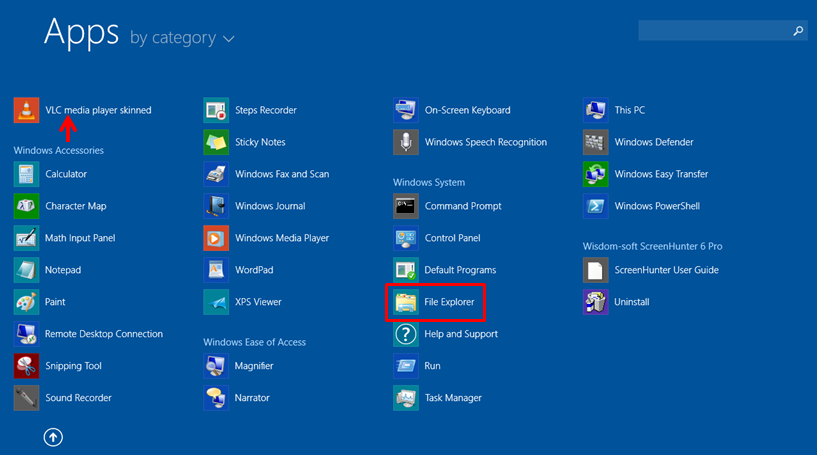
When the File Explorer Window opens, you can simply click on the OneDrive item that you can find from the navigation pane that is located at the left-hand side of the Window and the files and other stuff that you saved in it will automatically display on the contents pane.
2. Adding the OneDrive Folder to the Start Screen
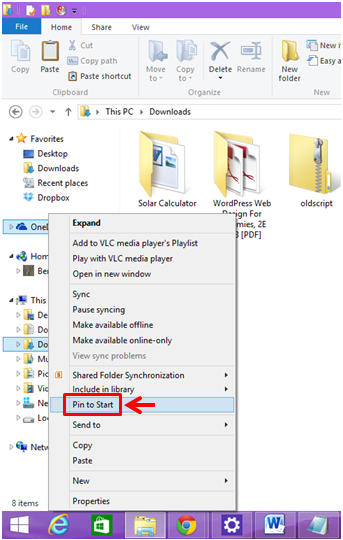
If you want to get easier access to your OneDrive folder’s contents, you can simply add a OneDrive folder shortcut into the Start Screen and the steps in doing it is extremely easy, you can even accomplish it even with your eyes closed. To do this, just open File Explorer as I have have explained in the steps shown above and once the File Explorer Window opens, just right click on the OneDrive item from the navigation pane at the left. After you do so, a menu will appear inside a box and from here simply hit the option that says “Pin to Start”.
3. Adding a New Folder to OneDrive
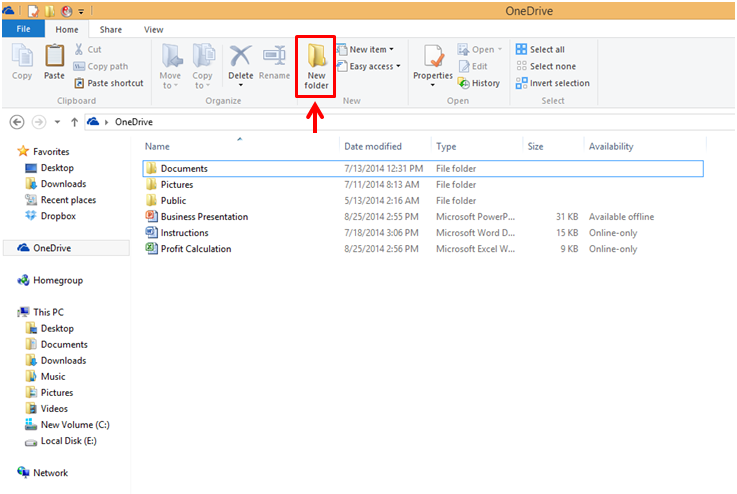
The OneDrive library has three default folders in it which are “Documents”, “Pictures” and “Public”. If you want to add a custom folder where you can store your special files into, you can simply use the options for adding folders from anywhere on your computer. To do this, just open the OneDrive library from the File Explorer Window and after doing so, you should see all of its current contents. From here, you can right-click on an empty space and on the right-click menu that appears, just point your mouse to the option that says “New” then more options will appear where you simply need to click on the one that says “Folder”.

Another way in creating a new folder in OneDrive is by clicking on the “New folder” option that is located at the ribbon on top of the Window as shown below. You can also do this even in other libraries and folders. Once the new folder appears on the screen, all you need to do is type in the name that you want to assign to it and move all the files into it to make everything organized and easy to find.
4. Renaming a Folder in OneDrive
In time as you store more files into OneDrive, you will need to do some organizing tasks in it like creating folders and naming them accordingly and when the time comes that you run out of space, you might need to delete useless folders or rename some and combine its contents. Renaming a folder in OneDrive is done in the same way as doing it in other libraries, simple select the folder or file that you want to rename then hit the rename option on the ribbon at the top of the Window.
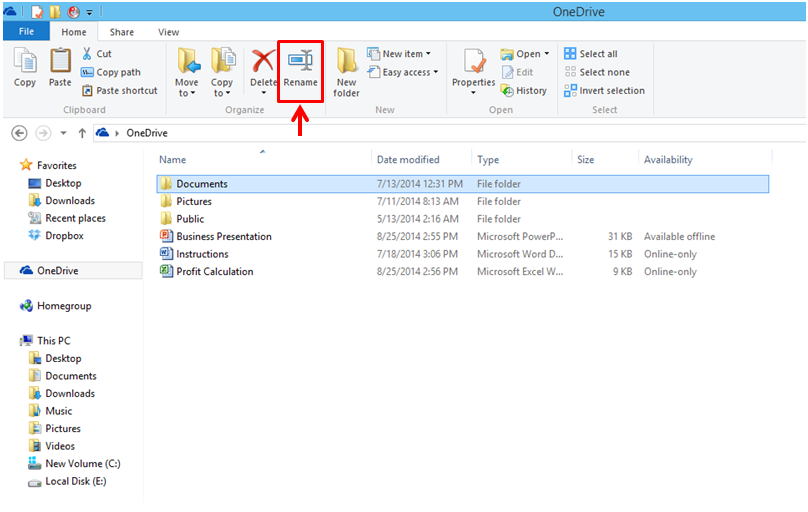
After doing so, you will notice that the name of the folder will already be enclosed and highlighted in an input box and a cursor will appear at its end portion, just press on the “Backspace” key in your computer’s keyboard and you will see the name of the folder disappear. When this happens, you can already input the new name for the folder or file and just click an empty space outside to save the new name. Another way in renaming a file or folder is by simply right-clicking on a file then hitting the “Rename” option that is on the right-click menu that will appear.

5. Making Files Available Offline
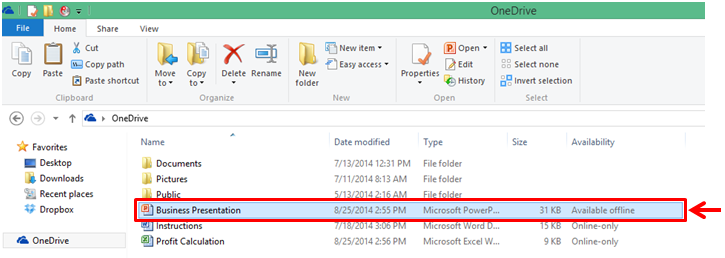
When you upload files to your OneDrive account from your favorite browser, you will be able to see it even in the OneDrive library since everything that you upload online will be synced to the OneDrive folder in your computer however, you will notice that it says “Online-only” under the “Status” column. This means that the file is not readily available offline and you need to download it in order to get the file available even when you don’t have an Internet connection. To do this, you can right-click on the file then hit the “Make available offline” option from the right-click menu that appears.

Another way in doing this is simply by double-clicking on the item itself. After you do so, you will notice that it will be downloaded straight to your computer and the “Status” will now say “Available offline”. When you try to open the file or folder, it will now be opened using its corresponding Microsoft Office app.
6. Make Folders Available Online-Only
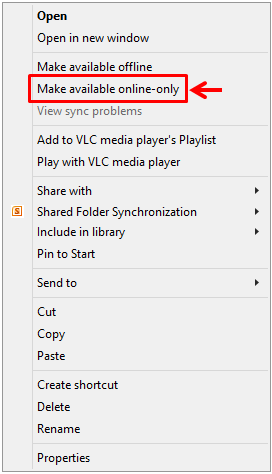
On the other hand, folders that you created in the OneDrive library or those that you added offline will have an option that will allow you to just have it available online. To do this, just right-click on it and on the right-click options that will appear, you will need to click on the one that says “Make available online-only”.
7. Get Familiar with the OneDrive Icon on the System Tray
While working with the OneDrive library in your Windows 8.1 machine that is connected to the Internet, you will notice its icon would also have some changes when you do some things in the library itself like uploading files or deleting as well as renaming some. If you can’t see this icon, it means that it is hidden and you can only see it when you click on the arrow up icon that is located at the extreme-left portion of the system tray.
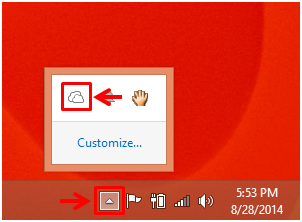
After you click the icon, a box that contains all hidden system tray icons will appear and the one for OneDrive should also be included in it. To move it into the system tray and make it always visible, just click-and-hold then drag it into the position that you want it to be on. When you copy a file to the OneDrive library, you will notice that the icon will have an overlay which looks like the screenshot below.
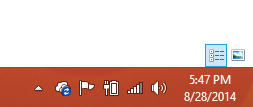
When you lose connection to the Internet while a file is being synced or uploaded into your OneDrive account, the icon on the system tray will change and have a triangular icon overlay that has an exclamation point (!) in it just like what appears on the network status icon when you lose network or Internet connection.

If there’s an error in the syncing process itself or in one of the files that OneDrive is trying to sync with your cloud account then you should be able to see a red circle overlay with an “x” mark in it. If this happens, you can try to upload the file using a browser and see if the problem would still occurs.
OneDrive: An Omni-Purpose Tool for Keeping Your Files Safe
As you can see, OneDrive is more than just an ordinary cloud service and because it is developed by Microsoft, it perfectly works with plenty of other features of the Windows operating system. In our next tutorial, we will be talking about the remaining features that this free cloud service has so be sure to stay in tune with us here on windowstechies.loc!