Making the Best Use of the Taskbar in Windows 8.1 (Part 2)
In our previous tutorial, we’ve shown you some of the hidden features that the Taskbar has which is not known to most beginners and even to some average users but since we ran out of space, we’ve decided to have the rest in a separate tutorial as a continuation of the first one.
So what other stuff things can the Taskbar do aside from handling active apps and programs and adding quick access toolbars that can bring up Windows, links, web addresses and more in a single click? The answer will all be discussed in this second part so be sure to read everything towards the end to learn more about this best ever feature that is found in every Windows computer.
View Important System Notifications from the Action Center
Every operating system, no matter what brand it is needs a feature that is capable of notifying users about problems and other important things that the system is experiencing. Something like a warning system that ensures the well-being of the system as a whole to avoid chain reactions that originate from one single trouble that was left unsolved.
Luckily, Windows has this feature which is called the “Action Center” and again, it is found on the Taskbar in a section which is called the “System Tray” as highlighted below.
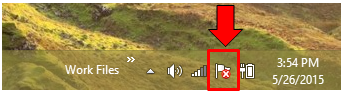
As you can see, the Action Center icon on the screenshot has a red “x” overlay which means that the system is currently detecting a potential problem that needs your attention. To view what the problem is, all you need to do is click on the “Action Center” icon and a Window that lists all the problems that has been detected will be shown.
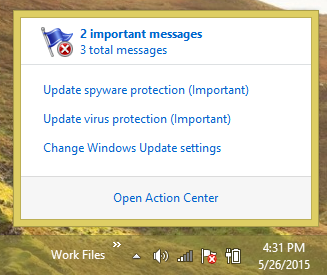
Aside from listing the problems that your computer is currently having, the Action Center also displays pop-up notifications of the problems that it detects in real-time. This means that you can actually be aware about a system problem like an outdated antivirus software instantly when it happens or when the Action Center detects it. When these pop-up Action Center notifications appear, you can choose to just ignore it or you can also click on it to open the section where you can find solutions and start solving the problem.
Get a Peek on What’s in your Desktop Screen
Clicking the extreme-right end of the Taskbar minimizes all open Windows and takes you instantly to the Desktop screen but do you know how to activate the “Desktop Peek” feature which allows you to view the Desktop without minimizing the active Windows on your computer? If you don’t know how to do this trick yet then here’s how it’s done.
First, you will need to point the mouse to the extreme-right portion of the Taskbar and once it’s there, hit the right-click button. After you do so, there will be a menu that will appear which contains two options as shown below.
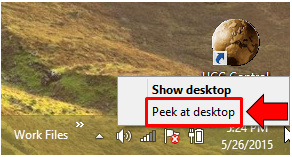
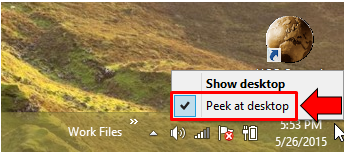
From these options, you will need to click on the one that says “Peek at desktop” in order to activate the “Desktop Peek” feature. After this option is clicked, it will now have a check mark which means that it has already been set active.
To test whether it really is activated or not, you will simply need to point the mouse to the extreme-right portion of the Taskbar and once the pointer is sitting on top of it, you should be able to see the Desktop screen without doing anything else. If you remove the mouse pointer from where it is, you will be taken back to the Window that has previously been open on your computer screen.
Arranging Windows Using Options from the Right-Click Menu
In the process of showing the features that are found on the “Taskbar” in Windows 8.1, we’ve shown the right-click menu that appears when an empty space on it is right-clicked and in this menu, there are still some items that has not been tackled yet which can help you arrange open Windows easily without dragging them to your desired positions. To do this, you will simply need to right-click on an empty space of the Taskbar and the right-click menu will appear as we have mentioned earlier.

The highlighted options on the image above are the ones that will help you organize Windows instantly in a single click. To see what they all do, we’ll try each one of them. The options sound pretty basic but they all serve as a very good shortcut in arranging Windows easily without that much effort on your side. First, let’s click on the option that says “Cascade windows”.
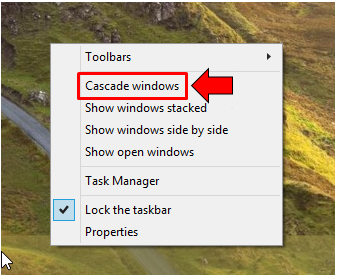
The “Cascade windows” option is listed as the second one on the right-click menu so you should find it easily, if you click on it while there are active Windows on your computer, you will see that the all open Windows will be arranged in the same way as the Windows shown on the image below.
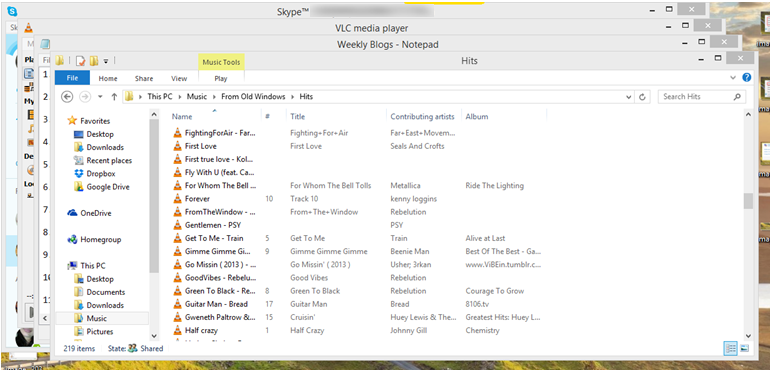
The “Cascade windows” option is a very good arrangement if you want to easily switch between open program and app Windows. Now, we come to the next option which is labeled “Show windows stacked”. To apply this windows arrangement on your computer that currently has some open program and app Windows, simply click on it and the active Windows on your machine should look like the ones show on the screenshot below.

Arrange Windows Side-by-Side in One Click
Another arrangement for the program and app Windows that are currently active on your computer screen is called “side by side”. This trick can be done by using the drag-and-drop method where you click-and-hold on one active Window and drag it towards the left or right until the mouse pointer touches the edge and release the left-click button once a silhouette of the Window taking half of the screen appears, there’s also a way of doing it from the Taskbar which will only require a single click.
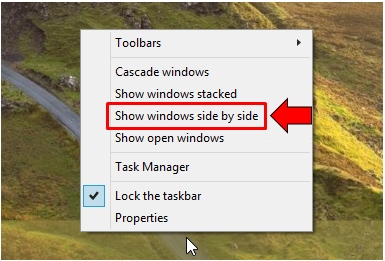
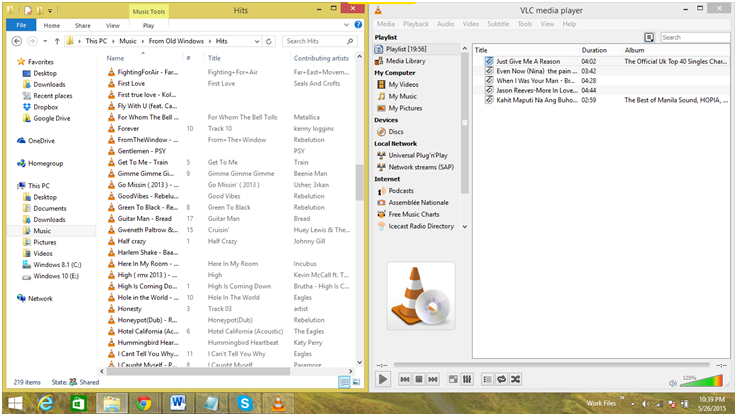
To do this, you will need to make sure that the program/app Windows that you want to place side-by-side are currently maximized on the screen. Once this condition is met, just right-click an empty space on the Taskbar and on the right-click menu that will appear, simply click on the option that says “Show windows side by side” and the two maximized program/app Windows should be arranged like the one shown on the image below.
Other Options
Now, next to the “Show windows side by side” option that would appear on the right-click menu says “Show the desktop” and when you click on it, all the maximized program and app Windows will minimize in order to show the Desktop screen. There’s also an options for “Task Manager” which you can simply click in order to open the Task Manager utility which will help you close programs that are not responding or even those that has been frozen for extended periods of time and refusing to respond to any mouse or keyboard command.
As you have seen in these two part tutorial, the Taskbar really has some features that are beyond the uses that most of us thought it is intended for. Want to learn even more about Windows? We’ve compiled different tutorials for you. Just select a category from our tutorial archives and find the help article that you’re looking for only here on WindowsTechies.com!