4 Methods in Changing Drive Labels in Windows 10
Windows has a friendly way in making sure that users are not confused especially when identifying a certain drive that is attached and distinguishing it from that which is built-in with it or the hard drive. The hard drive is commonly named as Local Disk (C:) while portable storage devices such as a flashdrive may have different names. If it is a new one then it should be named after its brand or simply “Removable Disk”. This way in naming drives is already in itself however, if you want a more unique way in getting your storage devices named then you can change their labels using the 4 methods that we will be showing below. Just take note though that these methods will only work on flashdrives, hard disk drives and portable hard drives. They will not work if you try to rename or change the label of a Blu-Ray disk, CD or DVD. All of the methods that we’re going to show in this tutorial will work in Windows 7, Windows 8.1 and Windows 10 so feel free to follow the instructions if you are using any of the mentioned Windows operating system editions.
Method # 1: Renaming Drives Using Windows or File Explorer
The very first method is surely a familiar one and you might even have been able to do it before in your Windows machine. If you are using Windows 7 then you will need to launch Windows Explorer or if you are on Windows 8.1 or Windows 10 then you’ll need to launch File Explorer. Once it launches, you will need to put your attention on the navigation pane at the left where you will need to click on the link that says “Computer” if you are using Windows 7 or “This PC” if you are on Windows 8.1 or Windows 10. 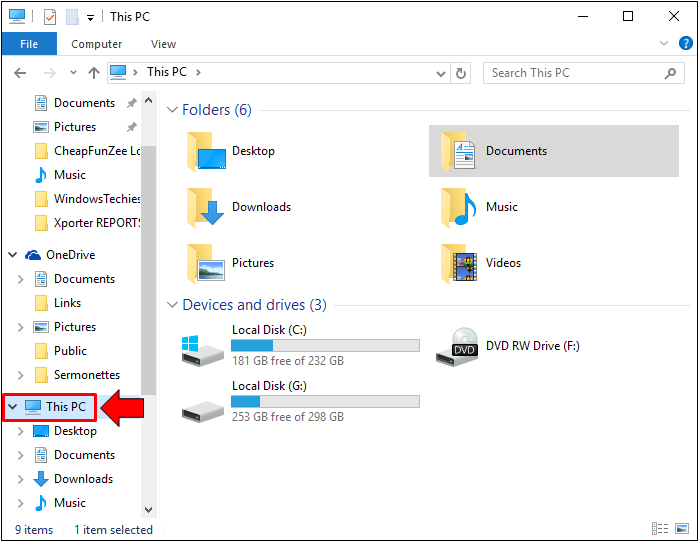 After this link is clicked, you will be able to view all available (both built-in and attached) drives on your Windows computer. Again, Local Disk (C:) is always the built-in hard disk drive where the Windows OS is installed (if you haven’t changed its label before). You will be able to identify the drive where Windows is installed because there’s a Windows logo on it as you can see below.
 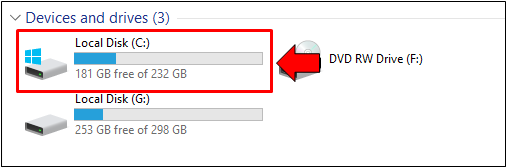 To change the label of a certain drive, all you need to do is right-click on it from the list and after doing so, you will be able to see a right-click menu where you will need to click on the option that says “Rename” as shown below.
 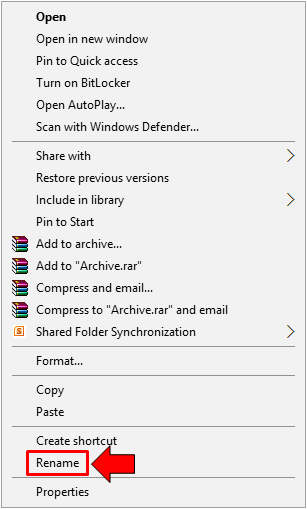 After doing so, the name that is currently assigned to the drive you have selected will be enclosed in an input box and you can simply delete it then type in the new one that you want to assign to the drive. That’s how simple it is to change the name of a drive if you do it in the Windows Explorer (in Windows 7) or File Explorer (in Windows 8.1 or Windows 10).
Another Quick Way in Changing Drive Name on File Explorer
Aside from the right-click menu, you can also change the name of a certain drive in your Windows machine using a very simple method. To do this, all you need to do is put the mouse pointer on top of the drive name, click and hold it then release the left-click button and press it again quickly the second time. After you do so, the name of the drive will be enclosed in an input box and it’s going to be ready for changing. 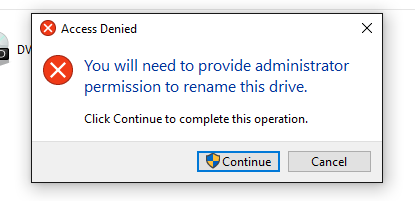 If you try to change the name of a drive that contains some system files in it, you will first need to provide administrator permission in order to set the new name of the drive. If you see a message that looks like the screenshot above, just click on “Continue” and the drive name will instantly be changed.
Method # 2: Renaming a Drive Using Command Prompt or Power Shell
Now, if you don’t like the mainstream way and you want to try something that’s not too common then you can use this second method. It is done with Command Prompt or Windows Power Shell. To start, you will need to launch Command Prompt by right-clicking on the Start Button or pressing the Windows + X keys in order to launch a hidden menu. Once this appears, simply click on the option that says “Command Prompt (Admin)” as highlighted on the screenshot below. 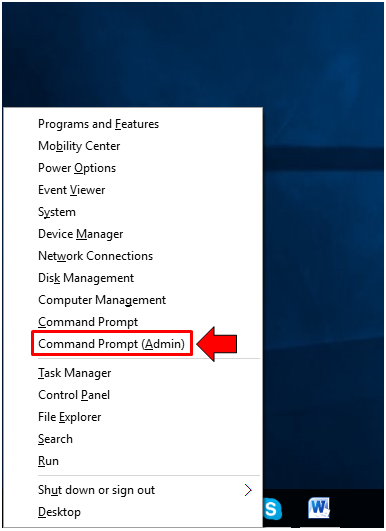 If you want to use Windows PowerShell instead, you can easily open it by first launching the Start Menu and once you are on it, simply click on the “All apps” link located on its bottom-left portion as shown below.
 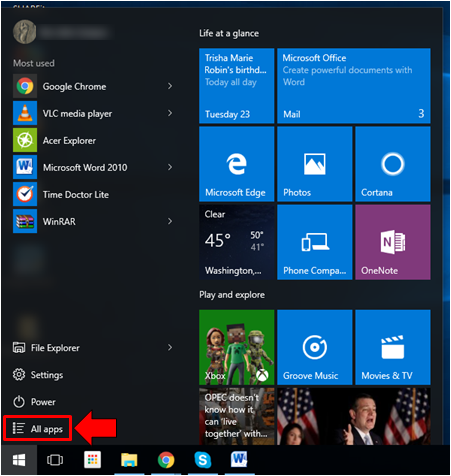 After this link is clicked, you’ll be able to view all the installed programs and apps on your Windows 10 machine. This programs and apps are arranged in alphabetical order so if you want to find Windows PowerShell, all you need to do is scroll down towards the “W” section and find the “Windows PowerShell”
 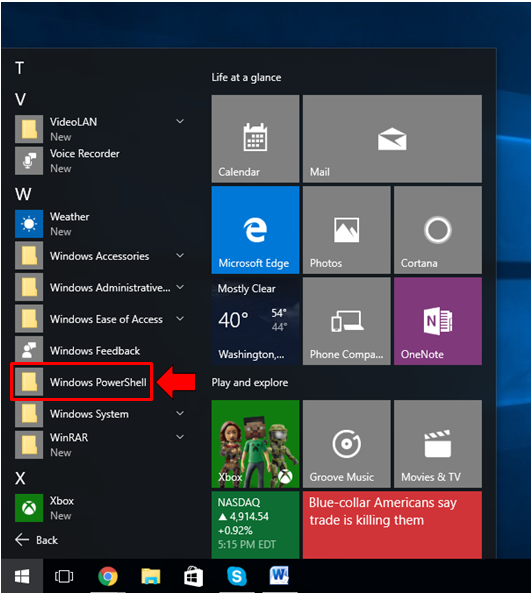 Once Command Prompt of Windows PowerShell opens, all that you need to do is enter the command that is shown below: label C: NewName The drive letter C: in this command is only an example. It stands for the letter assigned to the drive that you want the label to be changed or renamed. The NewName command should be replaced with the new label/name that you want to assign to the drive. So if it is the D: drive that you want to change the label/name of to “Files”, you will need to type in the command “label D: Files” (excluding the quotation marks) into Command Prompt or Windows PowerShell as shown on the screenshot below.
 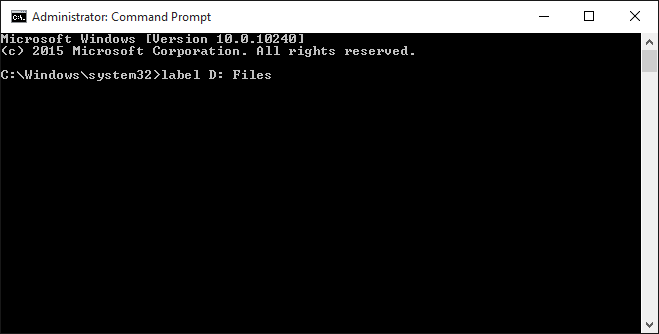 If you did it in Windows PowerShell, it should look like the one shown below.
 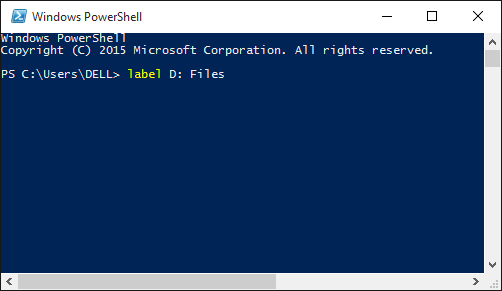 After hitting the Enter key, the command will not show a message that acknowledges the changing of the drive label but if you look into the “This PC” section of the File Explorer Window, you’ll be able to see that the label you specified is already applied.
Method # 3: Changing Drive Labels Using Disk/Computer Management Tool
There’s a very useful tool that is found in every Windows machine and is called “Disk Management” snap-in found within the “Computer Management” console. To launch this tool, all you need to do is open the “File Explorer” Window and once it launches, just right-click on the “This PC” item found on the navigation pane at the left as shown below. 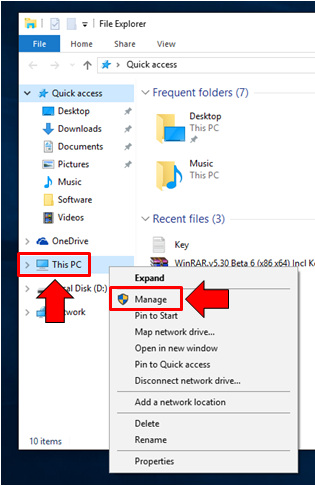 After right-clicking on “This PC”, simply click on the “Manage” option from the context menu that would pop-up as you can see highlighted on the screenshot above. After doing so, you’ll be able to open the “Computer Management” tool and from here, you should be able to see the different snap-ins that are located at the left navigation pane. Just click on the one that says “Disk Management” from here as shown below.
 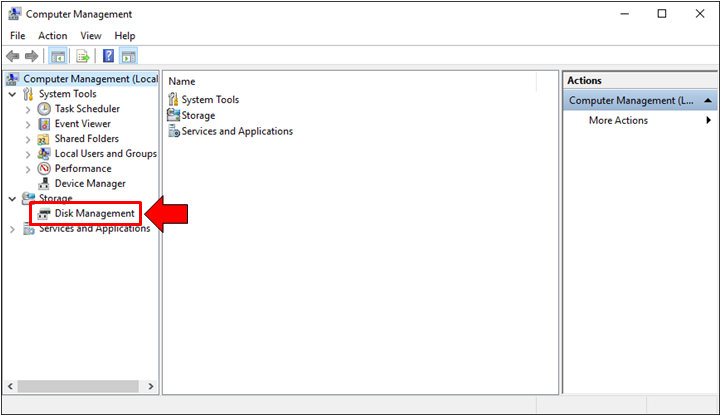 From here, you can change the drive name and assigned letter. In case you want the simpler tool, you can directly launch the “Disk Management” tool and use it in renaming the drive that you want to change the name of. To do this, you will first need to launch the Disk Management tool by pressing the Windows + X keys first in order to launch the hidden Admin menu.
 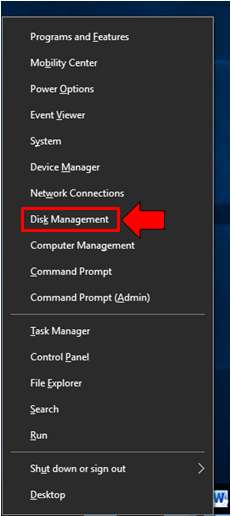 Once the Admin Menu pops out of the bottom-left portion of your computer screen, you will simply need to search for the “Disk Management” item and once you find it, simply click on it in order to launch the Disk Management tool.
 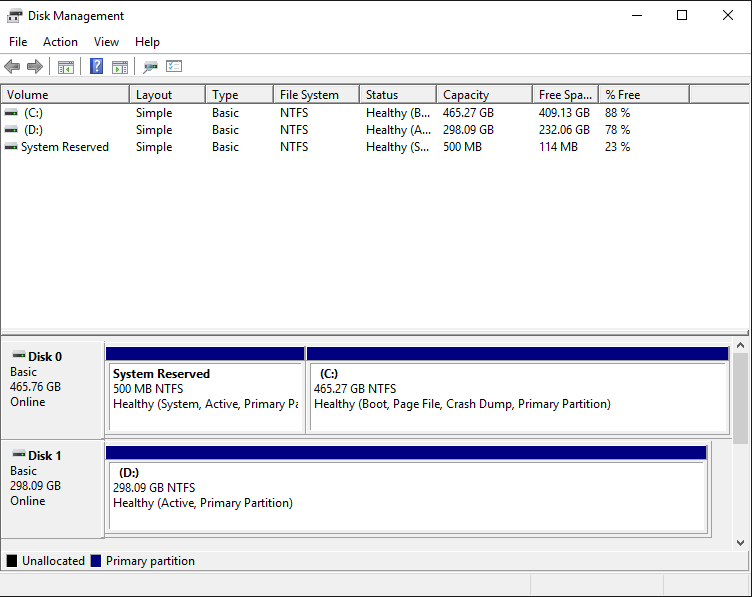 Now, no matter which tool you launched, the steps in changing the name of a certain drive is the same in both. Just right -click on the drive that you want to change name of and from the right-click menu that will appear, simply click on the option that says “Properties” as you can see highlighted below.
 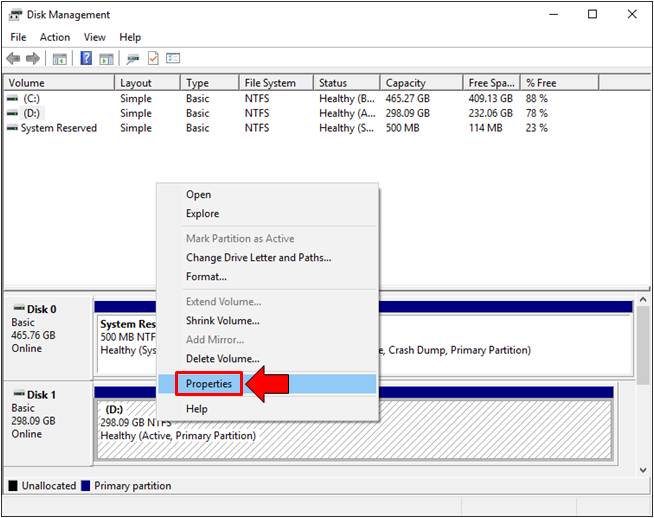 After hitting this option, the Properties Window of the drive you selected will open in a small Window. From here, just click on the tab that says “General” then enter the name that you want to assign to the drive that you have selected.
 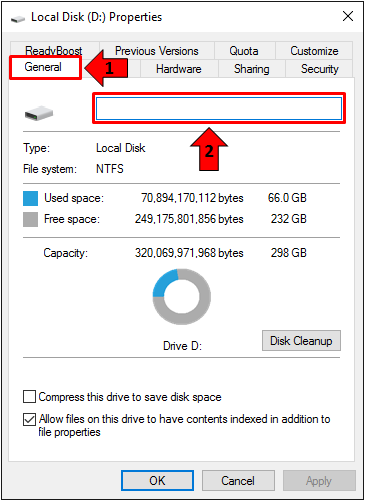 After entering your desired name into the input box, just hit the “Apply” then “OK” buttons then open File Explorer and you should be able to see the updated name of the drive.
Method # 4: Rename/Relabel a Drive Using the Autorun.inf File
Lastly, there’s one more method that you can use in renaming or relabeling a certain drive and it works best for removable drives although, you can also use it for the internal hard disk drive on your computer. When Windows detects and mounts a drive that has been attached to it, the system automatically checks if the autorun.inf file exists in it. The autorun.inf file contains information about the drive such as its name and as well as the icon that displays in File Explorer whenever it gets connected to your machine. If you really want to get one step further and be able to tweak and relabel certain drives the geeky way, you can learn this advanced step which we will be demonstrating in our next tutorial.
Identify a Drive Easily By Renaming It
Do you connect many different drives to your Windows machine most of the time which gets you confused because they the same default names? Avoid being confused by renaming each one of them using the steps that we’ve shown above. Just select the method that you like best and follow it in order to get everything named according to their content or use. You can also learn more about the Windows 10 operating system by browsing through our library of tutorials which will surely help you use this newest Windows OS like a pro!