9 Ways in Launching the Disk Management Tool in Windows 10
Previously, we’ve shown the steps which are involved in creating a new hard drive partition in Windows 10. Along with the process, we’ve demonstrated 3 different methods in launching a tool called Disk Management. The tool itself is needed since it bears the wizard that will guide users through all the steps so everything completes like a breeze.
But just like any other tool that is found within the Windows operating system, launching Disk Management can be done in several ways. If you want to feel more like an expert knowing several methods in accessing a single tool and in this case the “Disk Management” tool then you will need to read this tutorial towards the end.
Here are 9 different ways in launching this handy tool in your Windows 10 machine.
1. Launching Disk Management from the WinX Menu
When taking a tough test in school, it is always good to start with the easiest questions or problems (in case you are taking Math) then move down towards the harder ones. This saves time and energy on your part and that’s exactly the same thing that we’re going to do in this tutorial. Yes! We will be starting with the easiest and the simplest method in launching the Disk Management tool which is done by first pressing the Windows + X keys.

Right after pressing the keyboard shortcut combination, you should be able to launch the WinX menu which will open on the bottom-left portion of the screen and from here, all you need to do is click on the link that is found on it which says “Disk Management” as you can see being highlighted below.
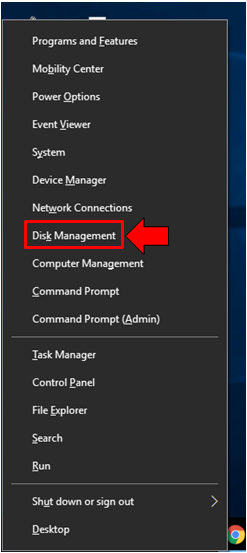
After clicking the link, the Disk Management tool should launch in an instant ready and prepared for some disk splicing task!
2. Accessing Disk Management Using the Run Tool
Another easy method that is available in launching the Disk Management tool or even any other system tool that is found in the Windows 10 operating system is done using a tool which is called the “Run box”. The tool itself is quite hidden within the operating system and looking for it would take some time but thankfully, it can be opened quickly by using a keyboard shortcut combination. To do this, just press the Windows + R key and the Run tool should open on the bottom-left portion of the screen as you can see below.
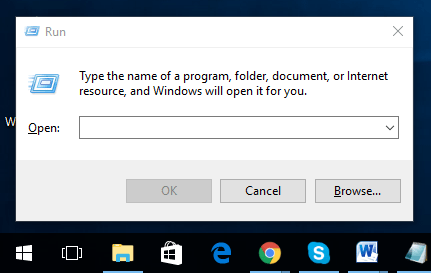
Once you see the tool, all you need to do is click inside the input box that is found on its center portion then enter the words “diskmgmt.msc” excluding the quotation marks of course and after doing so, you can simply click the “OK” button found at the bottom as you can see being highlighted on the screenshot below.
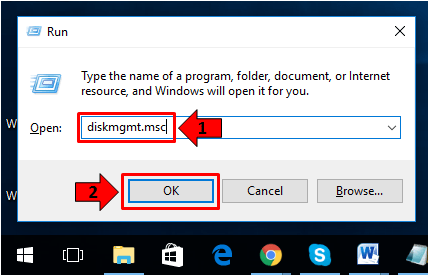
After hitting the “OK” button, the Disk Management tool should open on your computer screen and you can start using it in managing the disk drive partitions that are available on your Windows 10 machine.
3. Launch the Disk Management Tool from the Computer Management Window
There is another tool that is available in Windows 10 which makes the Disk Management tool become “A Tool Within A Tool”. It might sound quite confusing but what we are actually referring to is the Computer Management tool that contains a set of other tools that are available in every Windows machine not just Windows 10 but even in older Windows operating system versions.
So technically, you will be launching 2 tools in this method. First, you will need to launch Computer Management tool by going to the File Explorer Window. If you don’t know yet how to launch File Explorer, you can read this tutorial which shows 8 available methods in launching it. The quickest method is done by pressing the Windows + E keyboard shortcut combination.
Once File Explorer opens, just right-click on the “This PC” link that is found on the navigation pane at the left in order to launch an options box as shown on the screenshot below.
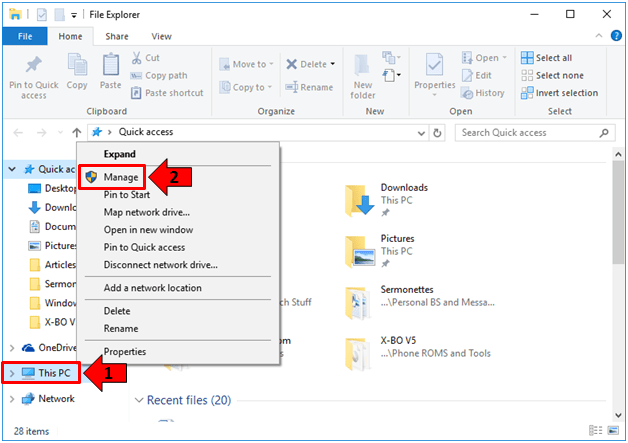
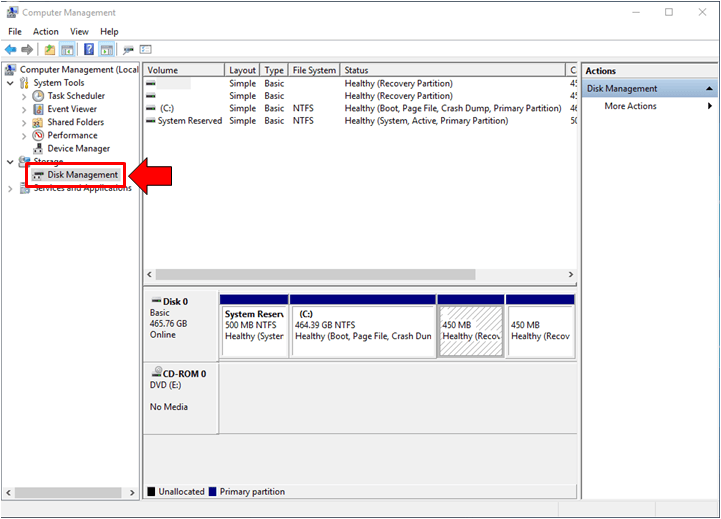
On this right-click options box, just click on the item that is found in it which says “Manage” as you can see on the screenshot above and the Computer Management Window should now open. From here, you will again see a navigation pane at the left and finally, just click on the link that says “Disk Management” in order to open the tool within the Computer Management tool as you can see on the screenshot below.
4. Open Disk Management from the Universal Settings App
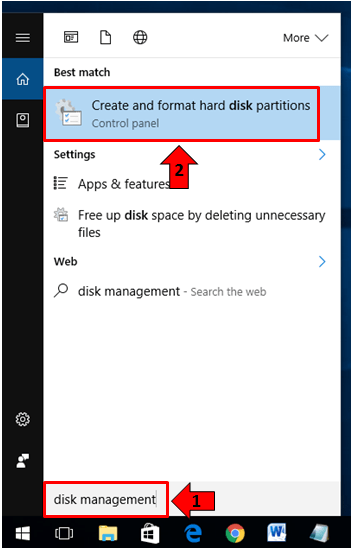
Windows 10 has another environment which represents the modern side of the operating system. It is called the Metro environment and it basically looks like the interface that you would find in mobile Windows operating system versions found on smartphones and tablets. To access tools from one of the features that represent this modern interface which is called the universal Settings app, all that you need to do is press on the Windows + I keys so you can launch it then type the words “disk management” excluding the quotation marks of course into the search input box that is found on the top-center portion as you can see below.
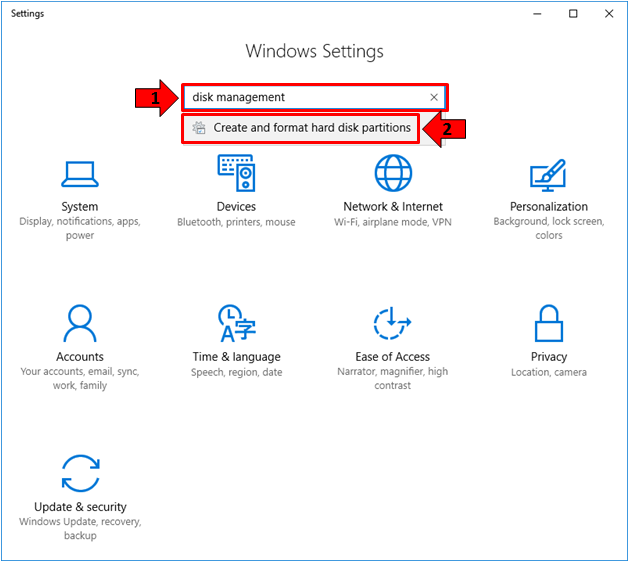
After typing in “disk management” a search result suggestion will appear just below the box which says “Create and format hard disk partitions” and in order to launch the Disk Management tool, all you need to do is click on it and the tool should launch in an instant!
5. Accessing Disk Management from the Control Panel
Aside from the modern Metro environment, Windows 10 also possesses the traditional Desktop environment which is typical in all previous Windows operating system versions including Windows XP, Vista and Windows 7. The combined Desktop and Modern/Metro environments only started in Windows 8 and was carried over to Windows 8.1 and now in Windows 10.
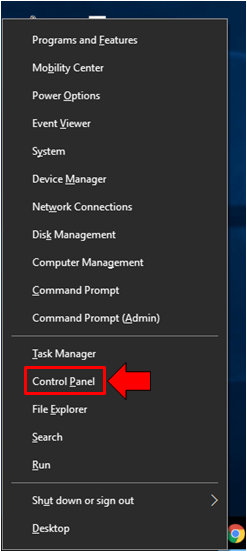
One of the features that most of use long time Windows users have really got accustomed to is the Control Panel and in order to access Disk Management from this mainstay feature, you will first need to launch it by accessing its shortcut link that is found on the WinX menu. To launch the menu itself, just press the Windows + X keys and once it opens on the bottom-left portion of your computer screen, simply click on the link that says “Control Panel” as you can see below.
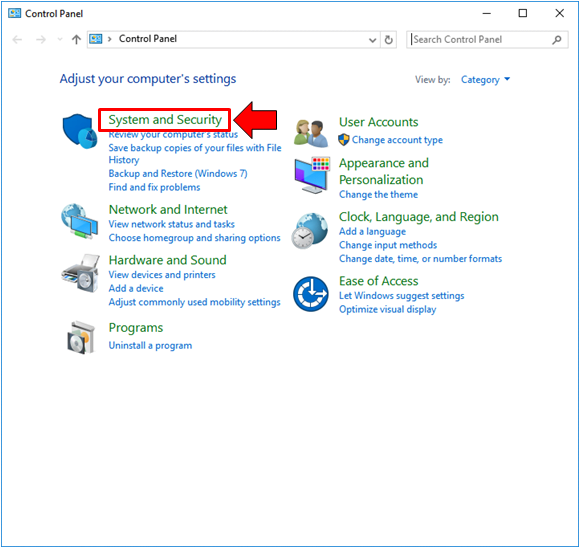
Once the Control Panel Window opens, you will simply need to click on the System and Security category as you can see being highlighted on the screenshot below in order to open the Administrative Tools section where the Computer Management tool is found. Computer Management is what we’re going to access in this tutorial since it actually has the Disk Management tool in it as we have shown earlier.
Once the System and Security category Window opens, simply look towards the bottom for the subcategory that says “Administrative Tools” or you may also click on the link that is found under it which says “Create and format hard disk partitions” in order to launch the Disk Management tool directly instead of launching Computer Management. If you chose to click on the “Administrative Tools” subcategory link, you will be able to open a new Window which contains a list of tools and from here, you will need to click on “Computer Management” which contains the Disk Management tool in it.
6. Launching Disk Management Using the Search Feature
Windows has always possessed the Search feature but it is only in Windows 10 that this very handy tool has found very good improvements. Yes! The search box is now found almost anywhere within the operating system and it can be set to show even online or web search suggestions in some places.
To access the Disk Management tool using the Search feature, you will first need to launch the Search screen by pressing the Windows + S keys. After doing so, search should then open on the bottom-left portion of your computer screen and from here, simply type the words “disk management” into the search input box that is found at its bottom as you can see below.
After typing in the words “disk management” completely into the search input box, the search results should then appear just on top and from here, simply click on the one that is labeled “Create and format hard disk partitions” as you can see being highlighted above. After clicking on it, the Disk Management tool should launch right away.
7. Open Disk Management with the Run Command from the Search Feature
Another interesting method that you can use in launching the Disk Management tool from the Search feature in Windows 10 is by entering its executable file name which is the same name that we’ve entered into the Run box in an earlier method that we’ve shown above. To do this, you will need to launch the Search box first by pressing the Windows + S keys and once the box opens on the bottom-left portion of your computer screen, simply enter the file name “diskmgmt.msc” into the search input box that is found on the bottom portion as shown below.
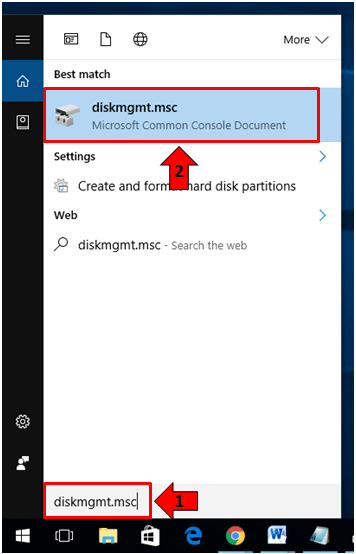
After the executable file name is typed into the search input box that is found at the bottom, the search results should then open on the top portion where you will need to click on the one that is labeled “diskmgmt.msc” as you can see being shown above. After the search result item is clicked, the Disk Management tool should open in an instant!
8. Access Disk Management Using the Command Prompt Console
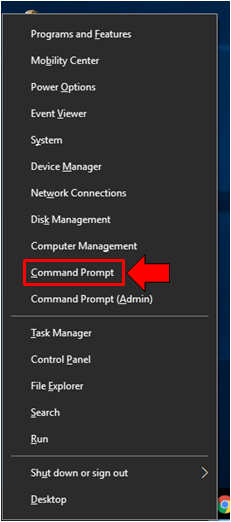
Another method that you can use in launching the Disk Management tool which will make you look like a techie geek is by using the Command Prompt console. To launch this tool, you will simply need to access its shortcut link from the WinX menu. To open this menu, just press the Windows + X keys and click on the Command Prompt link that is found on it as you can see being highlighted below.
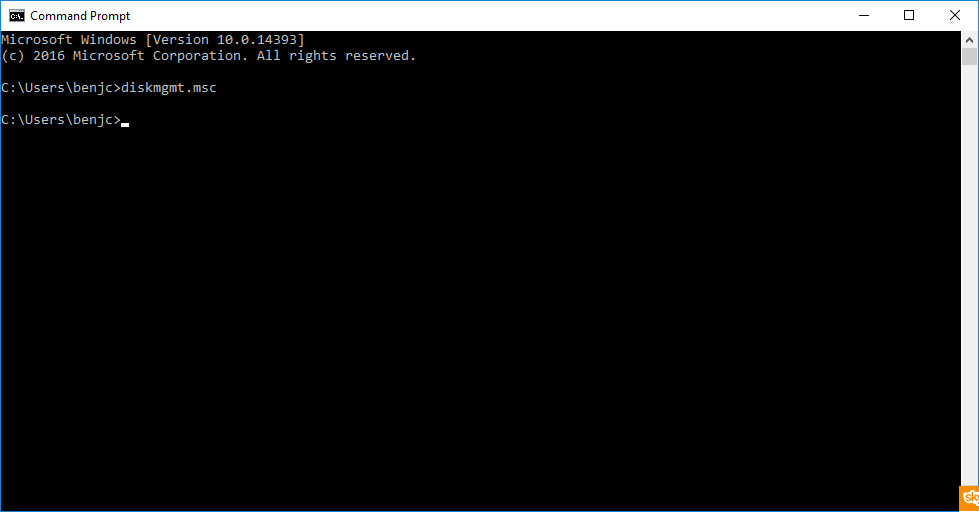
After clicking the Control Panel link, the console should launch right away and in order to open the Disk Management tool from it, all you need to do is type-in the words “diskmgmt.msc” into it then hit the Enter key and voila! Disk Management should open like magic!
9. Launch Disk Management from the Windows PowerShell Console
Lastly, another available method in opening the Disk Management tool is done from another console which basically looks and feels like the Control Panel with the difference being its background showing blue instead of black. The tool is called Windows PowerShell and in order to launch it, you will simply need to type in “windows powershell” into the Search input box as you can see on the screenshot below. If you don’t have any clue on how to launch the Search box, just press the Windows + S keys and you should have it opened on the bottom-left portion of your screen in no time!
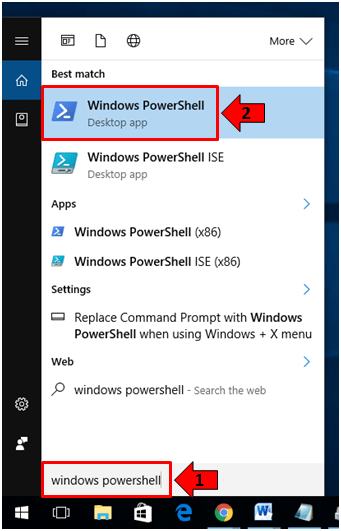
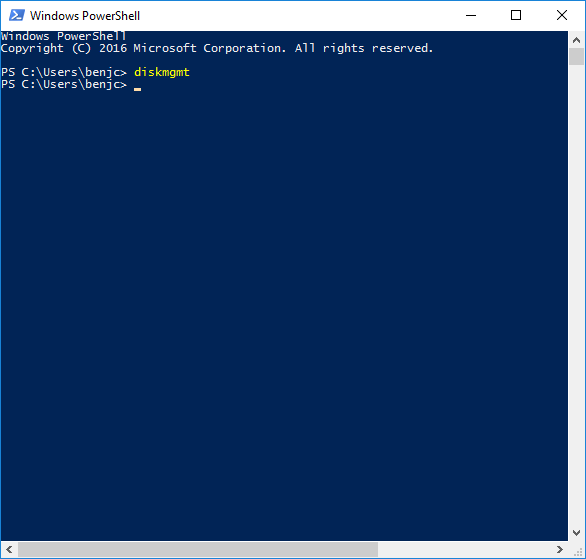
After typing in “windows powershell” into the search input box that is found at the bottom of the Search feature, the search results should then appear right on its top portion and from here, all you need to do is click on the one that says “Windows PowerShell” as you can see being highlighted on the screenshot above. Now, when the Windows PowerShell console opens, all you need to do is type-in the word “diskmgmt” excluding the quotation marks of course into it then hit the “Enter” button and the Disk Management tool should launch right away!
What is Disk Management Used For?
As you have seen in this tutorial, there are actually several ways in launching the Disk Management tool in your Windows 10 machine. Now that you’ve already got acquainted with all of them, you can choose the one that you feel comfortable with and access Disk Management using it.
Disk Management is a tool that allows you to make changes to your computer’s hard drive partitions and is a very handy tool especially if you want to create a new partition which will serve as a storage for backup files and other important stuff. It can also be used in formatting some hard drive partitions that are found in your computer so you will have them cleaned and ready for merging back to your main hard drive.
However, this tool is quite limited in some ways. For instance, it does not allow other advanced options like merging partitions without deleting their contents so you will need a third-party software to help you with such tasks. Have you ever tried creating a new hard drive partition on your Windows 10 machine? Did you succeed in your attempt to do so? What problems have you encountered? We’re here to help you solve them so please feel free to share your story on the comments section below.