Configuring a Wireless Network on Your Windows 8.1 Machine
Wireless networks are found everywhere in our modern world and being connected to them has become very important especially in the wake of social media taking much of most people’s lives. However, if you are a novice user just starting to learn the basics, connecting to a wireless network can become a challenge especially when Windows tells you that there is something wrong with the connection, IP address and other network related stuff. In this tutorial, we will be learning how to configure wireless networks on your Windows 8.1 machine and get familiar with some simple solutions that you can do whenever something causes your wireless Internet connection to fail so get your computer ready and turn on your WiFi or any other wireless network setup and follow the tips that I will show below.
Getting Acquainted with Some Quick Options
The very first thing that you need to learn about your wireless network is its properties and settings and accessing this in your Windows 8.1 machine is quite different from the process that you used to follow back in Windows 7 but before that, you will first need to learn some quick options and you can access them by clicking the network status icon on the system tray at the bottom-right portion of the screen.

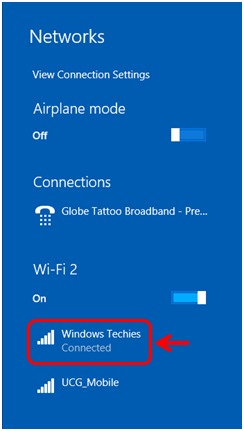
After doing so, the “Networks” screen will appear and display all available wireless networks that your computer is able to detect. From here, you will need to check to which network you are currently connected to and you will know this when you see the status that says “Connected” underneath the network’s SSID as shown on the screenshot below.
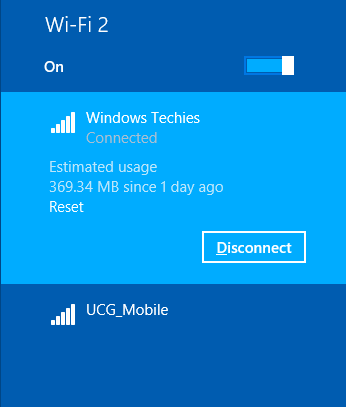
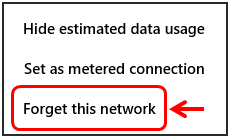
To see some quick options for the network that you are currently connected to, simply right click on it and a white box containing three options which are “Show estimated data usage”, “Set as metered connection” and “Forget this network” will appear. If you click on the first option, you will be able to view the amount of data that has been used by your computer since you connected to the network. You can reset this information by clicking on the “Reset” button.
This feature is useful if you are trying to keep track of your data usage especially in cases when you are limited to the amount of data that can be consumed per hour. To disable the data usage display, all you need to do is right-click on the network again then hit the “Hide estimated data usage” option from the white options box that appears.
The second option which is “Set as metered connection” doesn’t have much to do with novice users but you can still enable it and check its status as a metered connection from Windows 8.1’s Task Manager but we will reserve this topic for a future tutorial. Lastly, you can remove a network easily from your networks list by hitting the “Forget this network option”.
Now, it is time to learn how to access the settings and configuration and as well as the properties of the current network that you are connected to. More details on this crucial step are shown below.
Knowing Your Network’s Configuration and Properties
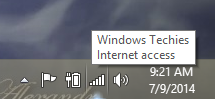
Now, we will explore your network’s settings and as well as its properties so you can learn some basic information about it. To do this, you will first need to make sure that you are connected to the network that you want to check and properties for just by pointing the mouse to the network status icon on the system tray and letting it stay there until the name of the network that you ware connected to pops out.
After making sure that you are connected to the right network, simply right-click the network status icon located on the system tray and click on the link that says “Open Network and Sharing Center” which is inside the right-click options box that appears.

After doing so, the Control Panel Window will open and take you directly to the Network and Sharing Center. From here, just click on the link just beside the “Connections” label bearing the name of the network that you are currently connected to as shown on the screenshot below.

Now, a small Window will open and show the status of your network. You will also find buttons that will lead you to other sections that will show even more information.
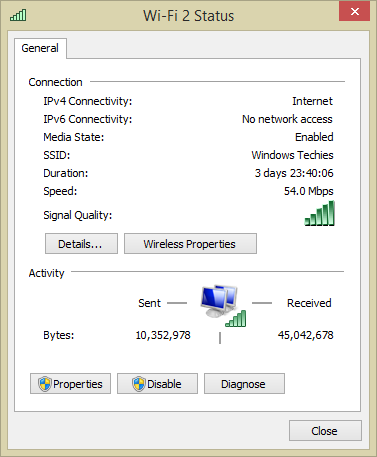
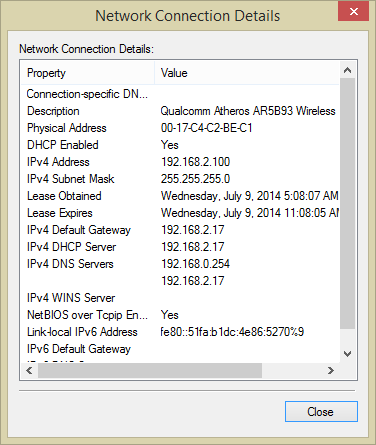
For instance, if you click on the “Details…” button, a new small Window will appear which is labeled “Network Connection Details” and show some information about the network such as IP address and many other important stuff especially for more advanced users.
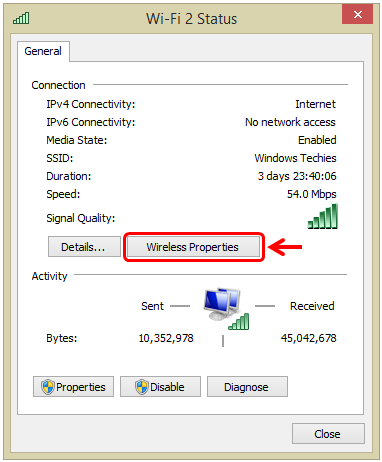
If in case the network administrator changed the password of the network, but not its SSID and any other settings and you got disconnected, all you need to do is ask for the password from the administrator and afterwards, you need to enter it to your machine by clicking on “Wireless Properties” located just beside the “Details…” button.
After doing so, another small Window will appear which is labeled “<Network Name/SSID> Wireless Network Properties”. The small Window will automatically open the “Connection” tab but we need to open the “Security” tab so just click on it to reveal its contents.

On the “Security” tab, simply click inside the tick box that says “Show characters” so you can make sure that you are typing in the right password for the network. After doing so, simply replace the existing password inside the “Network security key” input box with the new password that you’ve got from the network administrator and once you are done, just hit the “OK” button. Now, you should be able to connect the the network again without any problem! However, if the administrator also changed the “Security type” and the “Encryption type” then you need to change these aspects as well before hitting “OK” so you can finally be connected to the network again!
Diagnosing Wireless Network Problems
There are two ways of doing this on a Windows 8.1 machine. First, you can click the “Diagnose” button on the Wi-Fi Status Window and the process will just initiate automatically through “Windows Network Diagnostics” or you can also right-click on the network connection status icon from the system tray at the bottom-right portion of the screen and click on the “Troubleshoot problems” option from the right-click menu that appears.

No matter which method you do, you will be able to open the “Windows Memory Diagnostics” tool which will automatically look for the problem and display its assessment after the process. It will also tell you some possible solutions so all you need to do is follow them but if the problem still isn’t resolved, you can reset your wireless router device and just set it up again by working on its web interface and configuring it again to its most recent settings that worked perfectly. To learn more about making your wireless network become more secured, you can read our tutorial that details these steps or you can also backup your router’s perfectly working configuration and use it in restoring the device to work perfectly again by following the steps illustrated in this article.