Managing the Homegroup on Windows 7
On a previous tutorial, I have shown you how you can create a HomeGroup on your Windows 7 machine. Right now on this article we will be digging deeper to the details of the steps in managing the HomeGroup which you created previously so you can start taking advantage of the features and capabilities that this feature has.
Since this feature allows the sharing of files and other contents on different computers, it needs a password to better secure all aspects of it and only allow users who knows the password to connect and access the files that you allowed for sharing. In this tutorial, I will be showing you how you can change your HomeGroup’s password and do some other important stuff like finding the password if in case you forget it and accessing all the other devices that are joined to your HomeGroup. To learn how these things are done, just follow the steps below:
How to Change the Password
Changing the password of an existing HomeGroup can be done on any computer that is joined to it. If the change of password was done on a later time after other computers and devices was connected to it then you need to type the new password on all those devices after the change so they can stay connected to your HomeGroup. However, if the change of password was done prior to having other devices joined to the HomeGroup then you will not be required to type the password on each computer since this means that you’ll be connecting everyone for the first time.
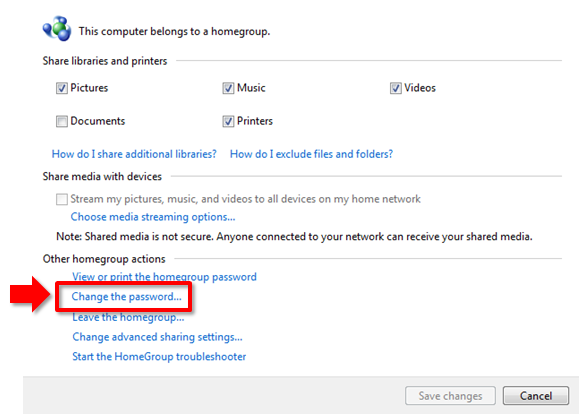
- To change the password, just click on the “HomeGroup” link located at the bottom-left side of the “Network and Sharing Center” Window. You will then be directed to the “Change homeGroup settings” Window, from here, you need to click on the link that says “Change the Password…” which is located at the bottom under the “Other homegroup actions” section.
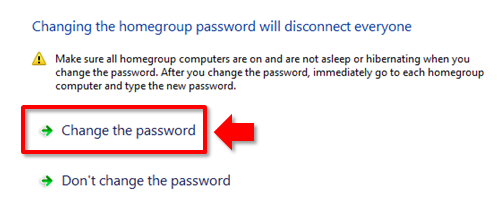
- After the link is clicked, you will see a Window which asks you what you would like to do. Just choose “Change the password” option to initiate the process of changing the homegroup password.
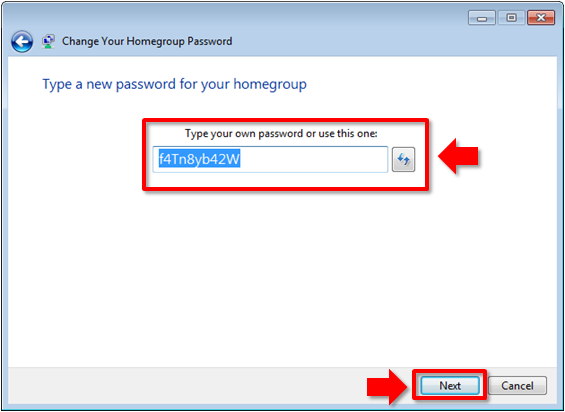
- Your Windows 7 computer will automatically generate a new password for your homegroup. This happens by default whenever you create a new HomeGroup. If you want your own personally created password that is easy to remember, all you need to do is to make sure that it contains at least 8 characters. Once you entered your desired password, just click on the “Next” button located at the bottom.
- After clicking “Next”, just wait for the wizard to notify you that the password change has already succeeded and it says so, you just need to click on the “Finish” button and everything will now be set up the way you want it to be.
How to Find the Password to Your HomeGroup
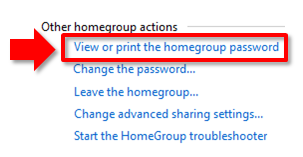
If in case you forgot the password to your HomeGroup, you can view it so that you can have other computers joined to it. To do this, just go to the “Change homegroup settings” Window and look for a “View or print the homegroup password” link under the “Other homegroup actions” section.
You will then be able to see your HomeGroup’s password on the Window that follows and from here. You can copy it on a paper or click on the “Print this page” button at the bottom so you can have a printed copy of the password and have it distributed to the people which you want to have access to it.

After doing so, just proceed on with adding other computers to your HomeGroup using the password you already copied or printed.
How to Have Other Computers Joined to Your HomeGroup
After learning how to create your own HomeGroup, changing its password and viewing it if in case you forget what what the password is, you can now proceed to adding computers and other devices to your HomeGroup so you can start sharing contents to them.
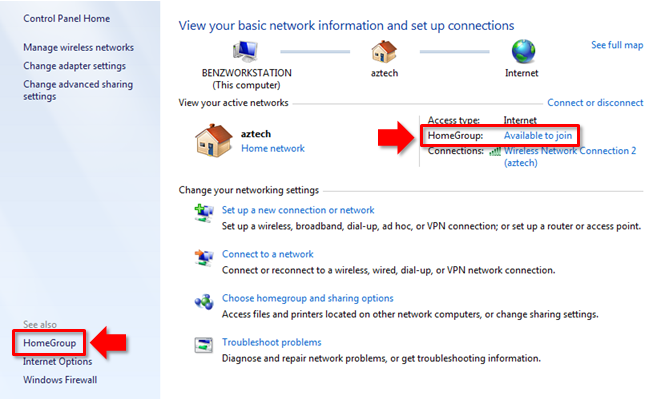
To do this, just access the Network and Sharing Center from the computer which you want to be joined to your HomeGroup and you’ll see a link that says “HomeGroup: Available to join” under the “View your active networks” section. just click on it or you can also click on the “HomeGroup” link located on the bottom part of the navigation pane on the left side of the screen.
On the Window that follows, click on the “Join Now” button located at the bottom to start the wizard.

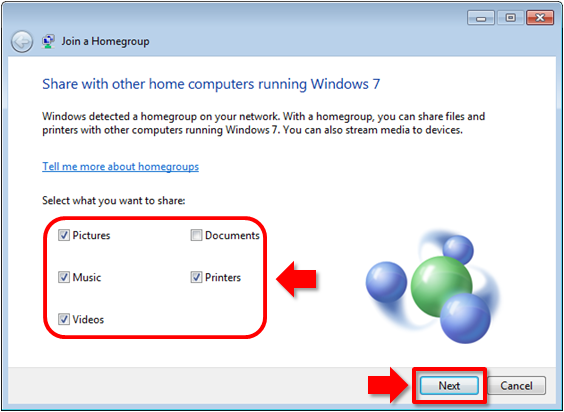
The Window that follows will ask you what libraries you would like to share to other users on the HomeGroup, all you need to do is check the boxes that corresponds to the contents that you want to enable for sharing and click on the “Next” button located at the bottom.
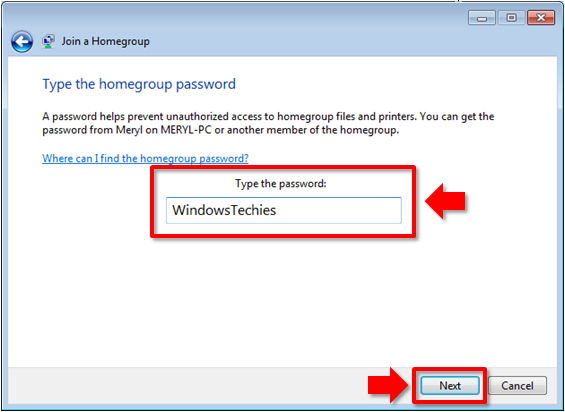
The Window that follows will then require you to enter the HomeGroup’s password, after inputting the right password, click on the “Next” button.
You will then be notified by the wizard that the computer has successfully been joined to the HomeGroup at the end of the process. If this happens, just click on the “Finish” button and you’ll now be able to access the files and other contents that are enabled for sharing by other users who are also joined to the HomeGroup. You need to do the same process to all the other computers that you want to be joined to the HomeGroup you’ve set up.
How to Access the Other HomeGroup Computers
After connecting other computers to your HomeGroup, you will then need to learn how you can access all of them and the files or other contents which they allowed for sharing from your computer. You can simply do this by following the steps below.
- Open Windows Explorer or any other library from the start menu. Once the Window opens, look for the “HomeGroup” link located at the left side navigation pane to open the users that are joined to it.
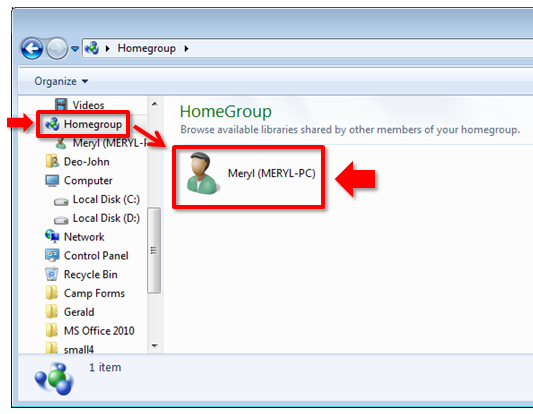
- Double-clicking on any of the users joined to your HomeGroup from the Window that you see above will open all the files and other contents which they enabled for sharing. You will not be required to enter a username and a password in doing this unlike on the older versions of Windows which requires you to do so.
How to Leave a HomeGroup
Leaving a HomeGroup is very simple. You just need to access the “Change homegroup settings” Window again and click on the “Leave the homegroup” link located under the section for “Other homegroup actions”.

Next, a Window which asks you what action you would like to do will appear. From this Window, click on the option that says “Leave the homegroup”.

After doing so, you just need to wait for the process to complete and when the process completes, you will be informed by the system that the process has been successful. Click on the “Finish” button so you can exit from the wizard.
That’s it! You now learned how to take advantage of this awesome feature. If you followed all the steps above then you should have been able to have the other computers joined to your HomeGroup. If you encountered a problem in any of the steps above please feel free to ask us by posting your query on the comments section for this article. We also welcome any suggestion or tips that you may know regarding the topic discussed on this tutorial.