The Complete Guide for Creating Shortcuts in Windows 10
Look into most Windows user’s Desktop screens and you’ll surely see some shortcuts in them. Shortcuts have been around since the earliest Windows editions and were carried over even to the most recent Windows operating system editions and now, even to Windows 10. Shortcuts seem to be the real mainstays in the Windows operating system so it is just fitting that we dedicate one tutorial that will talk about how you can create them in your Windows 10 machine.
They are flexible tools that can represent a file, folder, program and many other stuff in your computer on other locations like the desktop screen and even in libraries and they provide really quick access to these items that are stored in your computer’s hard drive. If you’ve been using Windows since its earlier releases like Windows XP, Vista or Windows 7 then you should already be very familiar with shortcuts and if you’ve recently made the decision to jump to Windows 10, you’ve surely met its modern equivalents called tiles.
So how exactly are shortcuts created and what items can you actually create a shortcut for. Join us as we discover the answers to these things and since most of us have already made the upgrade to Windows 10, we will be using Windows 10 all throughout this tutorial so be sure to get your computer prepared and follow the steps that we will be demonstrating below.
What Are Shortcuts?
While most of us already know what shortcuts are, it would still be a good idea to start with the basics for the benefit of the readers who are just starting to learn how to use Windows and are not yet aware of the terminologies and other technical terms that they might meet along the way while exploring the whole Windows 10 operating system. Let’s start with what shortcuts are and how they look like.
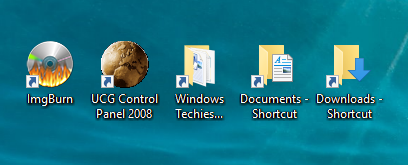
Shortcuts are actually icons that are pinned on a certain location such as the Desktop screen or even in libraries like Documents, Music, Pictures or Downloads and these icons provide instant access the the program, app or file that they represent. Shortcuts look like the items shown on the screenshot below.
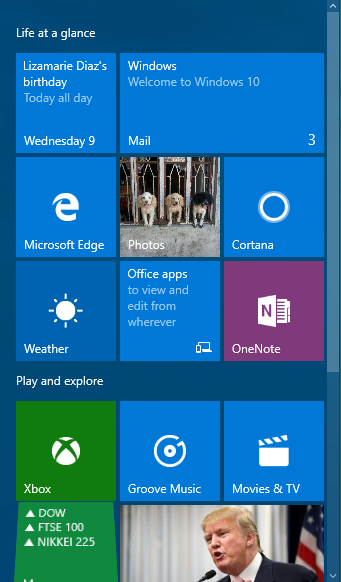
However, in the advent of modern Windows OS editions such as Windows 8, Windows 8.1 and now Windows 10 which feature a combined Desktop and Mobile environments, modern equivalents of the traditional shortcuts called “Tiles” are now available but unlike the traditional ones, these new features are not capable of being pinned to any other place within the Windows operating system and they just stay on the Start Screen (in Windows 8 and Windows 8.1) or the Start section of the new and improved Start Menu in Windows 10. Tiles look exactly like the ones shown on the screenshot below.
Creating Shortcuts for Different Items Saved in Your Computer
As we have mentioned earlier, you can actually create shortcuts for the different stuff that are saved in your computer on varied locations but the most common place where we all create shortcuts on is the Desktop screen so let’s start learning how to create shortcuts for folders, libraries and programs in this location.
How to Create Folder Shortcuts on Windows 10’s Desktop Screen
So let’s first look into the steps involved in creating a shortcut for a certain folder that is saved in your computer’s hard drive. If the folder is saved in your computer’s Desktop screen, all you need to do is right-click or do a long tap gesture on it (if your computer has a touch-enabled screen) until a right-click menu appears as shown on the screenshot below.
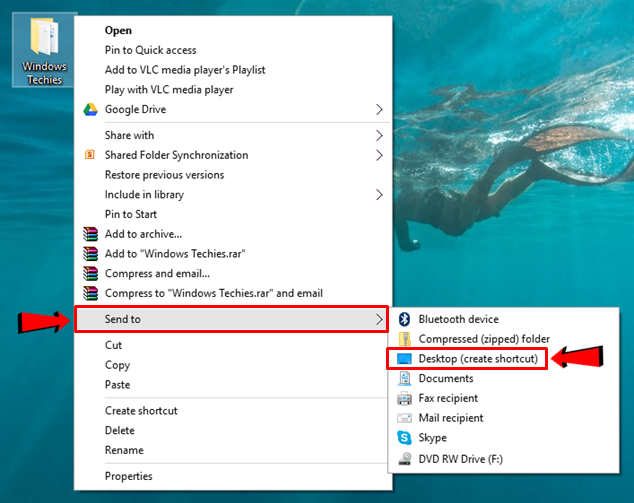
From this right-click menu that appeared, you will now need to click on the option that says “Send to” then a new set of menu will appear where you will need to click on the option that says “Desktop (create shortcut)” as highlighted on the screenshot above.
Creating a Shortcut for Folders Saved in Other Locations
Now, if the folder that you want to create a shortcut on the Desktop screen for is not saved on the Desktop itself and is stored in other folders or libraries, you will can still create a shortcut for it so you can directly open the folder by clicking on its shortcut on the Desktop without the need of navigating towards its location using File Explorer. To do this, you will first need to locate the file using File Explorer. Once you find the file, you can simple right-click on it or tab and hold on the item if you are using a computer with a touch-enabled screen then on the right-click/contextual menu that would appear, simply hit the same “Send to” then “Desktop (create shortcut)” options as shown below.

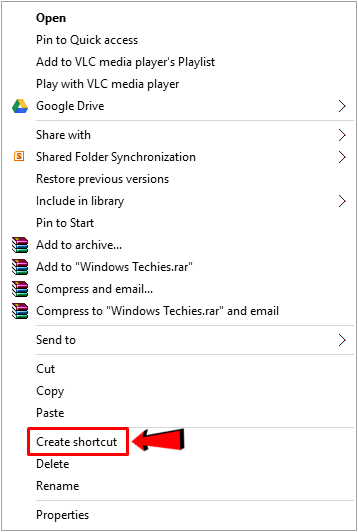
A shorter way in doing this same trick is still done by right-clicking on the folder that you want to create a shortcut for and after doing so, you will simply need to click on the “Create shortcut” option instead of the “Send to” option and after you do so, a shortcut icon for the selected folder will automatically be created on your computer’s Desktop screen.
Creating Shortcuts for Programs and Applications
Aside from the folders that are stored in your computer’s hard drive, you can also create shortcuts for the programs and apps that are installed in your Windows 10 computer. Doing this is basically just the same with the process involved in creating shortcuts for folders but you might find a little bit of challenge in looking for the program’s “.exe” file. To navigate towards the “.exe” file of a certain program or app that is installed on your machine, you will simply need to launch File Explorer first then once it opens, you will need to click on the “Local Disk (C:)” link that is found on the navigation pane at the left as shown below.
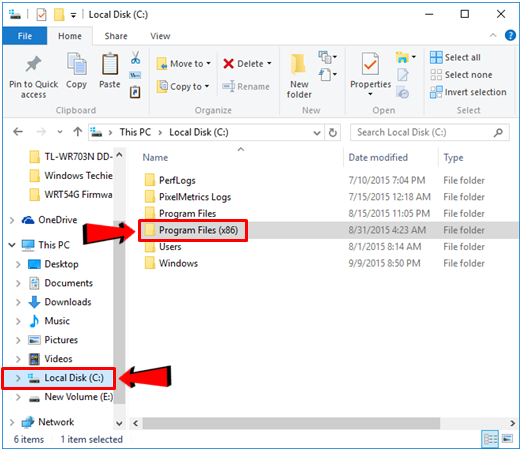
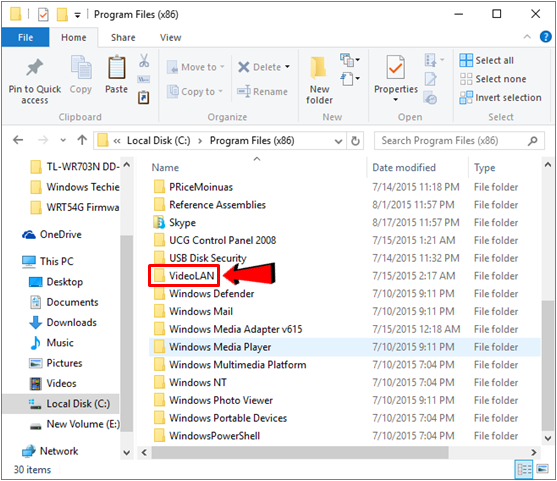
Once the items stored under the “Local Disk (C:)” drive displays on the contents pane of the File Explorer Window, you will simply need to click on the folder that is labeled “Program Files(x86)” for it to open. The contents of the folder will then be displayed and from here, you will notice that most of the folders are named according to the programs and apps that you have installed to your computer. This is because the “Program Files (x86)” folder is actually the repository for all of the associated files of the programs and apps that you have installed to your Windows 10 machine. From here, simply look for the program or app that you want to create a shortcut for. For illustration purposes, we will be selecting the folder that is labeled “VideoLAN” which is actually “VLC Medial Player’s repository folder as highlighted on the screenshot below.
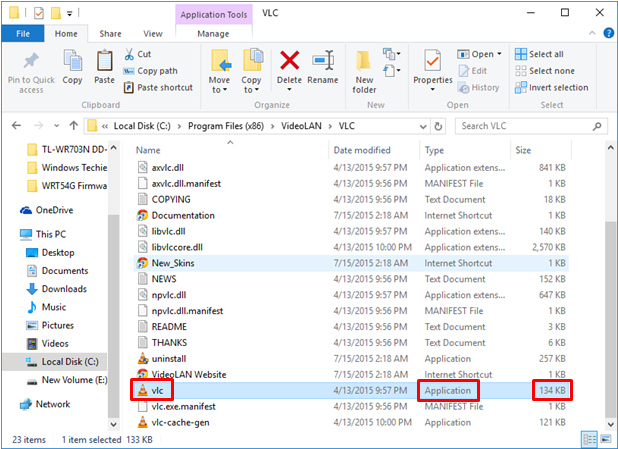
Once you find the repository folder for the program or app that you want to create a shortcut for, just click on it so you can view its contents then start looking for its “.exe” file. A program/app’s “.exe” file would often be labeled according to its name and is commonly classified as an “Application”. Most are more than 100KB in size and should also bear the icon of the program/app itself so you shouldn’t find it hard to spot it from the list of items that would open after you click on the repository folder. On the screenshot below, you will see that I have selected the item that is labeled “vlc” and if you look into the “Type” information column, it is classified as an “Application” that is just 134KB in size. There are other items that has the name “vlc” in them with the VLC logo as well but have other names connected so they are not what we are looking for. Remember, choose the file that bears the name of the program/app alone and nothing else. The information that you need to pay close attention with when looking for the “.exe” file of a program/app are also highlighted below.
Now, after finding the “.exe” file for the program that you would like to create a shortcut for, you will need to right-click on it then a right-click/contextual menu will appear. Once this menu pops-out, you will again need to click on the “Send to” option then once again, on the new menu box that will appear, just click on the option that says “Desktop (create shortcut)” just as what you did in the previous steps when we have created a shortcut for a folder that is saved in your Windows machine.
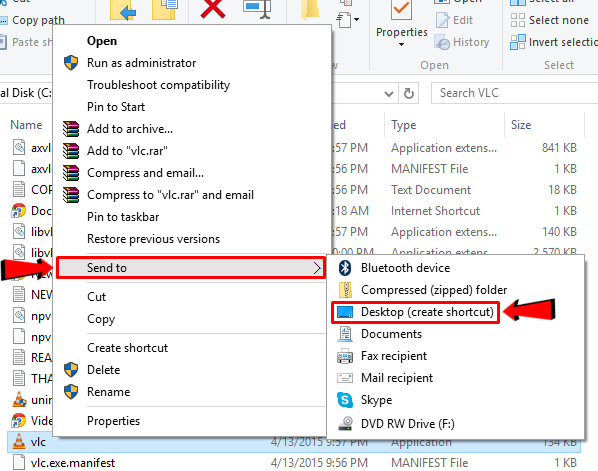
If you prefer to use the shorter method in creating a shortcut icon for the program/app into Desktop screen then you will simply need to again right-click on the “.exe” file then on the right-click menu that would appear, you will need to click on the “Create shortcut” option instead of the one that says “Send to”. It really is a faster way in creating a shortcut for the program on the Desktop screen of your Windows 10 computer since you won’t need to be clicking on another option in a separate menu.
How to Create a Shortcut for a Library in File Explorer
Accessing File Explorer whenever you need to open a file or send something to a friend via Bluetooth may become a hassle especially in Windows 8 and Windows 8.1 where there’s a shortage of shortcuts that will launch the File Explorer tool. In Windows 10, launching File Explorer is made a lot easier and faster because of the restored Start Menu but still, it would be more comfortable especially to those busy users if they have shortcuts for important libraries like “Documents”, “Music”, “Pictures”, “Downloads” and many others already pinned on the Desktop screen just waiting to be clicked.
In order to create a shortcut for any of these libraries and have it automatically pinned on the Desktop, you will first need to launch File Explore by clicking on its icon on the Taskbar or hitting the “File Explorer” link that is found in Windows 10’s new and improved Start Menu and once it opens, you will need to look for the library from the navigation pane at the left. We will be using the “Documents” library for illustration purposes.

Again, once you find the library that you want to create a shortcut for from the navigation pane at the left hand portion of the File Explorer Window, all you need to do is click on the “Send to” option just like what you did in the previous steps above and one the options under it appears in a separate menu box, you will simply need to click on “Desktop (create shortcut)”.
Now, on this right-click menu, you will notice that there’s no longer an item in it which says “Create shortcut” so you can’t use that option in creating a shortcut of the library onto the Desktop screen.
Other Ways in Creating a Shortcut for Different Items Saved or Installed in Your Computer
Aside from the methods that we have already demonstrated above, there are actually two more ways in creating a shortcut that is available in Windows 10 and even in Windows 7, Windows 8 and Windows 8.1 operating system versions. One of them is quite easier than the other but they are both applicable to the scenarios that we have given above. So let’s start with the harder one and in order to do it, you will first need to be on the Desktop screen of your computer. Once you are on it, simply right-click on an empty space in order to summon a contextual/right-click menu where you will need to click on the “New” option as highlighted on the screenshot below.
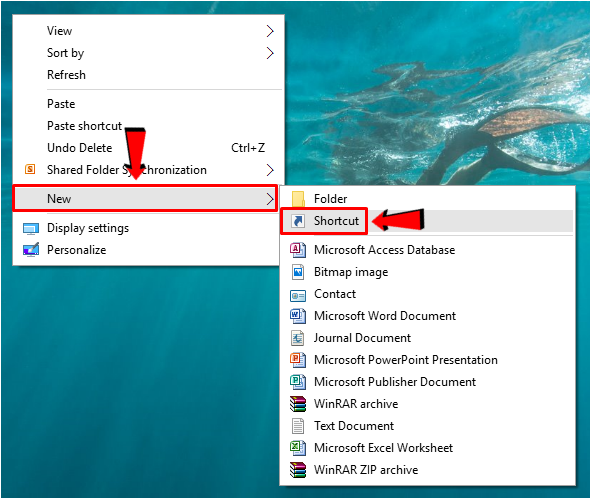
After hitting the “New” option from the right-click menu that appeared on the screen, you will again see a new menu which now contains the items that you can create and from here, just click on the option that us labeled “Shortcut” as you can see being highlighted on the screenshot above. After this option is clicked, a new Window which is labeled “Create Shortcut” will appear. This is actually the wizard that will guide you through the steps in creating a brand new shortcut on your machine’s Desktop screen. On this “Create Shortcut” wizard Window, you will see an input box in it with a “Browse…” button on its right hand portion as shown below.
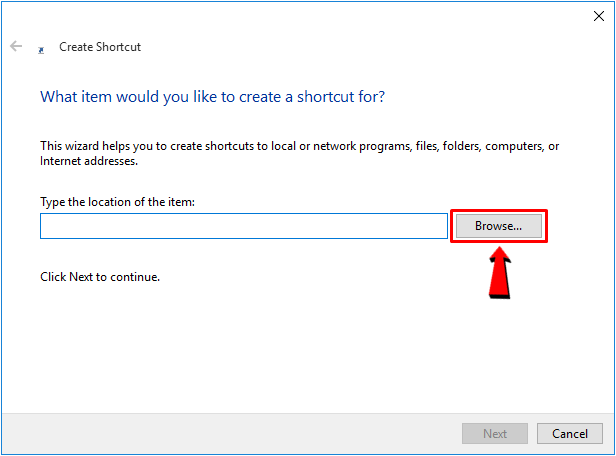
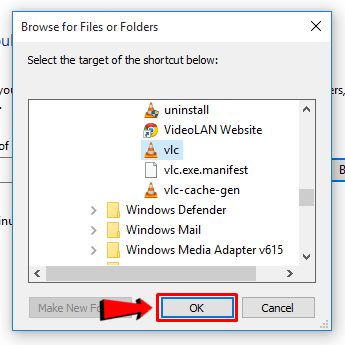
After the button is clicked, a new Window will appear which is labeled “Browse for Files or Folders” and from here, you can navigate towards the file, folder, drive, program or any other item that you want to create a shortcut on the Desktop screen for and once you find it, just click on the “OK” button that is located on its bottom portion as highlighted on the screenshot below.
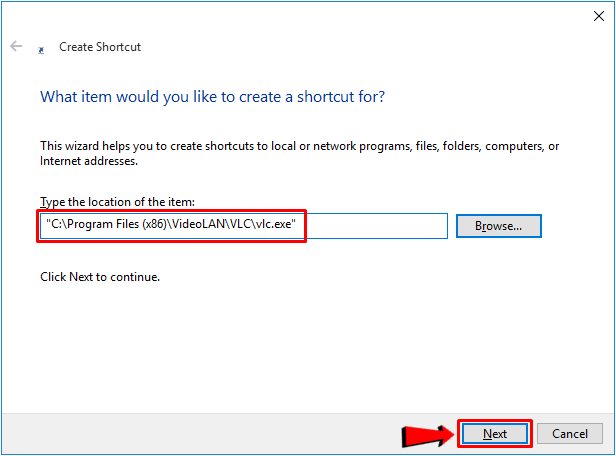
After you do so, you will be taken back to the “Create Shortcut” Window and the input box which was empty earlier should now contain the address path of the item that you would like to create a shortcut for. On this Window, you will need to click on the “Next” button that is located on its bottom-right portion.
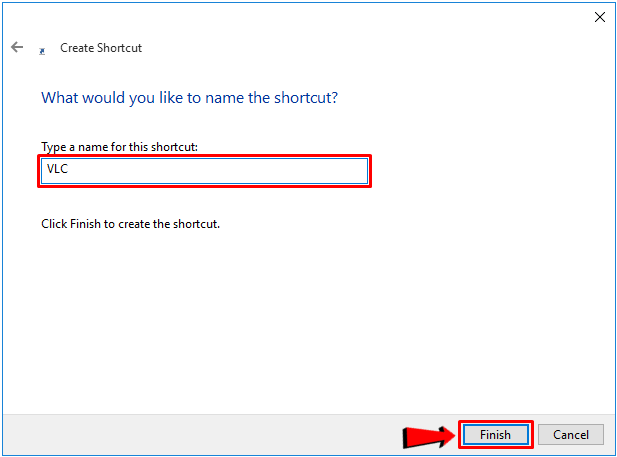
After hitting the “Next” button, the Window that would follow will now ask you to enter the name that you want to assign to the shortcut that will be created. On this Window, all you need to do is enter your desired shortcut name and after doing so, just hit the “Finish” button located at the bottom.
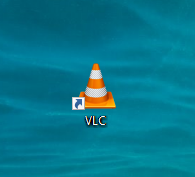
Finally, after the “Finish” button is clicked, you should now be able to see the newly created shortcut on your computer’s Desktop screen.
The Easiest Method of Creating a Shortcut
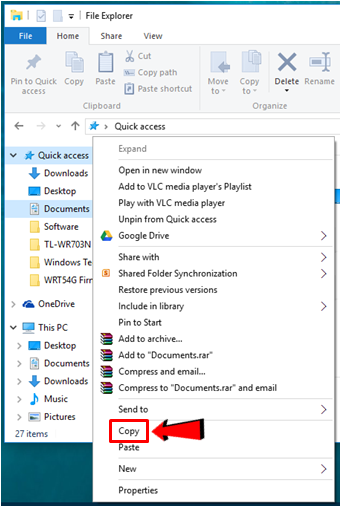
Now, we come to the last available method in creating a shortcut for almost anything in your Windows 10 machine. Doing this is very simple, just open File Explorer and browse towards the location of the “.exe” file or the folder/library that you want to create a shortcut for and once you find it, just select the item then copy it or press “CTRL + C” on your computer’s keyboard.
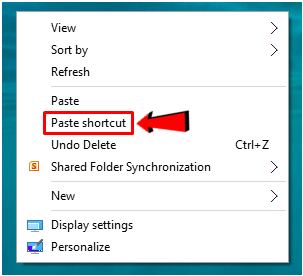
After the item is copied, simply head towards the location where you want to create the shortcut on (not necessarily just the Desktop screen since you can create a shortcut in other folders or libraries as well) then once you are on it, simply right-click an empty space then from the right-click menu that will appear, click on “Paste shortcut” as highlighted below.
Get Quicker Access to Your Stuff by Using Shortcuts
Shortcuts are everywhere and now in the age of computers and mobile devices, they have found their way into our gadgets and all other electronic stuff. Having shortcuts to the different stuff that are stored in your computer is really an advantage but of course, it is always good to know where each item that they represent are truly located so that you can always get to them in case the shortcut gets deleted. Did you enjoy this tutorial? Feel free to spread the word by sharing it to your friends so they too can learn how to create shortcut in their newly upgraded Windows 10 computer!