Tips for Improving Creativity in Windows 8
Most of us have experienced using the previous Windows versions and I am sure everyone would agree that all of them worked very well for any purpose. Every new one bears some improvements and a little bit of brand new stuff but Windows 8 has taken a leap to include a bunch of features that have ever since been unheard of. If you’re the type of user who likes doing some creative stuff then you need to learn a special set of tips that will help you maximize the usage of all the brand new stuff found in your Windows 8 machine so if you’re planning to edit some photos or assign great sounds for your machine then simply follow the tips below.
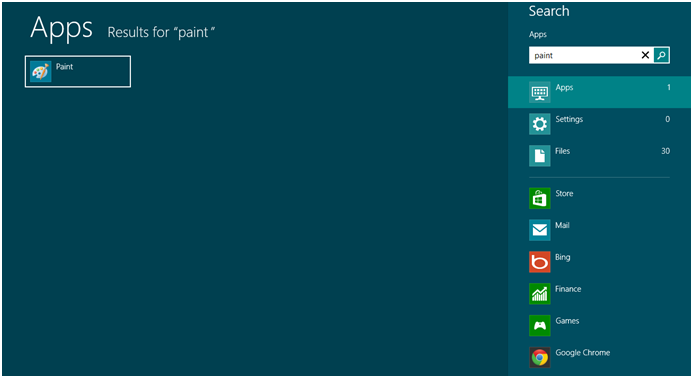
1. If you are an old school Windows user then you probably are familiar with the “Paint” app but you might think that it has already disappeared from Windows 8 because of the absence of the Start Menu. It has not gone anywhere, you can access it simply by opening the “Start Screen” then start typing the word “paint”. After doing so, the “Paint” shortcut will appear at the left-hand portion of the screen which you’ll need to click or tap to open the “Paint” app.
2. You might wonder why the “Paint” app has been moved to a place that’s a bit hard to find but Microsoft doesn’t do anything for no good reason. Take time to search for the app called “Fresh Paint” from the Windows Store and install it on your computer. Once it gets installed, you’ll be able to see how good it is in letting you paint and do some other stuff with its multi-touch support feature, fancy brushes and other great functions that are not available in the traditional “Paint” app.

3. Fresh Paint works great if you are trying to employ some artistic effects on your photos but it can’t do some editing work like tweaking the saturation, cropping or resizing the whole picture. If you want to be able to do these advanced photo manipulation methods, you can use Microsoft Photo Gallery which you can get from “http://windows.microsoft.com/en-ph/windows7/products/features/photo-gallery”. If you want to do more than what Microsoft apps can offer then you’ll need to purchase other tools like Adobe Photoshop, Corel and other related photo editing software which can do virtually anything!
4. The Photo Gallery software from Microsoft can make adjustments such as making a dull snap shot become bright simply by tweaking its exposure. To do this, simply open the photo that you want to do adjustments with and hit the “Edit” menu then click the “Fine-tune” button that appears on the ribbon. Just use the sliders to tweak the photo until its appearance satisfies your taste.
5. Photo Gallery is also capable of stitching photographs together to create a panorama. The results of this tweak may vary since you may be snapping your photos in places with consistent source of light or you’re trying to capture an object that is in motion. Whatever it is that you want to do, you can find this feature under the “Create” menu.

6. If you want to try a third party tool that shares power similar to that of Adobe Photoshop but is offered for free then you can try GIMP which you can get from “www.gimp.org”. This tool is a well regarded one which does more advanced photo editing and correcting so be sure to get your hands on it before trying those premium version of other the photo editing software brands
7. Have you done something great with your Windows machine which you’d like to show to everyone? You can do it easily with Windows 8’s improved screenshot tool which can be used simply by pressing the “Windows + Print Screen” keys. After you do so, you can find the screenshot photo from the “Screenshots” folder under the “Pictures” library.
8. You still can use the old screenshot method by pressing the “Print Screen” key alone and send the screenshot directly to the clipboard. If you are on the desktop screen, you can also press the “Alt + Print Screen” keys to capture only the active Window and excluding all the other elements that are behind it.
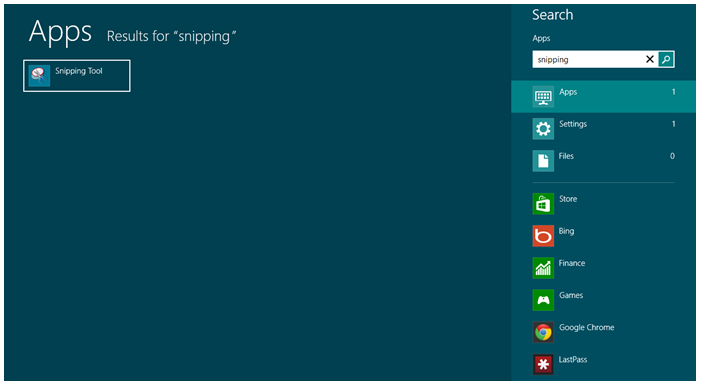
9. If you want to capture a more specific content that is open on your computer screen then you can use the “Snipping Tool”. To access the Snipping Tool in your Windows 8 machine, simply open “Start Screen” and start typing the word “snipping” on your keyboard. After you do so, the “Snipping Tool” shortcut will appear at the left-hand side of the screen.
10. After capturing images on the screen with the “Snipping Tool” you can save it then send it as an email or do even more enhancements to the images you’ve taken using any photo editing software that you have. The tool itself has a number of pens which can give you a choice of colors and as well as a tool for highlighting parts of the image for emphasis.
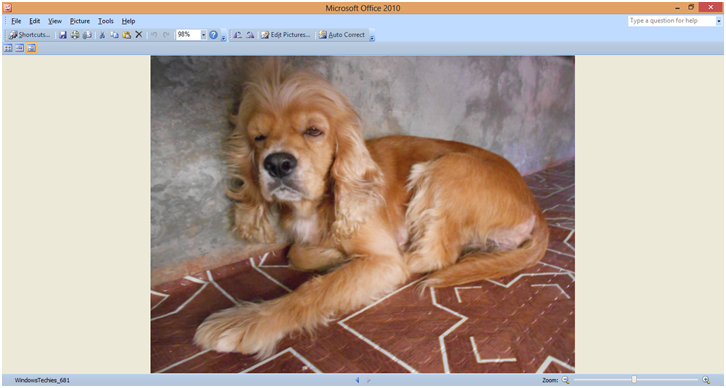
11. Windows 8 also has some other photo editing tools which are already built-in with the system. One of these is “Microsoft Office” which gives a bunch of other options like resizing, adjusting colors, rotating upside down photos and some quick links for emailing or printing the photos you have edited with it. The tool can also zoom images so you can have a better view of the parts that needs to be edited so if you only need simple editing before sending an image to a specific recipient then this tool will be the perfect one to use.
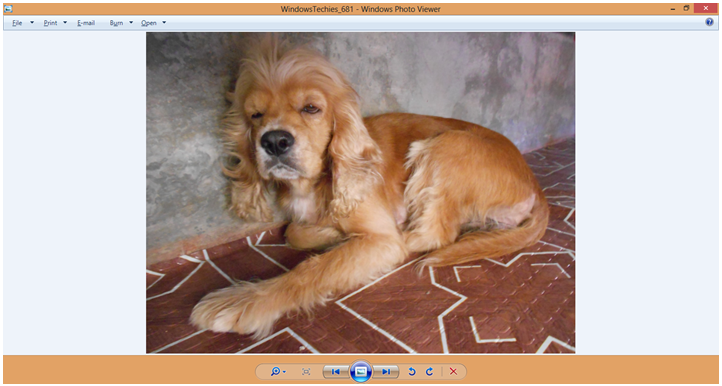
12. If you are just trying to view photos then you can use another built-in tool called “Windows Photo Viewer”. This tool allows you to perform slideshows of the photos saved in one folder so you won’t need to keep clicking on buttons or pressing on any keys just to flip from one photo to the other. The tool is also capable of rotating your photos and it also provides quick buttons for emailing and printing any image or burning them into a disk.
Getting the Right Tools
As you can see, Windows 8 has all the basic tools that will help you do some minor editing to the photos that you own but if you want to get even better ones then there’s some good software available online just waiting to be downloaded or purchased and before I forget about it, there’s also a built in app within your Windows 8 machine that will help you get a full screen view of your photos. It is called the “Photos” app which is a part of the modern app line up offered by Microsoft’s latest operating system. It is just a matter of practice and before you even know it, you’re already creating quality edited photos that are worth posting on magazines! Just start learning the basics first and you’ll be able to get into the more advanced ones later on. Do you know a software that does a good job in editing photos? Let all the other readers know about it by sharing the info on the comments section below.