Tweaking Some Aspects of the New Windows 10 Start Menu
In our two previous tutorials, we have shown some of the new features that are worth watching out for in the upcoming Windows 10 operating system from Microsoft and as well as demonstrated how the new Start Menu is different from the old one found in Vista and Windows 7 but that’s not everything yet.
Windows 10, especially its brand new Start Menu still has a lot of things to show off even on its developmental stage. The items that are found on the left portion for instance aren’t really the ones that are found in the Start Menu that we all used to be accustomed with in the old Windows versions so there should be something that needs to be done in order to take them back.
In this tutorial, we will be showing you even more settings and tweaks that you can do to the modern Start Menu that is found in Windows 10 so you can control it better and make it work according to your liking so be sure to read this tutorial towards the end to learn every detail that’s available in improving how the Start Menu behaves.
If you are not contented of just reading a tutorial about this new feature then you can also install Windows 10 Technical Preview and configure it in a dual boot setting together with your existing Windows installation on your computer.
Removing Items from the Start Menu
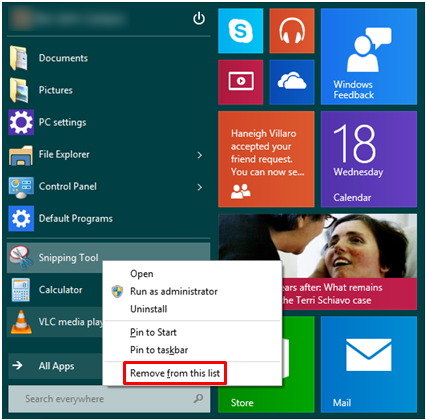
Not all items that appear on the left and the right portions of the Windows 10 Start Menu are really the ones that you truly use so you will need to be able to remove most of them so they can be replaced by more important ones. To do this on the items that are on the left side of the Start Menu, you will simply need to right-click on each one of them and on the right-click menu that would appear, simply click on “Remove from this list”.
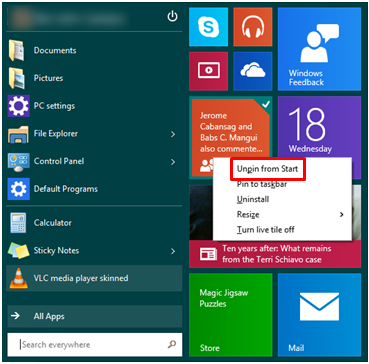
After doing so, the item that you have selected will then be removed. On the other hand, if you want to take away some items on the modern app section of the Start Menu which is on the right hand portion, you will also need to do the same thing. Just right-click on the tile/s that you want to remove and hit the “Unpin from Start” option that is located on the right-click menu that will appear.
Adding More Important Items to the Start Menu
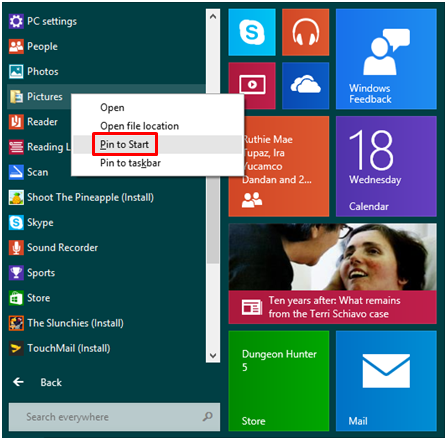
Now, after you remove all the items from the left hand portion of the Start Screen, you can add even more useful shortcuts to it by hitting the “All Apps” list and after doing so, simply look for the item that you want to add to the list then right-click on it. A menu will then appear where you will need to click on the “Pin to Start” option.
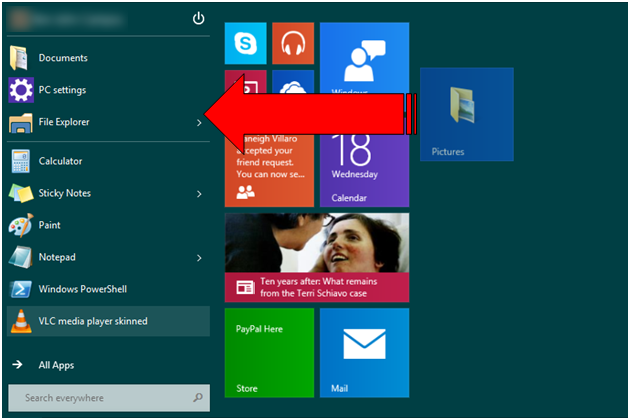
After doing so, the item will then be pinned to the right hand portion of the Start Menu and from here, you will simply need to drag it towards the left portion then drop it on the spot where you want to put it so it will be added to the list. If you just want the item to stay on the right side along with all the other tiles that represent the modern apps then just leave it there and don’t drag-and-drop it towards the left.
Adding Even More Important Shortcuts to the Start Menu
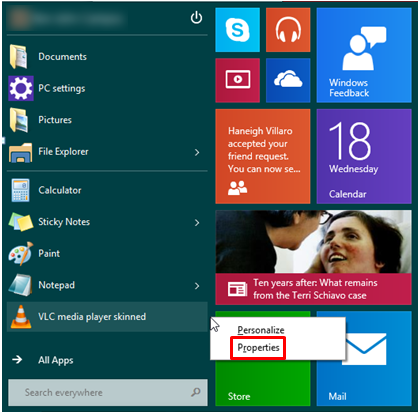
Now, if you really want to add even more important items to the left hand portion of the Start Menu then you will need to access the “Taskbar and Start Menu Properties” Window. To summon this Window, you will simply need to right-click on the narrow space between the shortcuts list on the left and the modern app tiles section on the right then hit “Properties” from the menu that will appear as shown below.
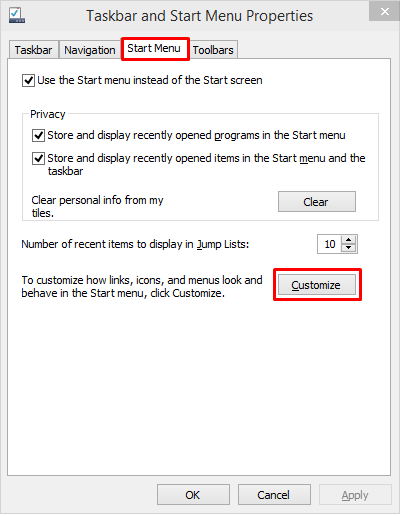
After doing so, the “Taskbar and Start Menu Properties” Window will then appear and from here, you will simply need to click on the tab that is located on the top which says “Start Menu” and from here, you will need to click on the button located towards the bottom-right portion which says “Customize”.
Another Window will then open which contains a list of all the available items that you can add to the shortcuts list which is located at the left-hand portion of the Start Menu. From here, you will simply need to mark each item that you want to add by clicking inside the small boxes which is located at the left as highlighted on the screenshot below.
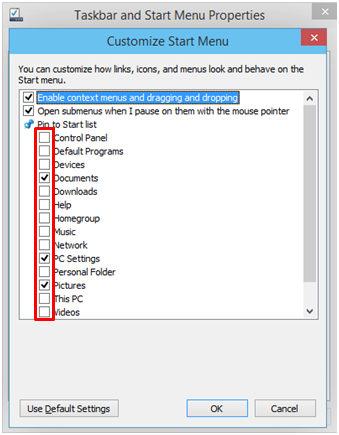
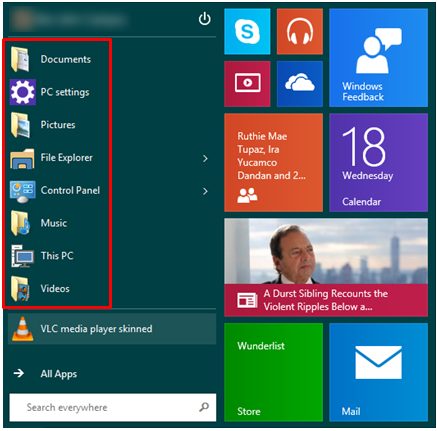
To make the Start Menu look like the one found in old Windows versions, you can check the items such as “Control Panel”, “Music”, “Videos” and “This PC” (previously called My Computer in old Windows versions). To add shortcuts to some Administrative tools like “Disk Defragment”, “Task Manager”, “System Configuration” and more, you can also put a check mark on the “System administrative tools” which is the last item on the list.
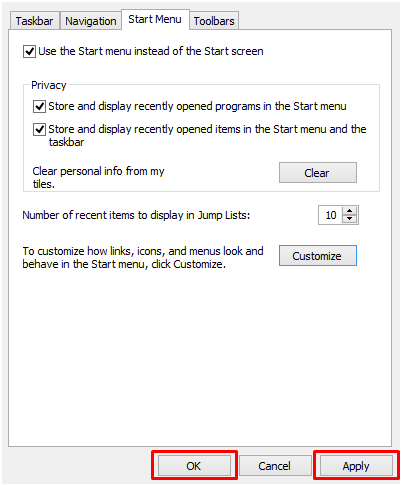
After you check all the items that you want to add into the Start list, simply hit on the “OK” button at the bottom and on the “Taskbar and Start Menu Properties” Window, be sure to hit the “Apply” and “OK” buttons.
Finally, you can now try to open the Start Menu by pressing on the Windows key or clicking on the Start Button and you should be able to see all the items that you have added to the Start list at the left hand portion of it as highlighted below. Now, the Start Menu would look and feel more like the one that you once had in your old Windows Vista or Windows 7 computer and accessing some important system locations or even your personal files would not be hard at all.
Quickly Change the Color of Start Menu’s Background
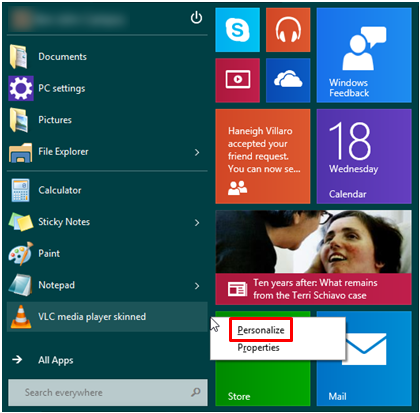
Now, one last trick that we will show is how you can change the looks of the Start Menu. If you feel like the default color of the Start Menu background is too dark then you can quickly change it by first right-clicking on the narrow space at the middle of the Start Menu itself as what we’ve done earlier. After doing so, a menu will appear and from here, you will need to click on “Personalize”.
A Window that contains a selection of different colors will then appear and from here, just choose the one which you want to set as the background color for the Start Menu.
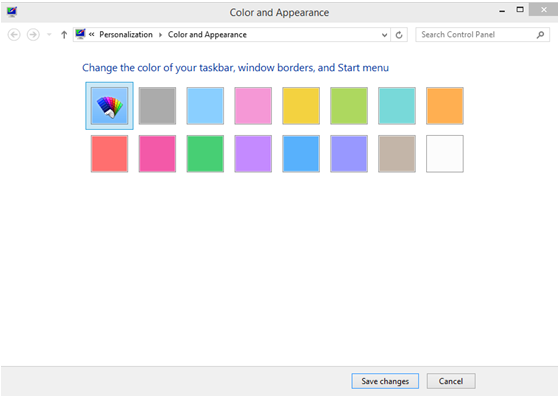
After choosing the color that fits your taste, simply hit the “Save changes” button which is located at the bottom to finally apply the color for the Start Menu background.
Missing the Start Screen? You Can Still Use It!
While Windows 10 boasts the presence of the new and improved Start Menu, it doesn’t really mean that the Start Screen has totally been removed. You can actually still use it in Windows 10 and that’s what we will be showing in our next tutorial so stay tuned to learn the details in doing it before you get to try Windows 10 Technical Preview loaded into your machine!