Switching from Start Menu to Start Screen and Back (Windows 10)
While everything is still on its development stage, Windows 10 has already earned mostly good and positive feedback from testers and Windows Insiders. This trend is expected to continue on as more insiders provide input and other suggestions on how to improve Windows 10.
One of the features that is becoming a big focus of positive feedback is the new Start Menu which is cleverly designed to provide a home for both the traditional items that used to be its mainstays and as well as the modern app tiles that used to be pinned on a full screen section called the Start Screen back in Windows 8 and Windows 8.1.
This redesigned Start Menu is a bit wider than the old one that is found in Vista and Windows 7 but it contains all of the needed shortcuts and stuff to help you use both the Desktop and Tablet related features efficiently. You can also add even more shortcuts to it to make its contents look very close to the old-fashioned Start Menu that we all loved as we have shown in our previous tutorial.
However, not all Windows users really hate the Start Screen. There are also others who loved it and have easily adopted to all the features that it offers and Microsoft is aware of it and so, in developing Windows 10, they made sure that users who prefer to have the Start Screen from Windows 8 and Windows 8.1 instead of having the Start Menu back would still be able to make it active once again.
In this tutorial, we will be showing the steps involved in how it is done and we will also explore some other settings and tweaks that are available for the Start Menu to be tailored to your usage preferences so just keep reading towards the end of this article to learn more!
Why Change from Start Screen to Start Menu
Microsoft has been very firm with their decision to remove the Start Menu from Windows 8 to the point of making it still absent in Windows 8.1. This move has left users expecting its return on the latter to be utterly disappointed.
Both operating system versions survived all the criticisms and complaints as well as seeing most users switching back to Windows 7 and while all of these commotions were happening, developers at Microsoft were already on their way to creating a better Windows version which would then be named Windows 10!
In creating this new breed of Windows OS, Microsoft made sure that all feedback are given enough consideration and so they established a feedback and suggestions program called Windows Insider.
This program makes Windows 10 available to developers, testers and other experts so Microsoft can get valuable feedback from them in making the upcoming operating system many times better than its predecessors.
One of the flaws that was found which really needed urgent attention was the removal of the Start Menu and so, in the current Windows 10 build, the Start Menu is already set as the default one instead of the annoying Start Screen.
When you press the Windows Key or click on the Start Button, there will be no full screen Window called Start Screen that would open which contains modern app tiles but instead, a new Start Menu will appear at the bottom-left portion of the screen which spreads to towards the center showing a combination of the traditional and the modern contents of the OS.
The putting back of the Start Menu in Windows 10 is just one aspect of Microsoft’s efforts to really make Windows better but that doesn’t mean that the Start Screen is already gone for good. It is still around and is just hidden somewhere. You can still use this feature if you prefer it over the new Start Menu and you will learn the steps in doing this on the items that will follow.
How Can You Get Windows 10
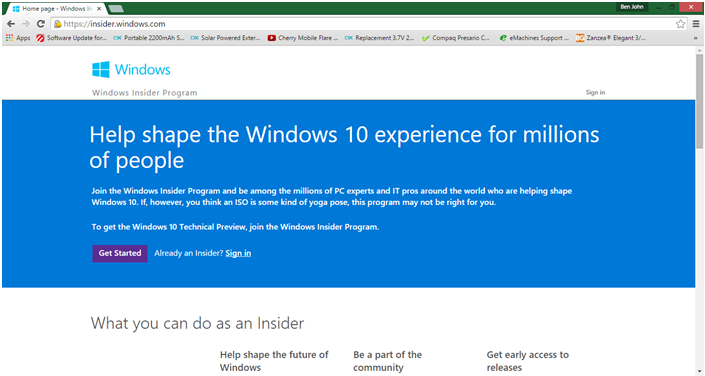
Before we really discuss the process which is relatively short and easy, you might be wondering how we’ve got to install Windows 10 even if it has not been formally released yet. If you want to get Windows 10 then you need to join the Windows Insider Program and be one of those who are providing feedback to better improve this upcoming Windows operating system version.
Just visit the official Windows Insider Program homepage and hit “Get Started” then provide all the required information so you can finally download the Windows 10 Technical Preview ISO file which you can use to install Windows 10 into your computer.
Just be sure to setup Windows 10 in a dual boot configuration with your current Windows OS installation to make sure that all your files in the other operating system are intact. Microsoft does not recommend that you make Windows 10 Technical Preview as your main OS since it is still on the developmental stage and is still subject to a lot of changes that can adversely affect everything that you have saved in your machine. This current build of Windows 10 is also buggy and error-prone.
Already Saw the New Start Menu? Try Changing it to a Start Screen!
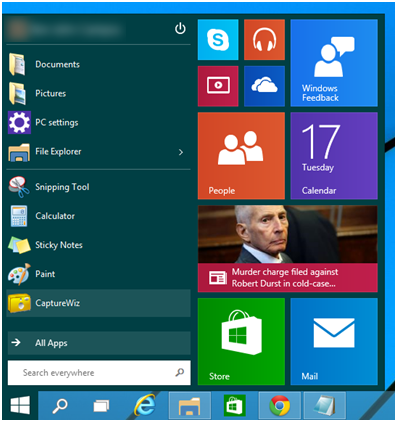
Now, if you have already installed Windows 10 Technical Preview on your computer, try pressing the Windows key or clicking on the Start Button and you should be able to see the new and improved Start Menu which looks like the one shown below.
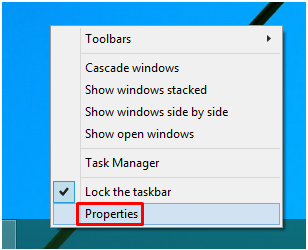
Now, if the Start Screen looks more appealing and feels a lot useful to you than this brand new Start Menu then you can quickly switch to it simply by right clicking an empty space on the Taskbar and on the right-click menu that will appear, simply hit “Properties”.
After doing so, the “Taskbar and Start Menu Properties” Window will appear and from here you will simply need to click on the tab which is located on top that says “Start Menu” and available options for tweaking the Start Menu will then appear.
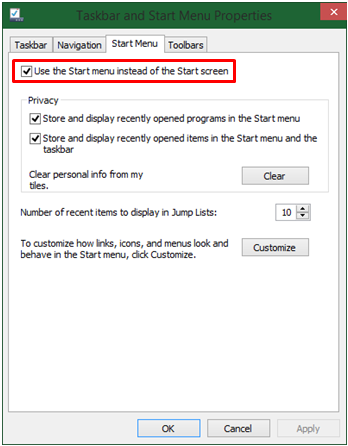
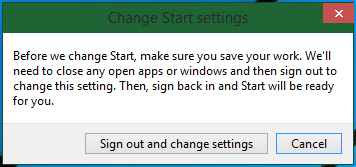
From this section, simply remove the check mark from the option that says “Use the Start menu instead of the Start screen” then hit the “Apply” button and you will see a small prompt which tells you that the process would require you to close any open program and Windows will need to sign out from your account in order to apply the changes done with the Start Menu. From this prompt, simply click on the button that says “Sign out and change settings”.
Afterwards, Windows will sign you out from your user account the it will let you sign back in. Just sign in using your user account details and once you’re in, just click on the Start Button or press the Windows key and you should be able to open the Start Screen instead of the Start Menu. If you want to switch back to the Start Menu, all you need to do is access the “Taskbar and Start Menu Properties” Window again as we have shown above, put the check mark back into the “Use the Start menu instead of the Start screen” option, hit “Apply” do the same steps again to sign out then sign back in to your computer and that’s it! You should have the Start Menu back.