3 Types of User Accounts in Windows 8.1
User accounts are very important in any Windows machine in the sense that it will never work without you setting up an account that will let you enter the operating system and use all of its features and components. It is like a key in a vehicle which lets you open the door and start the engine so you can start having its wheels rolling towards the place that you want to go. If you already have a user account set up in your Windows 8.1 computer, you might need to setup another one for guests whom you don’t want to get access to your personal files and other important stuff that are stored in your machine’s hard drive or even for your child which needs some access restriction or limits in using your laptop or PC.
If you’re new to Windows 8.1 then you will need to learn how you can do these things in your computer so you can add another layer of security and privacy to your machine. In this tutorial, we will be going through the each account type that you can create in your Windows 8.1 computer and discuss some advantages of setting up one account type over the other so buckle up and get ready to follow the steps below and learn some facts that will help you decide what type of account should you create in your Windows 8.1 machine.
Accessing the PC Settings Screen
In creating a new user, the very first thing that you need to do is access the “PC settings” section which is part of the Windows 8.1 metro environment. There are many ways in accessing this section and I’ll be showing you the easiest ones here. First is through the Settings charm. To do this, just point your mouse to the upper or the lower right corner of the screen and after doing so, the Charms bar should appear.
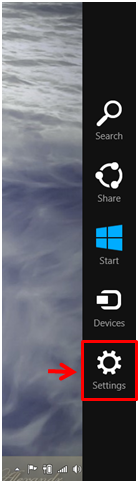
From these charms, just click on the one that is located at the bottom which is labeled “Settings” and after you do so, the settings screen will appear. From here, you will need to click on the tab at the bottom that says “Change PC settings” and you will be taken right away to the PC settings section.
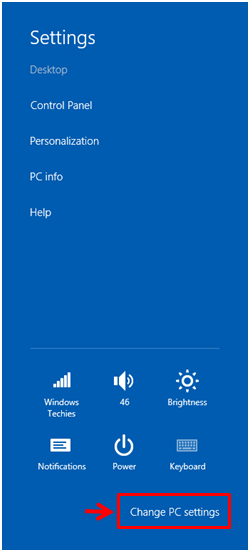
Another way in accessing the Settings screen is by pressing the Windows+I keys. Once the Settings screen appears, just click on the “Change PC settings” tab at the bottom the same as what is shown on the screenshot above and after you do so, the PC settings section will open.
Now, on the PC settings screen, you will see some links at the left edge of the screen which will lead you to the different settings, locations and tweaks within the Windows operating system. From here, just click on the link that says “Accounts” and you will be taken to the accounts section.

The next metro screen will then show all available options under the “Accounts section”. By default, the screen will open the “Your Account” section and you will see some options for changing your account picture or even disconnect from your Microsoft account. However, since we are going to add a new account to your Windows 8.1 machine, we will be clicking on the “Other accounts” link for now and just reserve the other ones in the next tutorial.
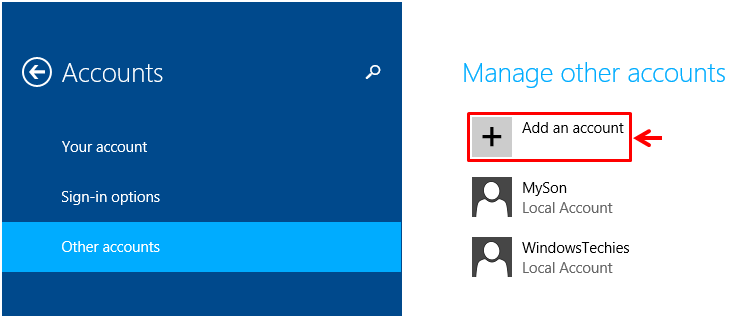
Now, under the contents of the “Other accounts” link which will appear on the contents pane, you will need to click on the option that says “Add an account” as shown on the screenshot above so we can start with the process of adding an account to your Windows 8.1 machine.
After clicking on the “Add and account” link, you will be taken to a screen that looks like the screenshot below. From here, you can choose to create a Microsoft account, an account for your child or even a Local account.
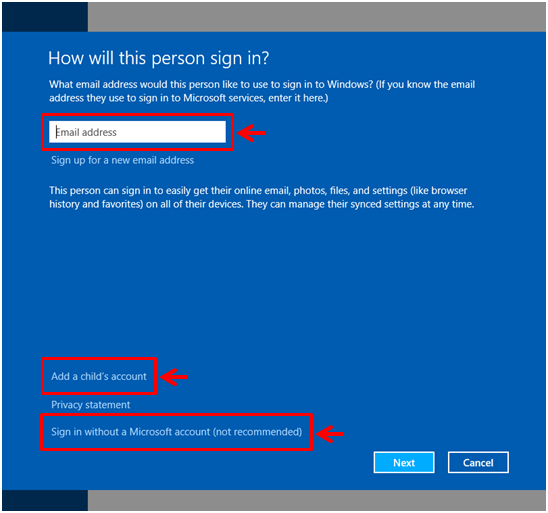
To create a user account using an existing Microsoft account, all you need to do is enter the Microsoft email into the input box provided. This type of account is the most recommended one since it offers some features and settings that are not available in the two other types of accounts. You can also create a new Microsoft email in case you still don’t have one simply by clicking on the “Sign up for a new email address” link located just below the input box.
If you want to create an account for your child so you can set certain restrictions to it such as blocking some sites or setting the time for computer usage then you will need to click on the link that is located near the bottom which says “Add a child’s account” and lastly, if you want to create a local account, all you need to do is click on the link that says “Sign in without a Microsoft account (not recommended)”.
Microsoft Account, Local Account and a Child’s Account: What’s the Difference?
This is a very important thing to ask and most novice users would surely wonder what differences do these accounts have since in older Windows versions such as Windows 7, you only can create a local account. Why are there three account types in Windows 8.1. Well, the very first reason is that Microsoft is tying to improve security and privacy for all types of users. Setting up a Microsoft account works like logging in to your android device using a Google account. Doing this will let you have access to all your files, settings and apps in any Windows 8.1 machine for as long as you sign in to it using your Microsoft account details.
The second type which is a local account works the same as the traditional accounts that you used to set up in Windows 7. It only allows access to your local files, folders and all the other stuff that are saved in your computer’s hard drive. It does not allow syncing of files and settings to all your other Windows 8.1 devices just like a Microsoft Account.
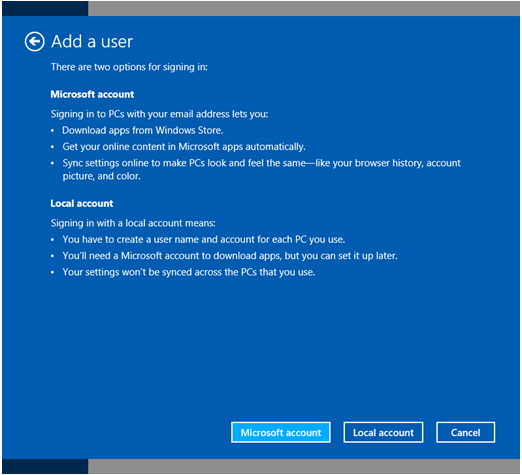
To learn more about the differences and advantages that a Microsoft account has over a Local account, simply click on the “Sign in without a Microsoft account (not recommended)” link and you will be taken to a screen which lists some quick information about the two types of accounts as you can see on the screenshot above.
Lastly, the third type of account is one that can be set to have restrictions in terms of website access or even time limits to control the user’s Internet and PC usage and manage the websites that he/she is able to visit. This account type is called a “Child’s account” and whenever you try to create a new account in Windows 8.1, you will always see a link that asks you if the account that you are going to create is for a child or not. The details in setting these three account types will be discussed in our next tutorial so be sure to watch out for it so you can master all the details in working with any type of account in your Windows 8.1 machine.