A Detailed Guide in Using the Options Under File Explorer’s Share Tab (Part 2)
Windows Explorer has been renamed as File Explorer in Windows 8 and Windows 8.1 and this new name is going to be carried over even to Windows 10 but have you ever cared to really see what actually is in it? Ever since its name was changed, there are also some features that were added to it.
Features that used to be mainstays of the right-click menu are now found on top of the File Explorer Window and in Part 1 of this tutorial, we have reviewed the different methods in launching the File Explorer Window and shown the first two options found under the “Send” option group of the “Share” tab but since we ran out of space in our previous article, we will continue explaining the rest of the options in it on this tutorial so again, we’ll invite you to turn on your Window machine and try all the steps that we’ll be showing as we move on.
Uses and Functions of the Options Under the Send Section of the Share Tab
In Part 1 of this tutorial series, we have already shown the first two options that belong to the “Send” section of the “Share” tab which are the labeled as “Email” and “Zip” and we’ve also demonstrated their uses but there are still plenty of other options and in fact, there’s two more groups of options that we still need to learn about and that’s what we’ll be talking about more in continuation.
First, let’s go over to the “Send” section again by launching File Explorer then hitting the “Share” tab that is found on top of it as highlighted below.
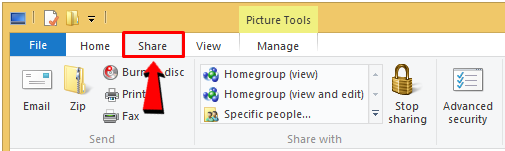
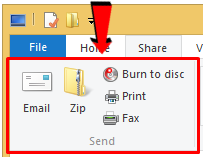
After the “Share” tab is clicked, you’ll be able to view the options that are found under it and now since you have already talked about the “Email” and “Zip” options, let’s proceed now to the next on which says “Burn to disc”. As you can see on the screenshot above, the icon for the “Burn to disc” option looks like a CD or DVD with a red beam and of course, from its label alone, its function is really obvious.
Burn to disc- The “Burn to disc” option is a relatively new one introduced in Windows 7 and it allows users to write files to a CD or DVD provided you have a built-in or a portable disc drive that supports writing/burning to discs. Try clicking on this option and you’ll be able to open the “Burn a Disc” wizard.
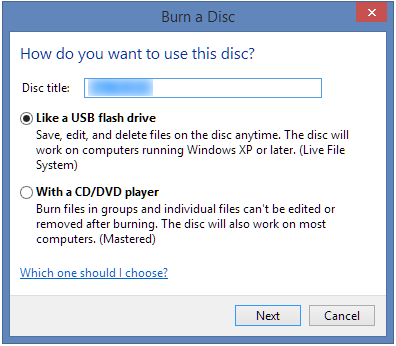
As you can see, there are two options for burning files to discs that is supported. First, you can actually burn files as if you’re saving some stuff to a USB flashdrive. If you burn files this way, they can be edited anytime the same as you do it on your portable USB flashdrive.
The second option is more permanent and when you use it, the files and all the other stuff that you burn into a disc can never be edited or removed after the process is complete. If you want to learn more on which option you should choose, you can click on the “Which one should I choose?” link found towards the bottom or you can also refer to our next tutorial that will show all the steps involved in doing this process.
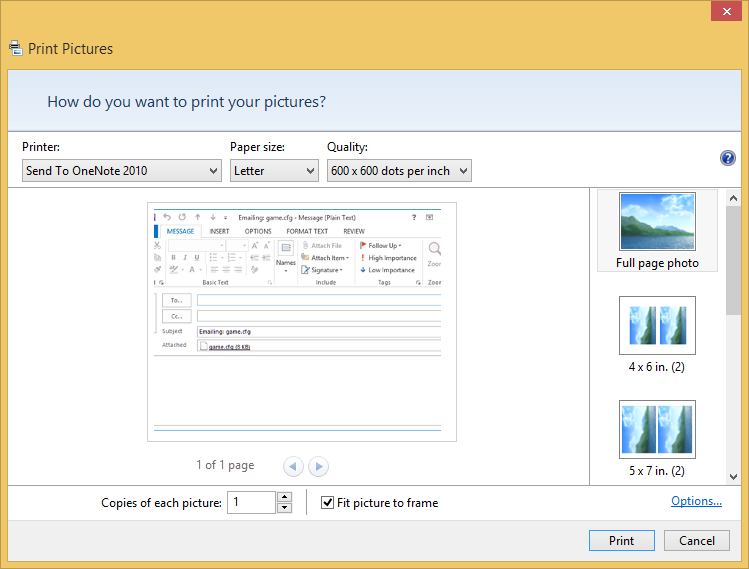
Print- Next option is the one that is labeled “Print” and again, its use and function is really very obvious. If you have some stuff that you want to print then be sure to connect your printer first on to your computer and afterwards, just select the file that you want to print then hit the “Print” option.
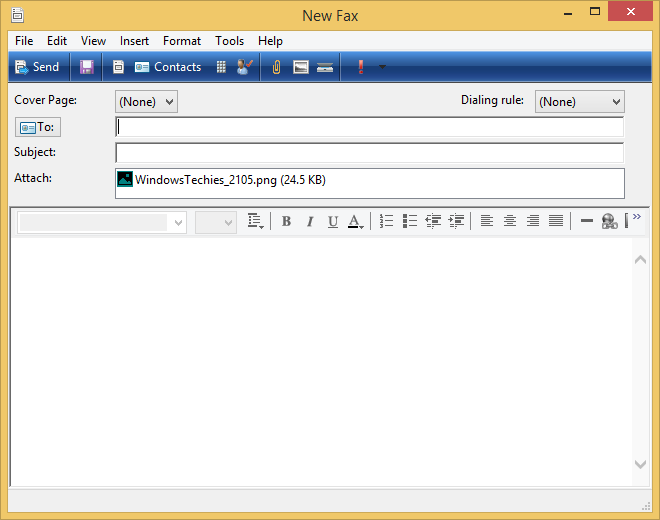
Fax- The fax option won’t really be familiar with home users but if you’re in an office that has a fax machine connected to the network then hitting this option will give you access to the machine itself through the “Fax Setup” wizard and after setting up everything and connecting to the network’s fax modem or fax server, you’ll be able to send the quick messages to a fax number instantly without a problem!
How to Use the Options Under the Share With Section of the Share Tab
Now that we’re done with the options that are found under the “Send” group, we’ll move forward and see what’s under the “Share with” section and see how we can take advantage of them in improving productivity. There are only two options under the “Share with” section but they are both very important in ensuring quick data transfer on a network. First, let’s look at the first portion which is a box containing a list of users that are connected to your network or Homegroup.
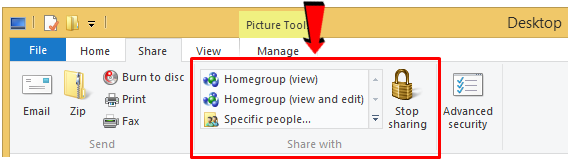
Sharing a file or folder to anyone on your network is pretty simple. First, you will need to select the file or folder that you want to share then afterwards, just choose the person to whom you’d like to share it to from the list that appears inside the box under the “Share with” options group.
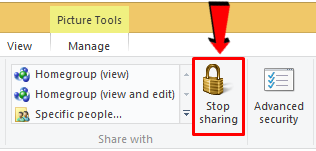
Stop Sharing- Now, in case you’d like a certain file folder that you have already shared to be disabled from being shared to other people on your network then all you need to do is click on the option that is found under the “Share with” options group that says “Stop sharing” as highlighted on the screenshot below and the file or folder will automatically be gone from the computers of the people that you’ve shared them with in the past.
How to Use the Options Under Advanced Security
Lastly, there’s also a tool provided under the “Share” tab of File Explorer’s ribbon based options which contains options for tweaking the “Advanced Security” settings of the files or folders that were allowed for sharing. To access this section, simply click on the “Advanced security” option from the top of the File Explorer Window as highlighted on the screenshot below.
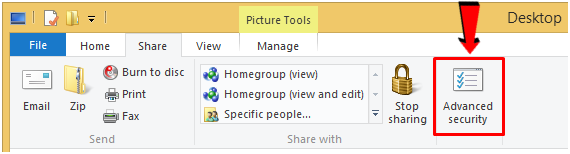
After the option is clicked, another window will appear which shows the Advanced Security settings for the file, folder or even library that you ave selected. For instance, you can see a list of users that has access to it and change different settings in what these users can do to the file, folder or the contents of the library that you have shared on your network or Homegroup. You can also view or edit the auditing properties or even test each of the users that have access to the file, folder or library to be able to see what they can actually do with them.

This Window is truly the go-to location whenever you want to make some tweaks on the people who can get access to certain files on your computer or even on your network and remember, these options are found in the “Share” tab of the improved “File Explorer” system/file management tool.
Less Options But Equally Useful!
As you can see, the “Share” tab doesn’t really have as much options under it as the “Home” tab does but that doesn’t mean that it’s less useful at all. In fact, it is one of the most useful set of tools that can serve different purposes especially if you’re on a network of computers in your workplace or even just at home. We’ve already covered the “Home” and the “Share” tabs in our tutorials here and we’re very sure that you are already seeing how impressive it is for Microsoft to really include the ribbon-based options in a File Explorer which all of us deal with each day but we’re not done yet so be sure to watch out for our future tutorials that will cover the “View” tab and explain the uses and functions that are found under it.