Creating Your Own Sound Scheme
Your Windows Operating System has a set of sounds that automatically plays during a particular event on Windows itself or in other programs installed on your computer. Events like “Maximize”, “Minimize”, “Close Program” and “Default Beep” and the sound that plays when such events happen can actually be customized. These sounds compose a collection called a “Sound Scheme”.
A sound scheme is always associated to a Windows theme that’s why you notice that whenever you change your theme, the sounds also change. The default theme for Windows 7 for instance has a sound scheme “Windows Default”.
You can always change a sound for a particular event if in case you don’t like the default sound applied to it. Here are steps you can follow in making your own sound scheme on your Windows machine.
Locate the Sound Scheme Customization Window
To be able to customize your Windows 7 sound scheme, you need to find the window where you can customize the sound for the theme that is currently set active. You can go to this Window in many different ways.
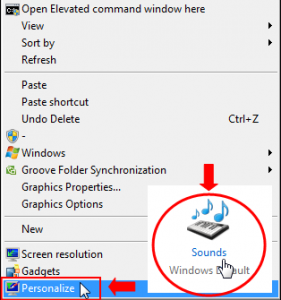
1. The first way of going to this Window is by right-clicking on the desktop area (anywhere on the desktop area) and clicking “Personalize” and then looks for the “Sounds” link at the bottom part of the “Personalization” Window.
2. You can also access the sound customization Window by going to “Control Panel” then clicking on the “Appearance and Personalization” link.

Then under personalization, click on “Change Sound Effects”.

3. The third and easiest way to find this customization Window is by clicking on the “Start” button and typing “Change system sounds” on the search box then press “Enter” on your keyboard.
Changing the Sound Effects
The next thing that you should learn is changing the sound scheme.
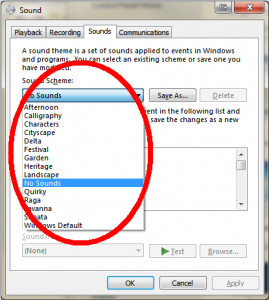
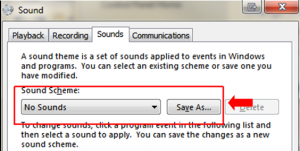
You can set another sound scheme to the one that is predefined for a particular theme by choosing from the list of sound schemes that are available.
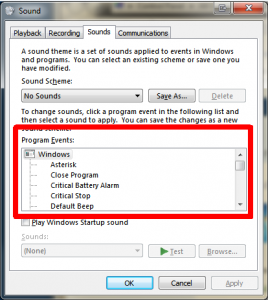
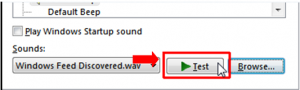
Note: If you would like your machine to stay silent. You can choose the “No Sounds” scheme. This will disable all sounds that are attributed to all events. In order to customize a particular scheme, click on the “Program Events” box, choose the event that you want to change the sound for then click on “Browse”.
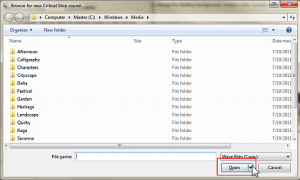
You may then search for the sound that you want to set as event sound then click “Open”.
You can also try listening to the new sound by clicking the “Test” button. It is recommended that you do this for every event sound that you want to change.
Remember: Your Windows 7 computer only uses .wav sound files for all of its event sounds. If the sound clip that you want to use is in .wma, .mp3 or any other format then you need to change or convert it to .wav format first using a media file converter. You can do the conversion on many sites on the web like “Online Converter” or “Media.io- Online Audio Converter”.
If you just prefer to do the conversion on your desktop without connecting to the Internet, you can look for a conversion software online which are free to download.
Creating Your Own Sound Scheme
If you want to create a completely new sound scheme, it is best to choose the “No Sounds” scheme first and start filling up the sounds for each item on “Program Events”.
Saving a Sound Scheme
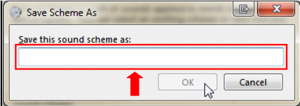
Once you are done changing the sounds on the events that you want new sound for, the next thing you should do is to save the scheme so you can easily select it easily next time and your hard work will not be wasted. You can do this by clicking on the “Save As” button,
type in the name that you want to assign for the sound scheme and click “OK”.
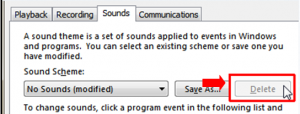
If you don’t save the sound scheme, Windows will automatically assign the same name to the sound scheme with the word “(modified)” next to it like “No Sounds (modified)” for instance.

Deleting a Sound Scheme
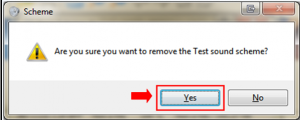
If in case you would like to delete a particular scheme you created, just click the sound scheme that you want to remove and click on the “Delete” button.
Windows will then ask you to confirm the action, just click “Yes” and the changes will now be saved and the scheme will be deleted.
Note: You cannot delete the predefined sound schemes on the list. You can only delete the ones you created and named yourself or those that has the word “modified” next to the default sound scheme name.
How Are Sound Schemes and Windows Themes Related?
One important thing that you should take note is that sound schemes which are readily available on your computer are assigned to your Windows 7 themes. This implies that if you create a new sound scheme, a new theme will automatically be created and Windows will assign the name “Unsaved Theme” to it.
If you want this new theme to be saved with the new collection of sounds you created and set as the sound scheme, you should save the theme and create a name for it.
You should also take note that the sounds you assigned for certain events will be played as long as the Windows theme is active. If you change your theme, the sound scheme will automatically be changed to the one that is assigned for the theme you chose. If you want to keep the sound scheme you created, you need to edit the sounds for each event of the new Windows theme you just applied.
That’s it! You now have a new sound scheme for your assigned theme. The sounds will automatically play during certain events and changes that you do on your Windows 7 machine.