Getting Acquainted with the Notepad Tool
The Windows operating system is full of different tools that can be used for a lot of purposes. You can edit documents, enhance pictures and other forms of images or even create them using some of the built-in tools in this very popular operating system. If you wish to have some advanced functions and do better editing of texts and images then you can also choose to install third-party programs that are available for free or purchased to obtain license.
But before getting into some advanced tools in Windows or trying some third-party programs available on the Internet, let us first check on a built-in and very simple tool that lies deep within the Windows operating system called the Notepad. In this tutorial, we will be learning what this tool is used for and take you through the steps that are involved in using it so no matter what edition of Windows is installed on your computer (Windows XP, Vista or Windows 7), just have it prepared and follow the steps that we will showing below.
What is the Notepad For?
But before delving into the deeper tweaks that you can do on the Notepad tool, you might stop and ask what is it really used for. Well, you can get a clue of this tool’s use from its name alone “Notepad”. Yes! This built-in Microsoft tool is actually used for simple text editing. You can create some compositions in it or list some things that you need to do for the day and save it.
Unlike other text-editing tools especially those that are part of the Microsoft Office suite like Microsoft Word and the others, the Notepad tool does not possess any formatting options, tags and other functions. In plain words, there are no Justify, Align Right, Bold, Italicize or Underline buttons in it. It is simply for handling texts and when you save a file that is created with it, the “.txt” (excluding the quotation marks) file extension will automatically be assigned to the file. This simple tool is capable of being used in the following tasks:
- Keeping a list of things that you need to do or the things that you already completed.
- Editing system files which will be used in a DOS environment
- Creating Source Codes for compilation or execution in Command Prompt
- Creating Draft of very lengthy documents so you can save in system resource and hard drive space.
- Creating HTML tags to be uploaded to the web.
Aside from the ones already mentioned above, Notepad can also be very useful especially if your computer’s hardware is a bit under-powered and running some more advanced programs like Microsoft word for simple text editing could take a toll on its performance.
How to Access Notepad in Windows 7
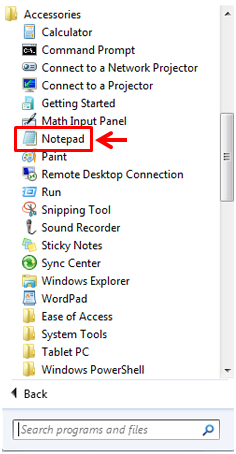
If you are using Windows 7, accessing the Notepad tool is done by first getting to the Start Menu. To do this, simply click on the Start Button or press the Windows Key and the Start Menu will appear. From here, you will need to view “All Programs” then click on the “Accessories” folder and you should find the Notepad shortcut from in there as shown on the screenshot below.
If you don’t want to go through the lengthy process of navigating to the “Accessories” folder, you can simply type “Notepad” into the search Search input box that is located at the bottom portion of the Start Menu and just wait for the Notepad shortcut to appear on the search result under the “Programs” category.

Accessing Notepad in Windows 8.1
Now, if you already decided to upgrade to Windows 8.1, accessing Notepad would be different than doing it in Windows 7. One way of getting to this tool in Microsoft’s latest operating system is by clicking on the Start Button and once the Start Screen opens, you will need to press the Windows + S keys in order to summon the Search screen that will slide in from the right edge and from here, simply type “Notepad” into the Search box that is found on its top portion as shown below.

After typing in “Notepad” into the Search input box, just wait for a few seconds and the search results will start appearing just below the box. From these search results, you simply need to click on the Notepad shortcut as highlighted above and it should open right away.
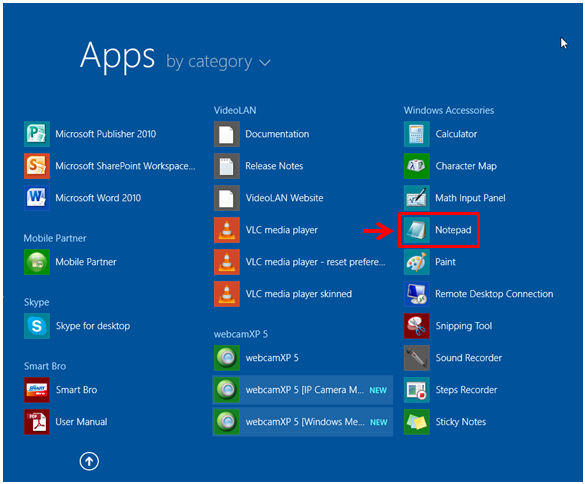
Another way in accessing the Notepad tool in Windows 8.1 is by going to the Apps view screen. To do this, just open the Start Screen first and move the mouse pointer to summon a round button containing an arrow-down icon in it that appears at the bottom-left portion of the screen.

When the round button appears, just click on it and the Apps view screen will automatically open. From here, you will need to scroll towards the right until you find the “Windows Accessories” app category where the Notepad shortcut should be located.
What’s in Notepad’s Main Screen
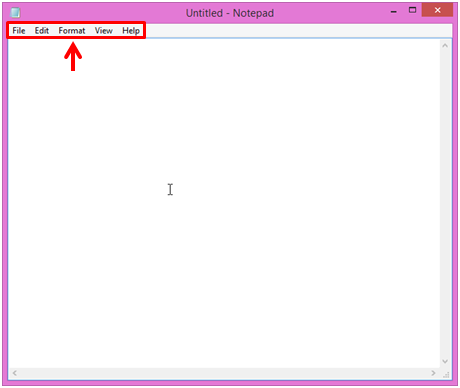
Now that you already learned how to open the Notepad in both Windows 7 and Windows 8.1, it is time to take a look into the available functions that can be found on its main screen. As you can see on the screenshot below, the only available functions on Notepad are tabs that are found on its top-most portion as highlighted on the screenshot below.
The File Tab
Now, try clicking on the “File” tab that is found at the left-most portion and you will see a menu box containing some other options for working with a new Notepad file or saving an existing one. Keyboard shortcuts are also indicated beside each of the options that are available. For instance, if you want to create a new file, simply hit “CTRL + N”. To open an existing file, just hit the “CTRL + O” and to save the file that you have just completed, simply hit the “CTRL + S”. Lastly, you can also print a Notepad file simply by pressing the “CTRL + P” keys simultaneously while the file is open and a working printer is attached to your computer.

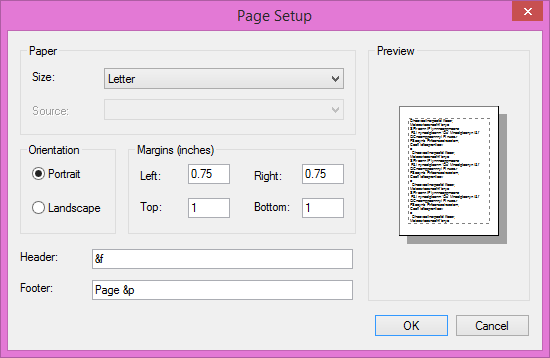
You can also make some changes on how Notepad files are formatted simply by clicking on the “Page Setup” option. Once you do so, a new Window will appear which contains some tweaks available for the “Paper size”, “Orientation”, “Margins” and as well as “Header and Footer”. After you are done making tweaks on this section, simply hit the “OK” button that is located at the bottom.
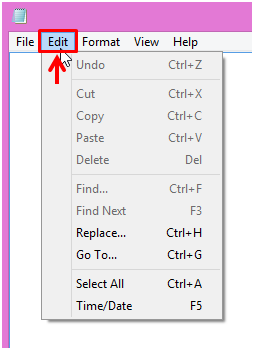
The Edit and Format Tabs
Moving on, you will find the “Edit” tab and when you click it, you will see some functions that are available for editing the texts that have already been entered into the screen such as “Copy”, “Paste”, “Cut”, “Undo” and many others. This is also the tab that contains the function for finding a specific text and replacing it and you can execute these commands simply by clicking on the “Find…” and “Replace” options respectively.
Next, you will find the “Format” tab which contains only two functions, “Word wrap” and “Font”. If you are not comfortable with the current default font style that is used by Notepad then you can simply change it using the “Font” option. The remaining two tabs which are “View” and “Help” doesn’t contain that much functions and options but if you need some help then the latter is tab that you need to click.