How to Assign Custom Starting Location in Windows 10’s File Explorer
You might have already been using Windows 10 for more than a month now but haven’t really enjoyed the file management aspect of it because of some changes that were implemented in this latest Windows OS version. Back in Windows 8 and Windows 8.1, the File Explorer tool opened directly to the “This PC” section showing your libraries, folders and available drive partitions but in Windows 10, it takes you somewhere else by default which is quite annoying especially if you’re used to its old configuration.
If you haven’t noticed it then you should already be aware now that the “File Explorer” tool in your Windows 10 computer takes you to a newly added section called “Quick Access” which provides quick shortcuts to your “Frequent folders” and “Recent files”. If you don’t like this change with the starting location that has been implemented by Microsoft in their newest operating system edition then you will need to learn how to change it back to the “This PC” section or even to a custom folder which you want to land on whenever you launch the File Explorer tool. Just read on to find out how this is done!
Two Default Starting Locations to Choose From
Unlike the File Explorer tool in Windows 8 and Windows 8.1 that has only one starting location, Windows 10 has two locations for you to choose from and as we have mentioned earlier, the default one is the new “Quick access” section instead of the “This PC” section which was the case in both Windows 8/8.1.

The screenshot above shows this default “Quick access” section which File Explorer has automatically opened when it launched. If you don’t like to be brought into this location whenever you open File Explorer and you want to be on “This PC” directly then you will need to change the starting location. To do this, you will simply need to click on the “View” tab that is located at the top as highlighted on the screenshot below.
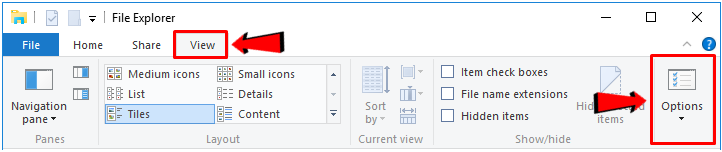
Once the ribbon-based options under the “View” tab appears right below the column where it is located, you will need to look for the item that says “Options” which should be located at the extreme-right end of the ribbon as highlighted on the screenshot above. After this item is clicked, the “Folder Options” Window should appear and it will automatically display the contents of the “General” tab in it.
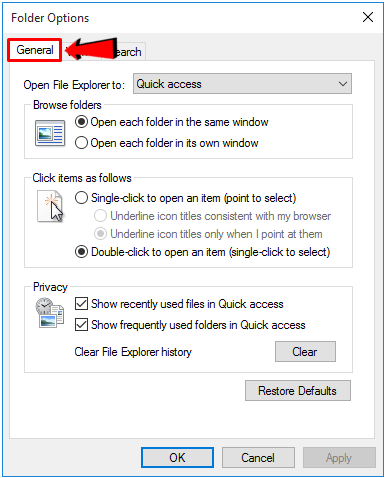
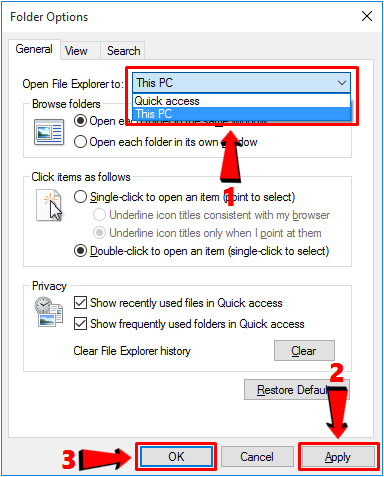
Now, under this “General” tab of the “Folder Options” Window, you will see the first item in it which says “Open File Explorer to” and on its right hand portion you will see a drop-down options box where the “Quick access” section is currently the one that is set as the default starting location. To change this, all you need to do is click on this box and after doing so, simply click on the “This PC” option so it will get selected as the default starting location and in order to save this change, you will need to click on the “Apply” then “OK” buttons.
After setting “This PC” as File Explorer’s starting location, you will need to close File Explorer then open it again and the change should now be applied. You will now be able to view the contents of the “This PC” section in your Windows 10 computer instead of being taken to the “Quick access” section as the default setting for File Explorer in this latest Windows OS edition.
1. Changing the Starting Location into a Custom Folder
As you can see on the steps that we have demonstrated above, there are only two starting locations that can be set for the File Explorer tool by default which are the “Quick access” and “This PC” sections but we have tried a tweak that will allow you to assign a custom folder according to your choosing as the starting location and thankfully, it worked! To start doing this tweak, you will first need to choose a folder, library or even a drive that you would like to be set as the starting location. Once you find the folder, you will need to follow the steps below:
Create a Shortcut for the Folder
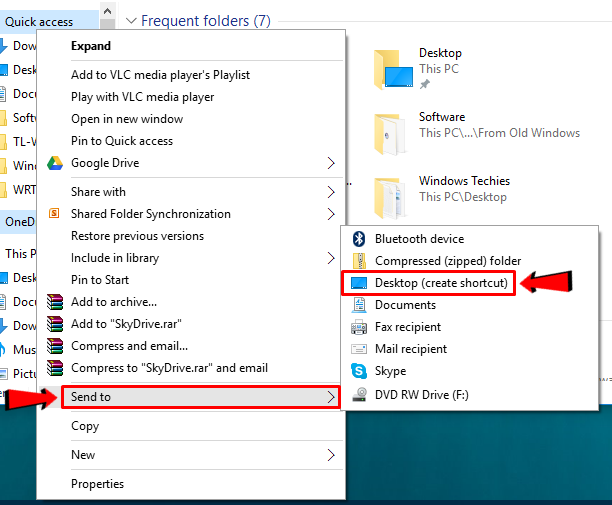
Now that you have already selected a folder that you wish to assign as File Explorer’s starting location, the next step would be creating a shortcut of it on the Desktop screen. To do this, you can right-click on the folder from the File Explorer Window and after doing so, you will be able to open a right-click menu which will now display different actions that you can do to the folder. From this menu, simply click on the option that says “Send to” then a new set of options will appear where you will finally need to click on the item that says “Desktop (create shortcut)” as highlighted on the screenshot below.
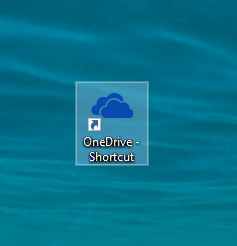
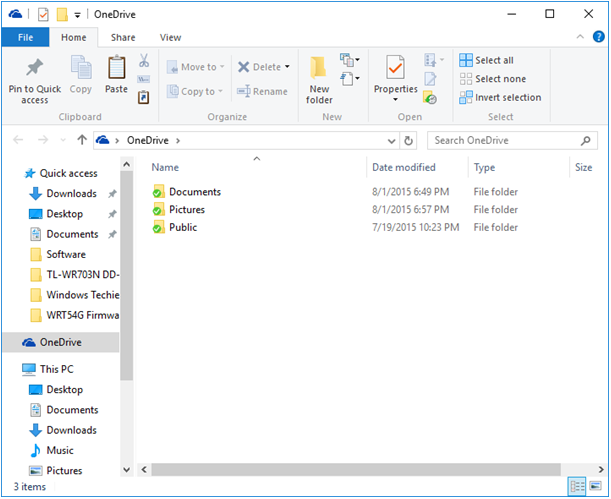
After doing these steps, you should be able to see the newly created shortcut on the Desktop screen of your computer. For this tutorial, we will be using OneDrive as an example.
2. Copy the Newly Created Shortcut to a Special Location and Rename it
Now that the shortcut for the folder has already been created on the Desktop screen, the next step is you will need to copy it to a special location. To do this, you will first need to open File Explorer then copy the path below (excluding the quotation marks) into the address box.
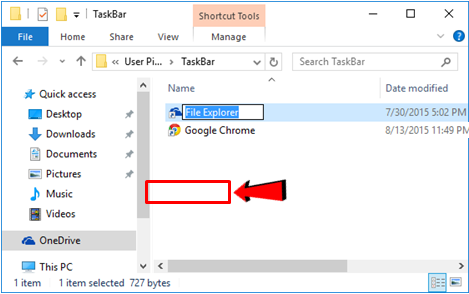
“%APPDATA%MicrosoftInternet ExplorerQuick LaunchUser PinnedTaskBar”
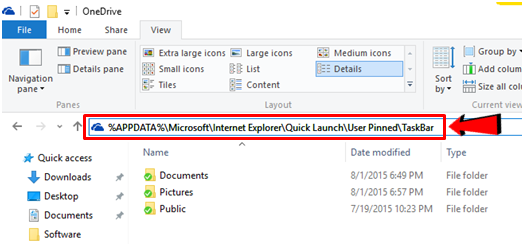
After the path is copied into the “address box”, you will need to click on the “Enter” key of your machine’s keyboard and after doing so, you will be able to access the special location where we are going to copy the new shortcut into as shown on the screenshot below.
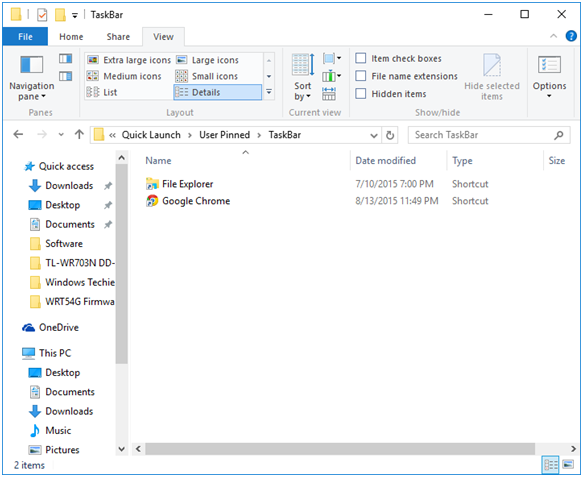
Now, just copy and paste the newly created shortcut from the Desktop screen to this special location. Once it gets copied, you will need to delete the “File Explorer” shortcut that is already in this special location. Why delete it? You’ll find out the reason in the next step.
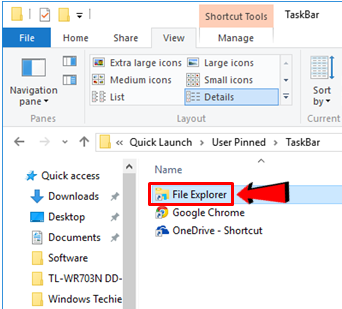
Now, when the File Explorer finally gets deleted, just rename the shortcut that you have copied as “File Explorer”.
3. Restart File Explorer
After doing this tweak in the special location that we have accessed above, it is time to close File Explorer then open it once again to finally apply the changes made. Once File Explorer restarts, you should now be taken to the new custom folder that you have assigned as the starting location for this very important feature in your Windows 10 machine.
Boost Your Productivity With the New and Improved File Explorer Tool
As we have shown above, the File Explorer tool in Windows 10 only has two starting locations by default which you can choose from but that doesn’t mean that you can’t make tweaks with it to make this tool work as you want it to. It only takes a little bit of exploring and experimenting to achieve something that works better than the default settings in your newly upgraded Windows 10 machine. Just follow the steps that we have shown above and you should be able to customize File Explorer’s starting location as you please!