How to Back Up Files in Network Locations and Drives Using File History
We’ve talked much about the File History feature in our past three tutorials but this very good tool’s uses doesn’t just end there. The benefits that certain users can get from this feature that was first introduced in Windows 8 seems to not end in just one personal computer because believe it or not, it can also save back up copies of files even in a network of computers that are set up in an office or anywhere else where network locations and drives are available.
You might already be impressed now just by reading the introduction but as we always do here on WindowsTechies.com, we’re going to take you through the steps in how to do this so be sure to get your Windows 10 machine ready to follow the steps that we are going to demonstrate as we move along in this tutorial.
Accessing File History in Windows 10
The very first thing that you need to do in order to execute every step that are going to be shown in this article is to first launch the File Explorer tool and thankfully in Windows 10, there are plenty of ways in doing this and we’ll show you how it is done quickly to save you the time and effort in doing additional research or getting into our previous tutorials. Let’s start with the easiest!
Accessing File History Using Search
The Search feature is one of our favorite tools in Windows 10. Not only is it made better in terms of performance, it is also omnipresent within the operating system which means that you can find it almost anywhere and you can even launch it anytime! To summon the Search screen, just press the Windows + S keys on your computer’s keyboard.
After pressing this keyboard shortcut combination, the Search app will pop out of the bottom-left portion of screen and on it, you will find a search input box at the bottom where you will simply need to input the words “file history” into it as you can see on the screenshot below.
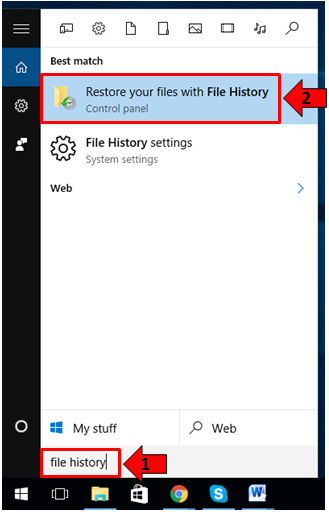
Once “file history” is entered into the box located at the bottom of the Search app screen, the search results will now appear just on top of the search input box and from these results, just click on the one that says “Restore your files with File History” as highlighted on the screenshot above.
Accessing File History from the Control Panel
Another easy way in launching the File History tool is done from the Control Panel. To start, just press the Windows + X keys in order to access a hidden menu that contains links to important Windows system and settings locations.
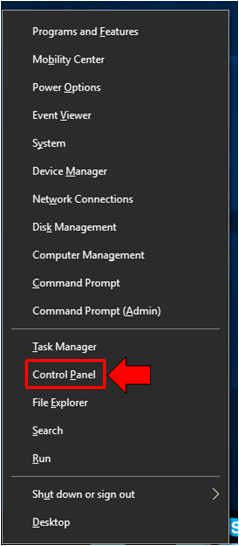
The hidden menu will pop out of the bottom-left portion of your computer screen and it should look like the one shown below. From here, all you need to do is click on the link in it that says “Control Panel”.
After clicking on the link, the Control Panel Window should launch in an instant and on it, you will need to put your attention to the “System and Security” section. Under this section, simply click on the link that says “Save backup copies of your files with File History” and the File History tool Window will launch right away. There is also a way in accessing File History settings from the modern Settings app and if you want to learn how it is done, you can read the details in our previous tutorial.
Now that you already know how to launch the File History tool, it is time to start learning how you can use it in saving stuff from network locations and drives so just read on and follow the steps that are going to be shown below.
Connect Your File History Drive and Recomend it to Your HomeGroup
We’ve used a USB flashdrive for backing up files in our previous tutorials but if you want File History to backup files for different computers in your network, we would recommend that you use an External Hard Drive attached to your computer. The reason for using such storage device is because it has a larger storage capacity compared to USB flashdrives.
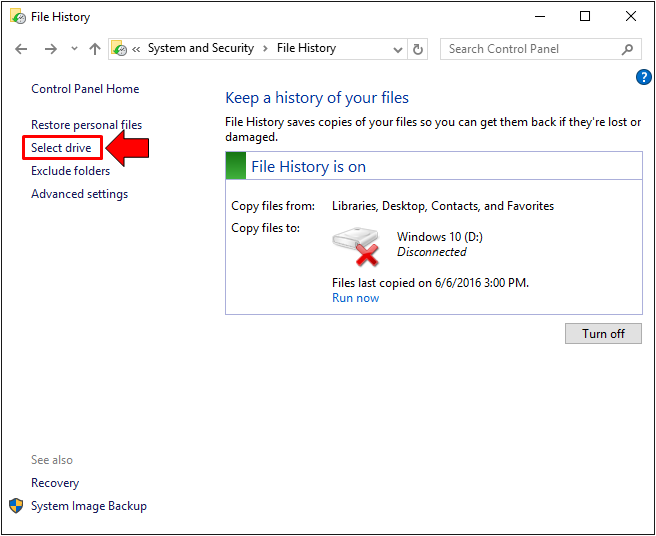
Once you have this storage device attached to your computer, you will need to set it up as the File History storage drive or backup drive. Doing this is pretty simple, just go to the main Window of the File History tool and hit the “Select drive” link which is located on the navigation pane at the left as highlighted on the screenshot below.
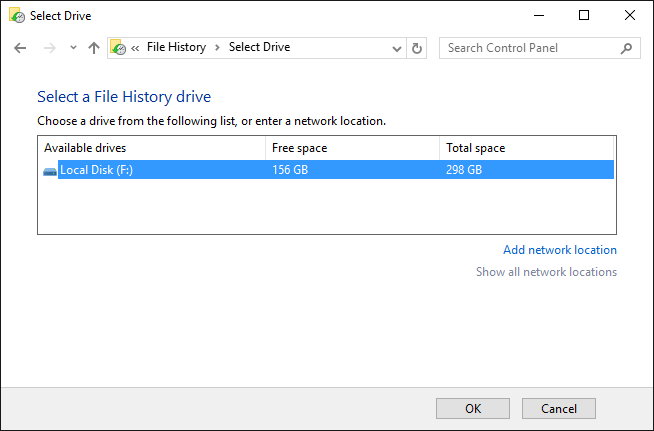
After hitting the link, you will be taken to the next Window which now shows all available drives that are attached to your Windows computer. From here, just select the External Hard Drive that you want to use as File History Backup Drive then hit the “OK” button located at the bottom.
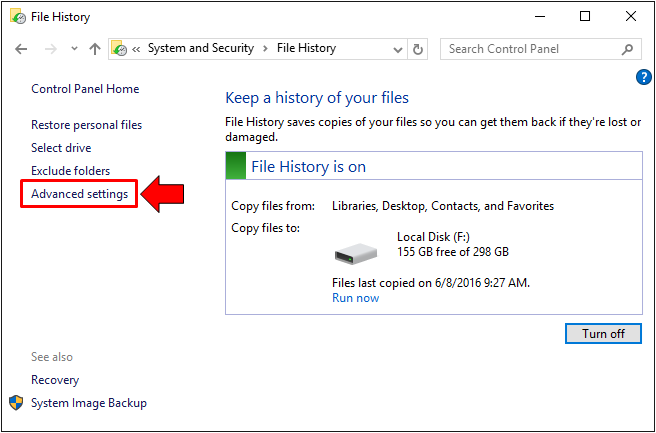
Once the External Hard Drive gets up and working as the File History Backup drive on the computer to which you attached it, the next step is to click on the “Advanced settings” link still from the navigation pane at the left of the main File History Window so you can recommend the drive to your HomeGroup.
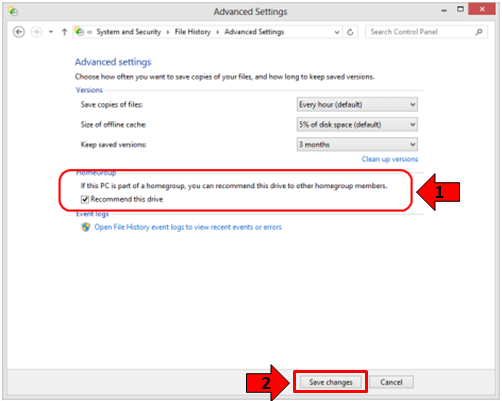
The Advanced Settings Window will then open and from here, you will simply need to tick inside the checkbox which says “Recommend this drive” located towards the bottom of the Window. After checking this box, just hit the “Save changes” button at the bottom of the Window to execute the changes you made.
The drive will then be shown to all computers in your network that runs on Windows 10 and are part of your HomeGroup. It will serve as the recommended drive to save File History backups into whenever other computers in the HomeGroup wants to use File History.
What are the Advantages and Disadvantages of this Setup?
Once a drive is used as the File History Backup on a network, it will serve as the default storage for all the computers of a HomeGroup for instance and every time one computer turns on File History, it would feel like the Backup Drive itself is connected to the computer and not on another station within the network. If you want to know the pros and cons of this setup, here they are in simple words.
- Speed of backing up files depends on the maximum speed that the computer to which the drive is attached to can handle.
- Other computers on the network cannot backup files to the drive if the station/computer to which the drive is attached to is turned off.
- Transfer speeds for backup files depends on the capacity of the network itself.
- If the drive is used to writing and accessing data to and from it then transfer speeds would significantly be faster.
Advanced Setup for Using File History
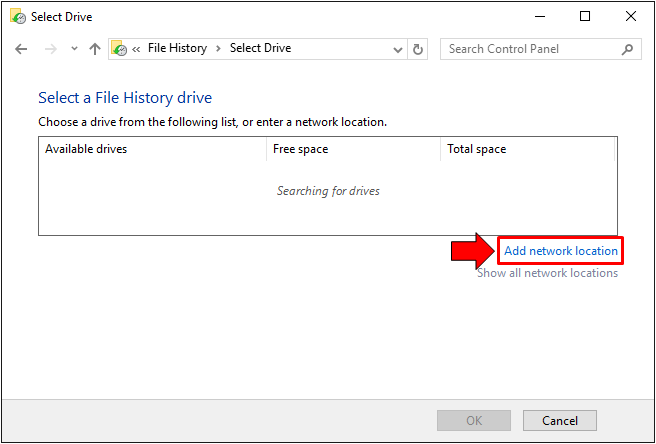
In other instances, you can also use File History for more advanced setup provided you have the modern equipment needed. If you own a modern router that supports using a network drive attached to it via its USB port then you can attach the external hard drive that you want to use as backup storage to it then head to the “Select Drive” section of the File History tool. Once you are there, just hit the link that is located on its bottom portion which says “Add network location” as highlighted on the screenshot below.
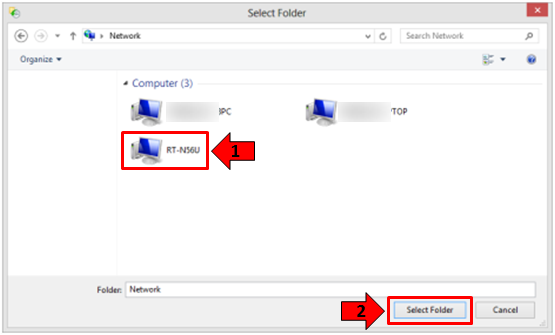
On the Window that would follow, all you need to do is click on the router device (RT-N56U in our case) then hit the “Select Folder” button at the bottom in order to open its contents.
The drive you connected to your router will then be displayed on the next Window and all that you need to do is select it and hit the “Select Folder” button at the bottom once again. This setup will now allow your computer to use the drive as the File History Backup storage and in order to allow the same drive on other computers that are connected to the same router, just do the same steps on each machine.
The Pros and Cons of this Setup
Compared to the other setup that we did above where the File History Backup drive was connected to one computer in the network, this second and more advanced setup is quite better because of the following reasons.
- File History will work in backing up files without depending on a certain computer in the network being turned on or off or being connected or disconnected from the network. Since the drive is attached to the router, all computers in the network can backup as well as access files from the backup drive anytime as long as the router is turned on and the computer that tries to save or access files to and from it is connected to the router.
- Writing and transfer speeds still depends on the capacity of the router but since it is only the modern versions of routers that supports this capability, transfer speeds should be faster. If the drive is used to the writing and accessing of files in it then transfer speeds will also be faster.
If you are asking us which one is the better setup then we would say that the second one is our choice but then again, you will need to acquire a modern router such as Belkin N600 DB or ASUS RT-N56U in order to take advantage of it. This setup is recommended especially if you have 2 or more Windows 10 computers in a network because of the flexibility it offers in saving and accessing backup files compared to the first method that we’ve shown above.
File History: An Ultra-Useful Backup Tool in Windows!
As you have seen in our tutorial series discussing about the File History feature, it really is a very useful and handy tool in saving backup copies of your important files to make sure that you don’t lose them out of a system trouble and other related problems. Microsoft has really did a great job incorporating it to their flagship software product!
Do you know some other tricks in using File History? Make it known to others who are Windows OS lovers by sharing it in the comments section below.