How to Connect to a Wireless Network in Windows 10
The devices that we have in our modern world all have one thing in common- they all can connect to the Internet through wireless or wired means. Being able to connect to a network is also a requirement even in some office and work places.
The world that we live in truly is one that is dependent with most of the stuff that the Internet offers. Games, social media, news, entertainment name anything that comes into your mind and the Internet offers information about it in one way or another.
It is therefore important that you know how to connect to the Internet from your Windows device whether it be a mobile one, a laptop or even a desktop computer that is capable of connecting to a wireless network. If you’ve been using older Windows versions for a long time then this would surely be easy for you.
Connecting to wireless networks is also easy in Windows 8 and Windows 8.1 but in this tutorial, we will be showing you the steps involved in connecting to a wireless network in the new Windows 10 operating system version so if you’re still using Windows 7, Windows 8 or Windows 8.1, you need to take time to read this tutorial so you can have a glimpse on how similar or how different the process is in Windows 10.
It always pays a great deal to be the first one to know about some important stuff and when Windows 10 finally gets released to the public, you will easily be able to connect to your wireless network after upgrading your machine to this upcoming operating system dubbed as the best one ever from Microsoft!
Viewing Available Wireless Networks in Windows 10
The System Tray section of the Taskbar is where the network status indicator icon is found in older Windows versions like XP, Vista, Windows 7 and even in Windows 8 and Windows 8.1. This section in every Windows operating system edition has not really changed too much and this important icon is still found on the same location even in Windows 10 as you can see on the screenshot below.
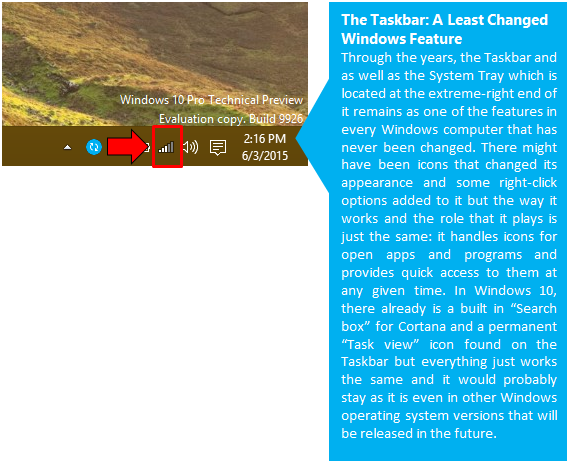
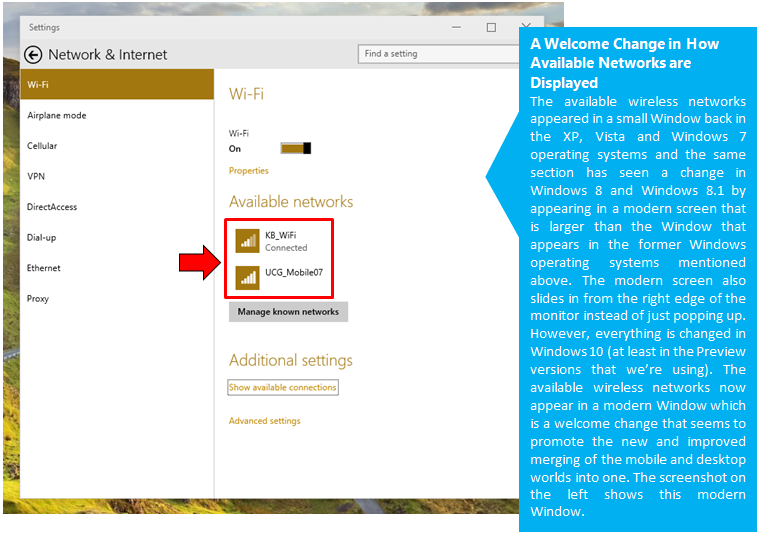
Now, in order to view the available wireless networks in your area, all you need to do is click on the network status indicator icon and we have noticed that in the Windows 10 Preview version that we are using, the section that shows all of the available wireless networks being detected by our computer appeared in a modern Window instead of being displayed in a modern screen that slides in from the right edge as what happens in Windows 8 and Windows 8.1.
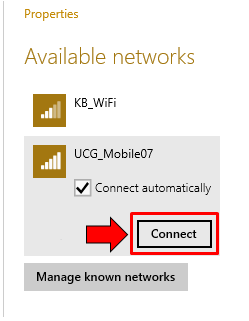
Now, from this screen, you can simply click on the wireless network that you want to connect to and there will be a a button that is labeled “Connect” which will appear. From here, you will simply need to click “Connect” as highlighted on the screenshot shown below.
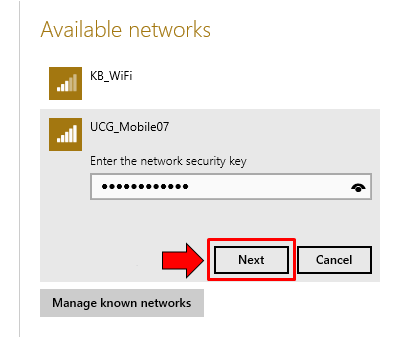
After hitting the “Connect” button, simply wait for a few seconds and the box where you will need to enter the network security key also known as the “WiFi password”. Now, be sure to enter the right password and always remember that it is key sensitive. Once the right network security key is entered, simply hit the “Next” button as shown below.
You will then see a notification that says “Do you want to find PCs. devices, and contents on this network, and automatically connect to devices like printers and TVs? We recommend that you do this on your home and work networks.”. At the bottom portion of this notification, there’s a “Yes” and “No” button and from here, simply click whether you want to enable sharing and other network connection capabilities among different devices (Yes) or not (No) and you will now be connected to the network!
How to Summon Network Connections Screen
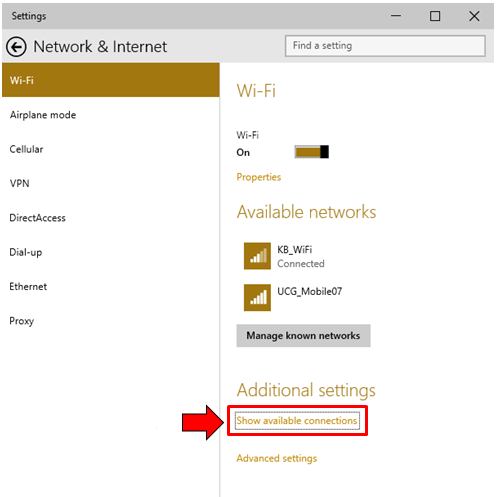
While it is true that all of the available networks in Windows 10 appear in a modern Window after the network status indicator icon on the system tray is clicked, there’s still a way to make these networks appear in the same way that they appear in Windows 8 and Windows 8.1 (in a modern screen that slides in from the right edge of your computer monitor). To do this, simply click on the network status indicator again and on the modern Window that will appear, look for a link that says “Show available connections” as highlighted on the screenshot below.
After clicking on the link, you will be able to see the modern screen that will slide in from the right portion of your machine’s screen. It should look very familiar because it is similar to the one found in Windows 8 and Windows 8.1 only that in Windows 10, you will need to click on a special link in order to make it appear (at least in the Technical Preview version that we are using).

Troubleshooting Your Network Connection
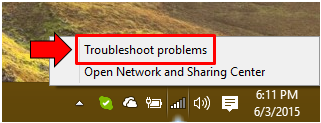
Now, if you experience problems connecting to a network even after entering the right network security key then you will need to perform a troubleshoot process in order to find out what’s causing the trouble. Doing this is just the same as how it is done in Windows 8 and Windows 8.1, just right-click on the network status indicator icon that is located on the System Tray and from the right-click options that will appear, simply hit the one that says “Troubleshoot problems” as shown below.
The wizard that will guide you though the troubleshooting process and will appear and from here, just follow the instructions that it will give in order to complete the troubleshooting process. In most cases, the problem will be fixed simply by restarting your wireless router device or restarting your computer or mobile device. Once the connection gets fixed, you can start browsing through the web and doing some other networking tasks on your Windows 10 device.