How to Customize the Apps and Other Items that Appear on Windows 10’s Start Menu
The Start Menu is now back in Windows 10 after its removal from both Windows 8 and Windows 8.1 and as we have shown in some of our previous tutorials, it now has better features that are not found in the Start Menu that is found in previous Windows versions. For instance, you can now pin different items to it and you can even resize it in case it already contains plenty of tiles and shortcuts but you don’t want to do too much scrolling just to find a specific item.
The new Start Menu is also capable of being set back into its full screen version just like the one that is found in Windows 8 and Windows 8.1 but aside from these awesome innovations, this resurrected feature in Windows 10 still has more to show off and in this tutorial, we will be learning even more aspects about the Start Menu and learn more steps in how you can customize it further by removing certain items such as “Settings”, “Most used” apps and many others so let’s roll out and start getting more familiar with the new and improved Start Menu!
How Different is the New Start Menu
The Start Menu in Windows 10 works the same as the one that is found in previous Windows editions but it has some added features that you’ll surely love especially if you love the idea of the Mobile environment being merged with the traditional Desktop platform that has been the focus of older Windows editions like XP, Vista and Windows 7.
If it is your first time to use Windows 10 then you might find the new Start Menu a little bit different but as you will see later, it is just the same with the old version but this time, it has a new addition and that’s what we’re going to discover first in this tutorial. The new Start Menu has 2 major sections, and it is clearly visible when you open it as shown on the screenshot below.
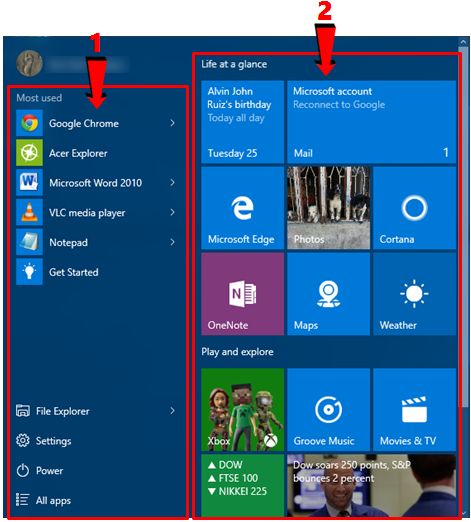
1. The Left Side
On the screenshot above, we have highlighted the two major parts of the new and improved Start Menu and let us first learn about the one that is found at the left. As you can see, the contents on this section looks similar to the old Start Menu with some new addition of course that is found on it bottom portion. As you can see, there is a “Most used” section on top and some user related shortcuts at the bottom. If you have added programs and apps to your Windows 10 machine then a “Recently added” section will also be available just below the “Most used” list.
2. The Right Side
On the right hand portion of the new Start Menu, you will find all the tile that represent the modern apps which are built-in and as well as those that you have installed to your computer from the Windows Store. On this section, you can also pin shortcuts and even network locations and websites as we have shown in one of our previous tutorials. So let’s now move on and learn how you can tweak some aspects of the Start Menu in your newly upgraded Windows 10 machine.
Customizing the Stuff that is Displayed on the Start Menu
As we have shown above, the new Start Menu now has two major sections and in our previous tutorial, we’ve already shown how you can actually add shortcuts and many other items to its right hand portion so let’s now proceed to the next tweak which is more focused on the stuff that are found on the left.
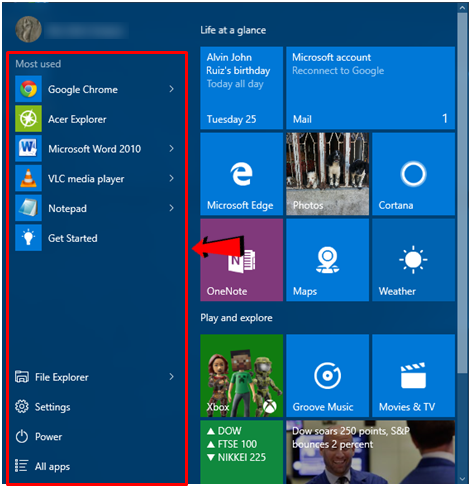
This left section of the Start Menu contains the “Most used” apps as well as those that you have recently added and at the bottom, you will find links to system tools, locations and shortcuts such as “File Explorer”, “Settings”, “Power” and “All apps” but these items are not permanently pinned on their current location. Yes! You can actually remove the ones that you don’t use and add the ones that you often access. To be able to do this, you will first need to access the modern Settings Window simply by clicking on its link that is located at the bottom-left portion of the Start Menu as highlighted on the screenshot below.

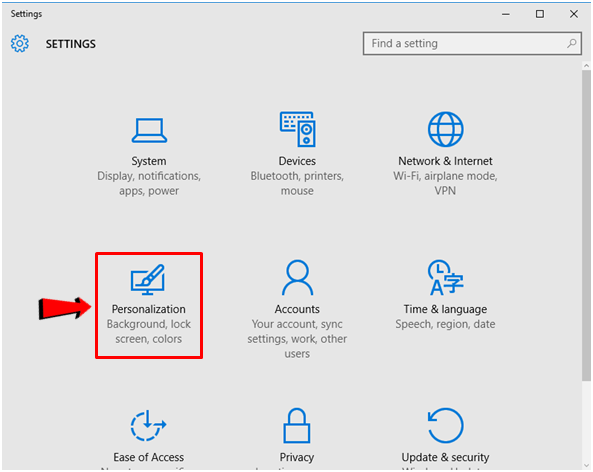
Once the Settings Window opens, all you need to do is click on the category that is labeled “Personalization” and after doing so, you will be brought to the section where all of the available tweaks for Windows 10’s appearance are found.
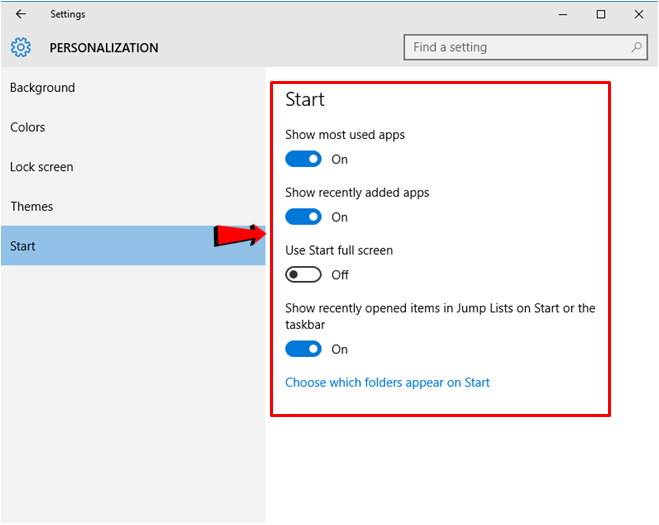
From the “Personalization” section, all you need to do is click on the “Start” link that is located on the navigation pane at the left hand portion as highlighted on the screenshot below.
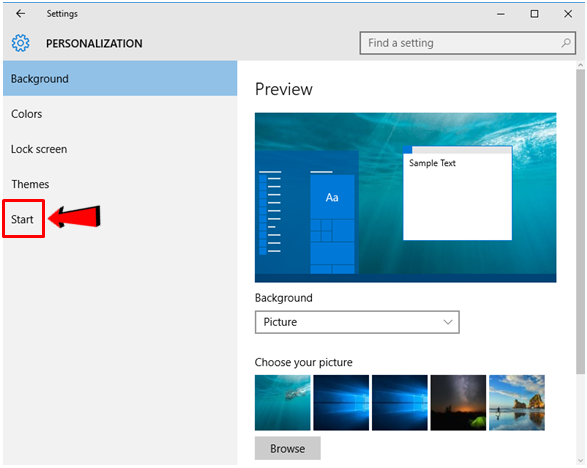
After the “Start” link is clicked, you’ll be able to access a set of switches that you can turn on or off in order to tweak the content of the left side of the Start Menu. So let’s see what each of these switches are used for and what would happen to the Start Menu if one is turned on or off.
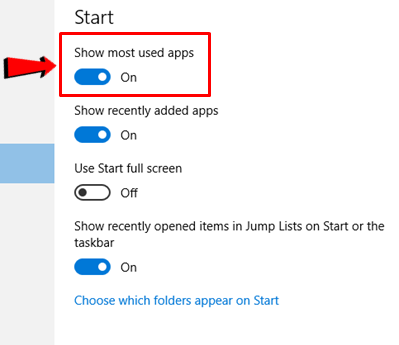
- Show most used apps- On the top section of the left-hand portion of the new Start Menu is a list of the programs and apps that you often use and as we have mentioned earlier, this list is there permanently because you can actually remove it simply by flicking the “Show most used apps” switch to the “Off” position.
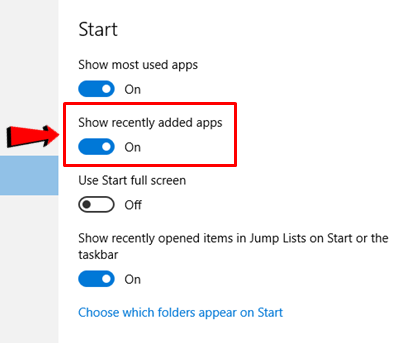
- Show recently added apps- Now, just below the “Most used” programs and apps list is another list that is labeled “Recently added” and just like the former, it can also be removed from the left-hand portion of the Start Menu simply by flicking the switch to the “Off”position. Do this if you don’t really find a good use for the list that appears on this portion of the Start Menu.
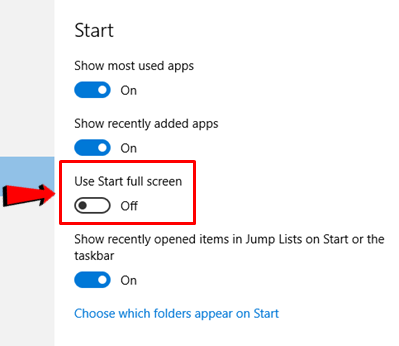
- Use Start full screen- While you can resize the Start Menu and make it wider, you can also set it into full screen mode just like how it actually appeared in Windows 8 and Windows 8.1 with the items on the left portion added of course. If you think the full screen Start Menu works better then you can freely switch this feature on so you can start using it.
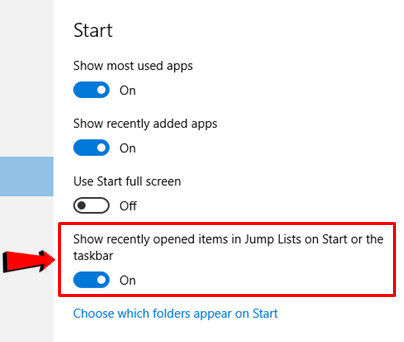
- Show recently opened items in Jump Lists on Start or the taskbar- Now, if you want to add quick access shortcuts for the items that you have just opened then you would need to turn this setting on but if you want to save on system resource then this would better be turned off.
Tweaking the Links that Display at the Bottom of the Left Section
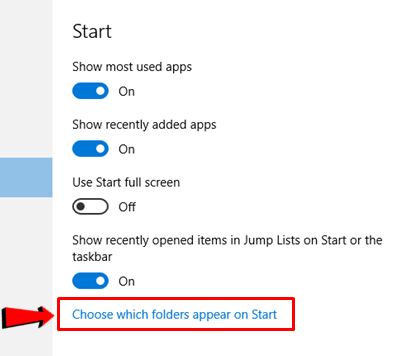
At the bottom-left portion of the new Start Menu are links that are labeled “File Explorer”, “Settings”, “Power” and “All apps” and again, you can also tweak these and remove the ones that you don’t really need that much. To do this, just click on the “Choose which folders appear on Start” link that is found at the bottom of the “Start” Settings Window as highlighted on the screenshot below.
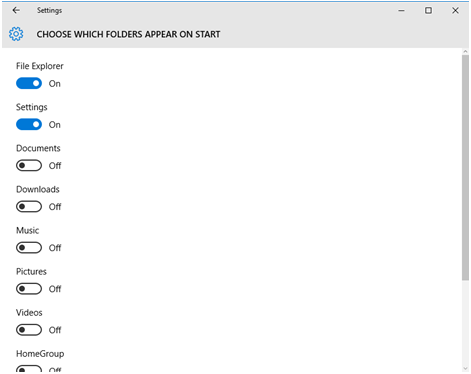
After clicking the link, you will then be brought to a list of switches that are labeled according to the folders that you can display on the Start Menu. From here, just turn on the ones that you want to be displayed on the left-hand portion of the Start Menu and they will automatically be displayed instantly.
As you can see, there are plenty of tweaks that you can now do to the new and improved Start Menu in Windows 10 which are all geared up towards improving your user experience and productivity. In our next tutorials, we will be discussing even more about this very important feature in your newly-updated Windows 10 machine so be sure to stay tuned-in with us here to learn all the latest about the latest Windows version dubbed as “the best one yet”.