How to Forget and Delete Wireless Network Profiles in Windows 10
Wireless technology has been around for years now and the world has never been the same since it’s become available for individual customers coming as part of their devices. One of the widely used technology is called Wi-Fi or Wireless Fidelity and if you look into the devices that you own, Wi-Fi is really part of it. In fact, your device would be useless without it.
Without this important chunk of hardware that sits within your device, connecting to the Internet would become a big hassle since you would need to always bring an RJ45 Internet cable with you wherever you go and of course, you need a port to which you would attach it to in order to access the Internet. This means that without routers and splitters that have RJ45 ports, your device can never connect to the Internet an start communicating and accessing stuff through the Internet.
These along with many other inconvenience are the reasons why Wi-Fi was invented and innovations on this technology promises even more good things to come for the devices and many other gadgets that we use.
Wi-Fi in Windows 10
Just like any other operating system, whether it’s intended for use in mobile devices or PCs, Windows 10 has its own unique interface for Wi-Fi settings that can be a bit confusing to use especially if you are used to other operating systems or even to older Windows editions. Microsoft’s latest operating system now has an interface that resembles mobile devices and in this tutorial, we will be looking into them and see how you can forget wireless networks that you have connected to in the past and as well as explore some other features and settings in it.
If you’ve already tried forgetting or deleting a profile for a wireless network connection from Windows 10’s universal Settings app but failed to do so because there seems to be no button or option for doing the action then you will need to read this tutorial and follow the steps that we’re going to show as we move along.
Accessing WiFi Settings in the Universal Settings App
The Windows operating system is known for being one that is user-friendly and this has not ceased even in the latest edition called Windows 10. One of the things that we like about Windows is the variety of ways that you can use in doing one single action. For instance, if you want to access and launch the universal Settings app in your Windows 10 machine, you can use any of the following methods that are shown below.
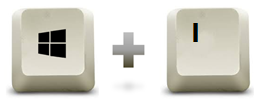
First, you can use the easiest method which is done using a keyboard shortcut combination. To do this, just press the Windows + I keys and the Windows 10’s universal Settings app should launch in an instant on your computer screen.
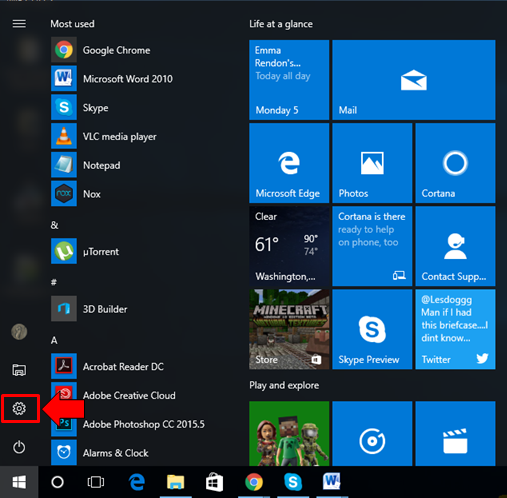
Another method that you can use in launching the Settings Window is by clicking on its icon from the Start Menu. Just launch the Start Menu first by clicking on the Start Button or pressing the Windows key and once it opens, simply click on the Settings icon that is found sitting at the lower portion of a narrow bar that is located at the left as you can see on the screenshot below.
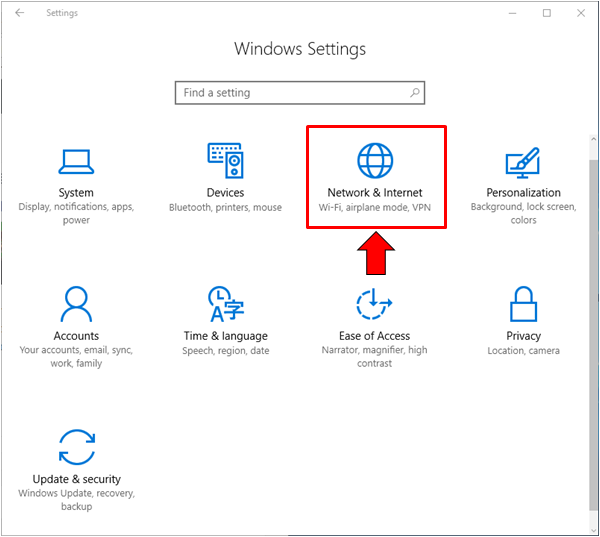
Once the universal Settings app Window opens, you should be able to see 9 main setting categories on the Homepage. Since we are looking for the Wi-Fi settings section, we’re going to click on the third category which is labeled “Network & Internet” as you can see being highlighted on the screenshot below.
After hitting on the category that is shown above, you should now be able to access all the settings that is under it and since we want to learn how to forget or delete Wi-Fi profiles, we’ll need to click on the link that is found at the left which says “Wi-Fi” as highlighted on the screenshot below.
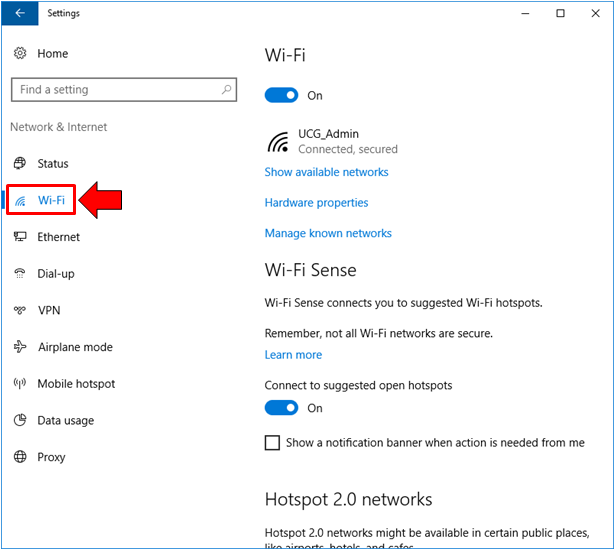
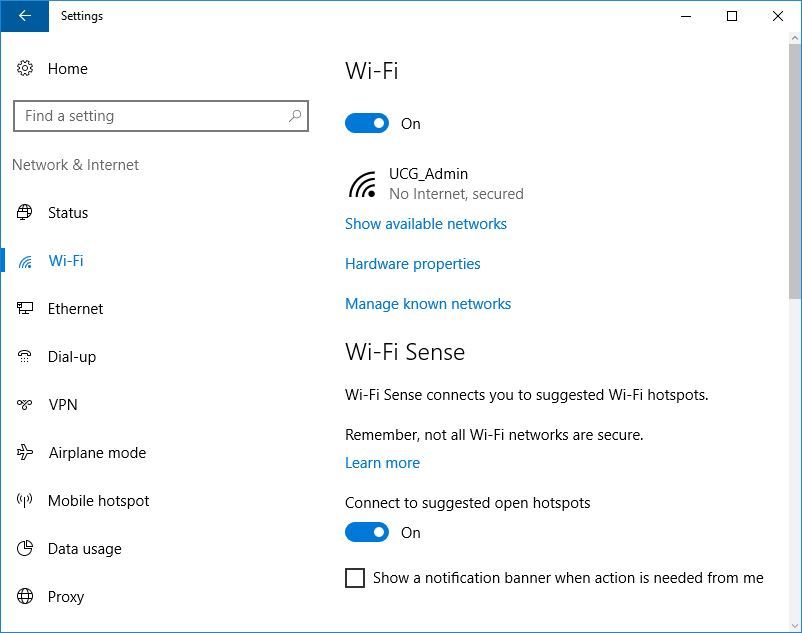
Clicking on the “Wi-Fi” link that is found on the navigation pane will now display all available settings for Wi-Fi on the contents pane which is the large area on the right. From here on its top-most portion, there is a switch for turning Wi-Fi On or Off as well as the name of the wireless network that your device is currently connected to. If this same section in your Windows 10 computer looks different, it means that you have not yet updated to the latest version of Windows 10 which is also known as the “Anniversary Update Version 1607”.
Accessing the List of Wi-Fi Networks Your Computer Remembers
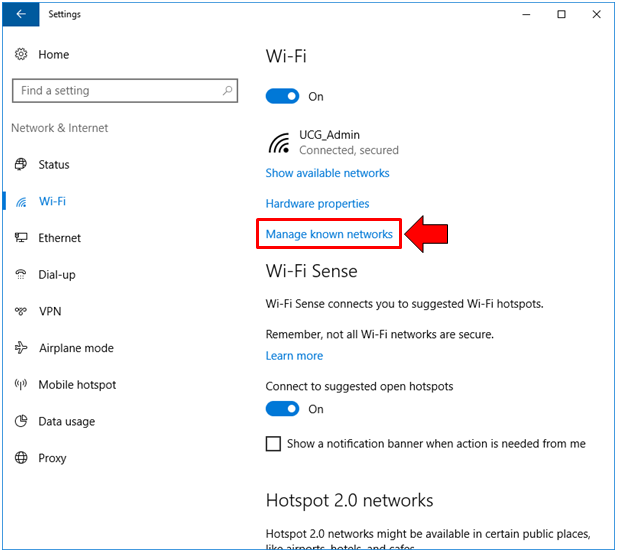
Now that we are in the Wi-Fi settings section of your Windows 10 computer, it is time to learn how to access the list of all the wireless networks that your machine has connected to in the past so you can find the one that you want to forget or delete. Doing this is pretty straightforward so it shouldn’t be that hard even for novice users. To start, you will need to click on the “Manage known networks” link as shown below.
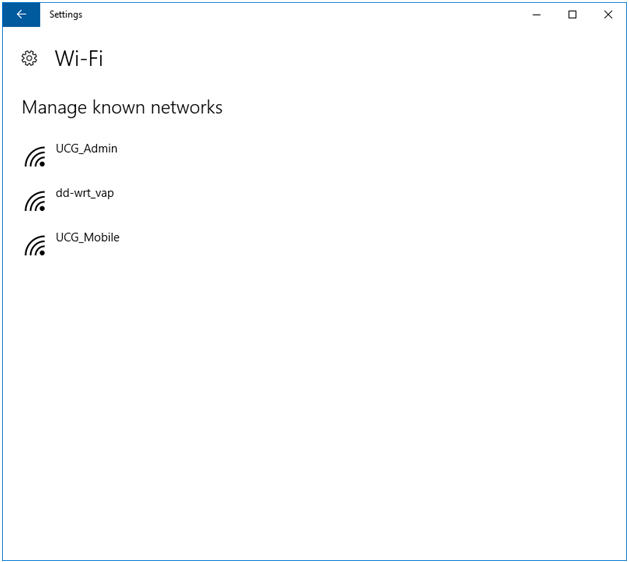
After clicking on it, the list of all the Wi-Fi networks that your computer has connected to in the past should show up. The length of this list depends on how many networks you’ve actually connected your computer which includes those you did access during travel or any other occasion where you needed Wi-Fi and you connected to the one that’s available. Windows 10 remembers all of them and stores a list in this section. Sometimes, even changing SSID or Password of your Wi-Fi at home can create a problem where you can’t connect to the newly setup or changed network because of the previously saved profile for the same device which is found on this list.
Now that you already know how the list of the Wi-Fi networks you’ve connected to in the past is accessed, it is time to learn how to forget or delete a certain profile in order to solve certain connection problems or make the list shorter and easier to skim through whenever you are looking for a certain Wi-Fi network on the list. Just continue reading to learn how it is done.
Forgetting or Deleting a Wi-Fi Network Profile
Now that you are already looking at the list that we will be working on to learn how to forget and delete Wi-Fi network profiles, it is time to start sorting the ones that would remain and the ones that need to be deleted. Again, we would stress the fact that the number of Wi-Fi networks on this list depends on the number of networks you’ve already connected to in the past and our test machine only shows 3 since it’s only been connected to computers at our office ever since. Once you find the Wi-Fi profiles that you want to delete, all you need to do is click on it as shown below where we clicked on “dd-wrt_vap”.
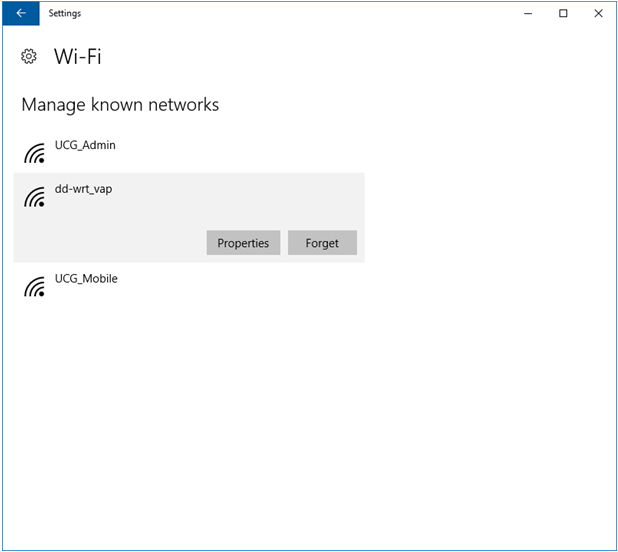
After clicking on the Wi-Fi profile that you want to delete, there should be 2 buttons that would show up at the bottom-right portion of the highlighted area around the selected profile and from here, all you need to do is click on the button that says “Forget”. Doing so will accomplish the goal of deleting the profile and solving connection problem or simply making the list of Wi-Fi profiles shorter so you can find items a lot faster.
In case you encounter the same Wi-Fi connection again and you want to connect to it, you will be required to enter the password of it since the profile has already been deleted from the list that we’ve accessed earlier. That’s the reason why you need to really make sure that the profile which you want to delete is a network that you wouldn’t be connecting again in the future.
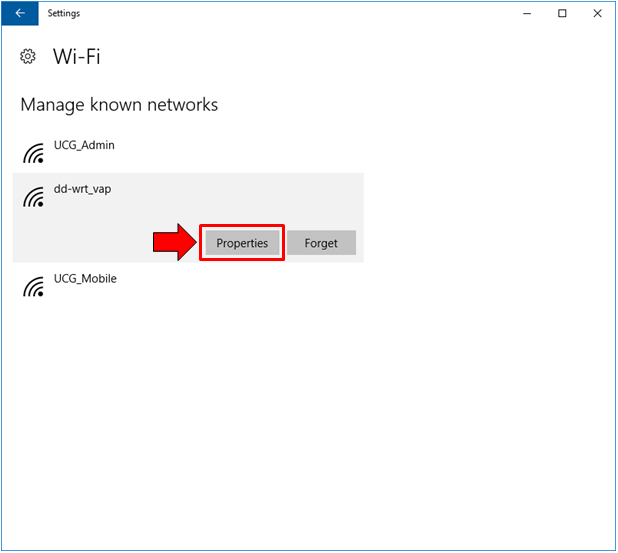
What Happens if I Click on “Properties”?
Now, if you have noticed after we’ve clicked on one Wi-Fi network profile from the list which is supposed to be deleted, there were two buttons that appeared. One was “Forget” and the other is “Properties”. If you’re asking what this button does then go ahead and click it.
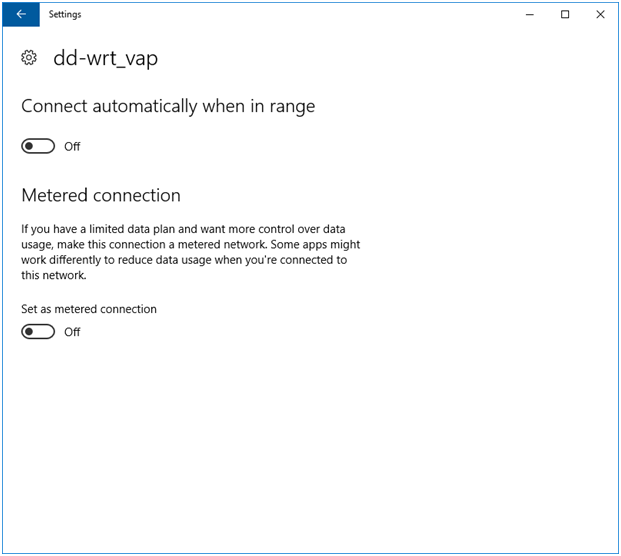
After clicking on this button, you will be able to access two options that is available for the Wi-Fi network profile that you have selected. One allows you to set your device to automatically connect to the network when it is in range while the other sets the selected Wi-Fi network as “metered” which means that you can set the allowable data that can be consumed and limiting apps from using too much of it. This is very useful especially if you have a limited monthly data allowance. These options are shown on the screenshot below and if you want to enable any of them, all you need to do is click on the switch so it can be flipped to the “On” status.
More to Learn in Windows 10’s Wi-Fi Settings Section
As you can see, forgetting or deleting certain Wi-Fi network profiles is actually very simple. It only takes a few simple steps and to good thing about it is that you’ve also learned how to launch the universal Settings app and do some other things in this tutorial which can also be applicable for other situations where you need to go to the Settings and launch other categories. However, we’ve only discussed just a little part of this Network & Internet settings category and there’s still a lot to discuss and learn about from this section. All of these will be discussed in our next tutorial so be sure to stay tuned-in with us or you can also subscribe for our newsletter so you can have all of our latest tutorials flying straight to your inbox!